
One Education Infinity Keyboard Replacement

What you need

  1. One Education Infinity Keyboard Replacement, Back Case: step 1, image 1 of 3 One Education Infinity Keyboard Replacement, Back Case: step 1, image 2 of 3 One Education Infinity Keyboard Replacement, Back Case: step 1, image 3 of 3
    • Always power off your device before beginning disassembly.

    • Remove the screw covers and rubber feet from the bottom of the laptop with a metal spudger.

  2. One Education Infinity Keyboard Replacement: step 2, image 1 of 2 One Education Infinity Keyboard Replacement: step 2, image 2 of 2
    • Using a Phillips #00 screwdriver, remove the sixteen 5.0 mm black screws from the back panel.

  3. One Education Infinity Keyboard Replacement: step 3, image 1 of 3 One Education Infinity Keyboard Replacement: step 3, image 2 of 3 One Education Infinity Keyboard Replacement: step 3, image 3 of 3
    • Using the iFixit plastic opening tool or spudger, start near the white hinge of the device and lift along the outer edges of the device until all clips are released.

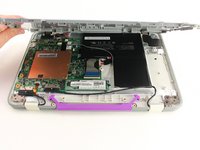
    • Lift the back case off of the device.

    • Removing the back may create a loud snapping noise.

  4. One Education Infinity Keyboard Replacement, Battery: step 4, image 1 of 3 One Education Infinity Keyboard Replacement, Battery: step 4, image 2 of 3 One Education Infinity Keyboard Replacement, Battery: step 4, image 3 of 3
    • There may be black tape inside your device covering components or holding down wires. This tape is unimportant for the function of the device, and can be removed.

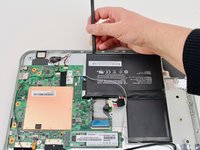
    • Carefully wiggle the battery cable to the right and out of the port with a plastic spudger.

  5. One Education Infinity Keyboard Replacement: step 5, image 1 of 3 One Education Infinity Keyboard Replacement: step 5, image 2 of 3 One Education Infinity Keyboard Replacement: step 5, image 3 of 3
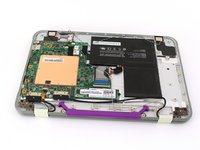
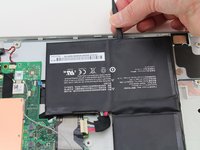
    • Wedge a plastic spudger underneath the battery from the upper edge and slide it carefully along the length of the battery to separate it from the case.

    • There is a mild adhesive holding down the battery. Take care not to puncture or excessively bend the battery while freeing it from the adhesive.

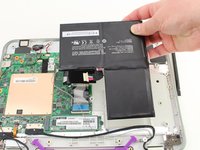
    • Lift the battery out from the internal case.

  6. One Education Infinity Keyboard Replacement, Keyboard: step 6, image 1 of 2 One Education Infinity Keyboard Replacement, Keyboard: step 6, image 2 of 2
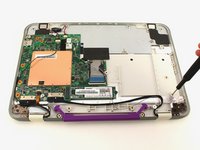
    • Remove the two silver 3.5 mm screws from the two raised mounting points with a Phillips #00 screwdriver.

  7. One Education Infinity Keyboard Replacement: step 7, image 1 of 3 One Education Infinity Keyboard Replacement: step 7, image 2 of 3 One Education Infinity Keyboard Replacement: step 7, image 3 of 3
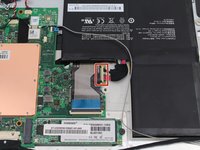
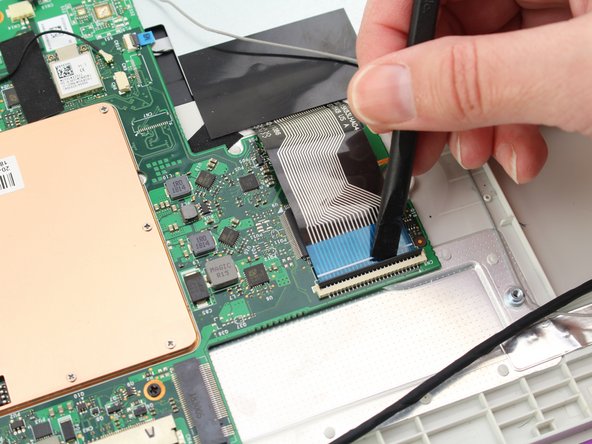
    • Using a spudger, pop up the locking hinge on the wide ZIF connector in the middle of the back case on the right side of the motherboard.

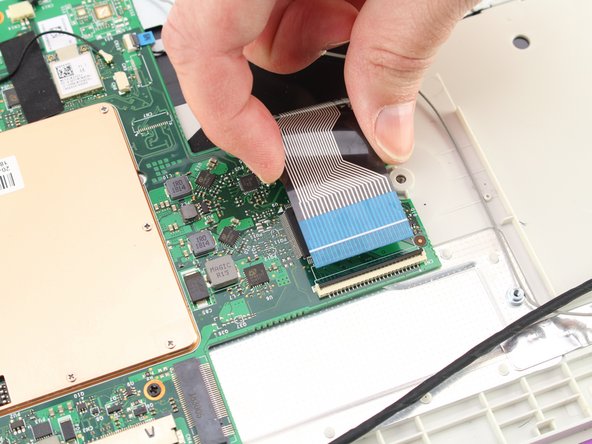
    • Pull the wide ribbon cable out from the ZIF connector with your fingers.

  8. One Education Infinity Keyboard Replacement: step 8, image 1 of 3 One Education Infinity Keyboard Replacement: step 8, image 2 of 3 One Education Infinity Keyboard Replacement: step 8, image 3 of 3
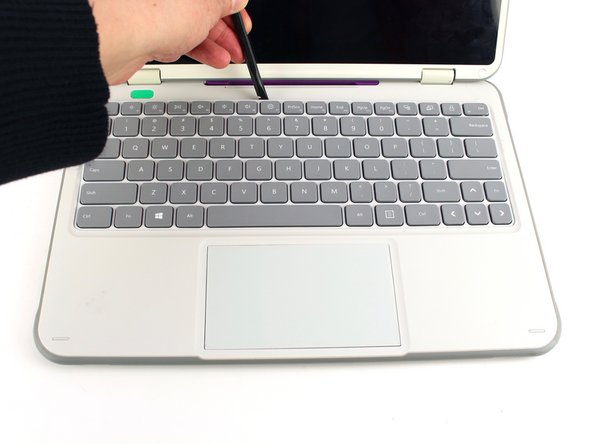
    • Use a spudger to pry the keyboard up from one of the upper corners, then move the spudger along the upper edge to disconnect all of the clips on the upper side.

    • Do not remove the keyboard yet, as the ribbon cable on the backside is still held down with tape.

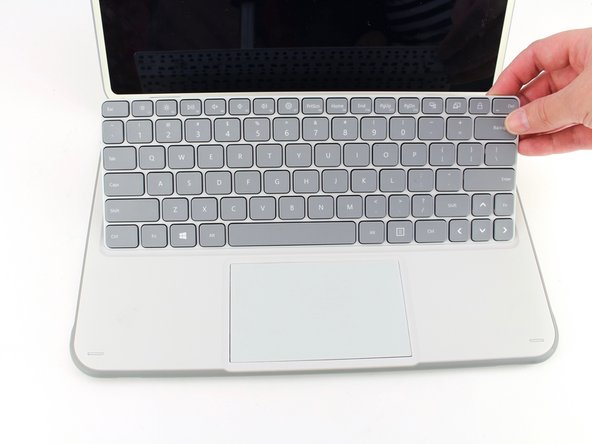
    • Flip the device over without allowing the keyboard clips to reengage.

  9. One Education Infinity Keyboard Replacement: step 9, image 1 of 3 One Education Infinity Keyboard Replacement: step 9, image 2 of 3 One Education Infinity Keyboard Replacement: step 9, image 3 of 3
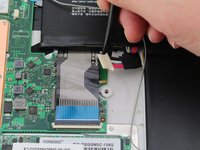
    • Peel back the thick black tape holding down the keyboard ribbon cable.

    • Lift up the ribbon cable and feed it through the case as you pull the keyboard away.

    • You may need to move the tape out of the way as you insert the new keyboard ribbon cable.

  10. One Education Infinity Keyboard Replacement: step 10, image 1 of 2 One Education Infinity Keyboard Replacement: step 10, image 2 of 2
    • Taking care that the ribbon cable doesn't get caught on the tape on the other side, lift the keyboard out from the upper case.

Conclusion

To reassemble your device, follow these instructions in reverse order.

Austin Blakely

Member since: 03/11/19

19,506 Reputation

53 Guides authored

Team

iFixit Member of iFixit

Staff

135 Members

16,817 Guides authored

One Comment

Some of the keys in my keyboard are not working. should i get it repaired or should i buy a new keyboard since i am a fast typing person and i am not liking it when the keys stops responding

Slayer - Reply

Add Comment

View Statistics:

Past 24 Hours: 0

Past 7 Days: 1

Past 30 Days: 5

All Time: 126