
Onda V80 Plus Touch Screen Replacement

What you need

  1. Onda V80 Plus Touch Screen Replacement, The slab: step 1, image 1 of 2 Onda V80 Plus Touch Screen Replacement, The slab: step 1, image 2 of 2
    • Having already removed screen (of the strong way) by removing it from the front and removing pieces of glasses by pieces of glasses. I strongly advise against this method, I have, because of this method, damaged the LCD, the latter being very fragile, be careful. (Blue marks on picture 2)

    • Not knowing if iFixit allows the sharing of links, the screen that I will use was bought on aliexpress, by QHD store Russia-Vip Store (The link, even if it would not surprise me that it is deleted ^^ : goo.gl/UZoSCH

  2. Onda V80 Plus Touch Screen Replacement, The separation: step 2, image 1 of 3 Onda V80 Plus Touch Screen Replacement, The separation: step 2, image 2 of 3 Onda V80 Plus Touch Screen Replacement, The separation: step 2, image 3 of 3
    • Flip the tablet, try to gently separate the white part on the screen side, and the golden part behind.

    • Be careful not to overdo the white part, the screen is attached to it, the twist could damage it. Be careful not to push your tools too deeply.

    • For information, the tablecloth of the touch screen is at the top right of the screen.

    • The top left corner can be difficult to remove, take your time and be careful.

  3. Onda V80 Plus Touch Screen Replacement, disconnections: step 3, image 1 of 3 Onda V80 Plus Touch Screen Replacement, disconnections: step 3, image 2 of 3 Onda V80 Plus Touch Screen Replacement, disconnections: step 3, image 3 of 3
    • After that, be careful not to lose the Power buttons, and Volume +/-

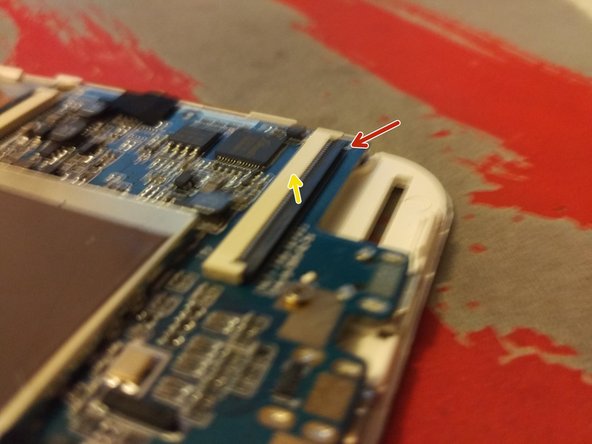
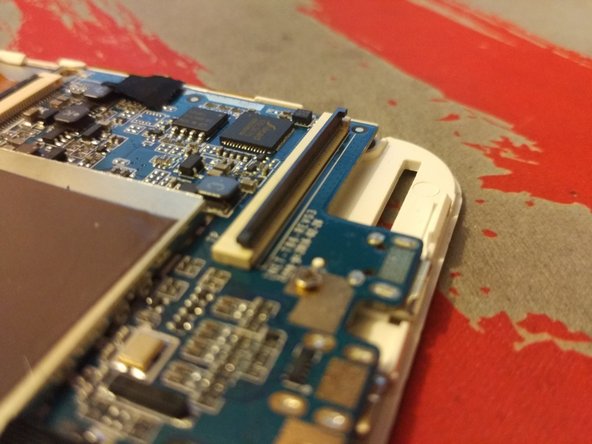
    • Remove the battery connector. Shoot from the red arrows on the photo, towards the yellow.

    • The touch screen connector is located at the top left. Gently lift the black part of the connector, then remove the tablecloth

  4. Onda V80 Plus Touch Screen Replacement, Takeoff of the slab: step 4, image 1 of 2 Onda V80 Plus Touch Screen Replacement, Takeoff of the slab: step 4, image 2 of 2
    • Turn the tablet on the screen side, and get an object to generate hot air. A hot air gun would be the perfect tool, but if in the worst case you do not have this, use a hair dryer. If you have an iOpener, it is just as convenient.

    • Heat only the edges of the screen, and never heat in the same place constantly, be in constant motion. The glass must be barely touching. The upper and lower parts of the screens are provided with a lot of glue.

    • Here is a diagram of the areas you will need to heat up. Heat small areas in small areas, and use a pick or a tool that will lift the slab. A tool such as a knife or a knife may be easier, because of their fineness, but be careful not to scratch the plastic, or the LCD panel.

  5. Onda V80 Plus Touch Screen Replacement,   Place the slab: step 5, image 1 of 2 Onda V80 Plus Touch Screen Replacement,   Place the slab: step 5, image 2 of 2
    • This step may vary slightly depending on the source of your replacement slab

    • Having not yet completed this step, I will indicate how to do it, it is surely the simplest step of the dismantling.

    • This is THE time to remove any fingerprints or dust on the LCD, or on the replacement tile, once the screen is placed, impossible to remove.

    • Remove the protection of the 3M adhesive from the edge of the slab. Do, without laying the screen, and without touching the edge, pass the sheet through the hole.

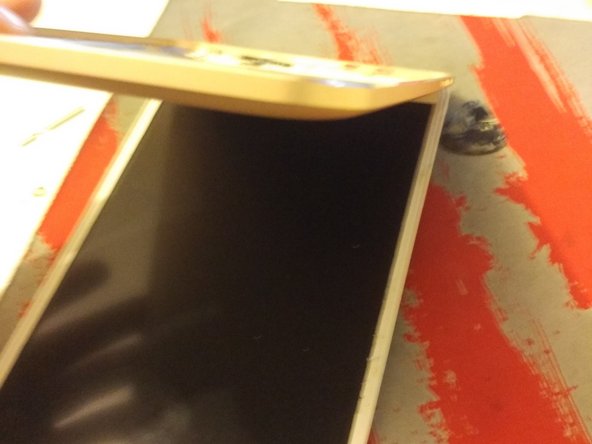
    • Carefully place the screen from the top edge because the tablecloth is at the top. (To simulate the placement of the screen, I will use the back of the tablet as a substitute for the tutorial.)

    • Then connect the tablecloth, passed through the hole. Reconnect the battery and turn it on to check that the LCD panel and the touch screen are working properly.

  6. Onda V80 Plus Touch Screen Replacement, End!: step 7, image 1 of 1
    • Take the back cover, set up the buttons, and start placing the tablet by the right side. Then, press the tablet all over the edge, and clip all the clips on each edge.

    • Check last the functioning of the tablet, and you're done! Bravo!

Conclusion

To reassemble your device, follow the instructions in reverse order.

One other person completed this guide.

Special thanks to these translators:

fr en

100%

irlanda is helping us fix the world! Want to contribute?
Start translating ›

Alexis Devios

Member since: 06/04/17

145 Reputation

1 Guide authored

0 Comments

Add Comment

View Statistics:

Past 24 Hours: 0

Past 7 Days: 2

Past 30 Days: 8

All Time: 133