
Onda V701 Speaker Replacement

What you need

  1. Onda V701 Speaker Replacement, Back Panel: step 1, image 1 of 3 Onda V701 Speaker Replacement, Back Panel: step 1, image 2 of 3 Onda V701 Speaker Replacement, Back Panel: step 1, image 3 of 3
    • Ensure device is powered off before disassembly.

    • Remove the 4 rubber screw plugs using a spudger.

  2. Onda V701 Speaker Replacement: step 2, image 1 of 3 Onda V701 Speaker Replacement: step 2, image 2 of 3 Onda V701 Speaker Replacement: step 2, image 3 of 3
    • Remove the four 4.8mm mounting screws using a PH00 screwdriver.

  3. Onda V701 Speaker Replacement: step 3, image 1 of 2 Onda V701 Speaker Replacement: step 3, image 2 of 2
    • Starting at one corner, gently pry the back panel assembly from the screen assembly using two plastic opening tools.

    • Slide the opening tools around the perimeter of the device to separate the back panel assembly from the screen assembly.

  4. Onda V701 Speaker Replacement: step 4, image 1 of 2 Onda V701 Speaker Replacement: step 4, image 2 of 2
    • Gently lift the screen assembly away from the back cover assembly.

    • Be careful when separating the two pieces as the screen assembly is still connected to the mother board by two ribbon cables.

  5. Onda V701 Speaker Replacement: step 5, image 1 of 3 Onda V701 Speaker Replacement: step 5, image 2 of 3 Onda V701 Speaker Replacement: step 5, image 3 of 3
    • Disconnect the two ribbon connectors by flipping the gray tabs up with a fingernail or a spudger.

    • Remove the ribbon cables.

  6. Onda V701 Speaker Replacement, Speaker: step 6, image 1 of 2 Onda V701 Speaker Replacement, Speaker: step 6, image 2 of 2
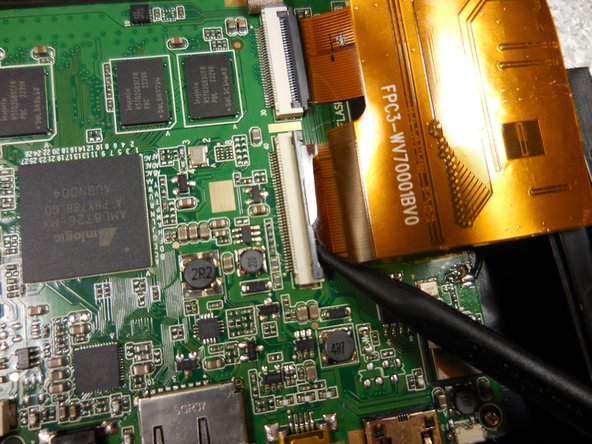
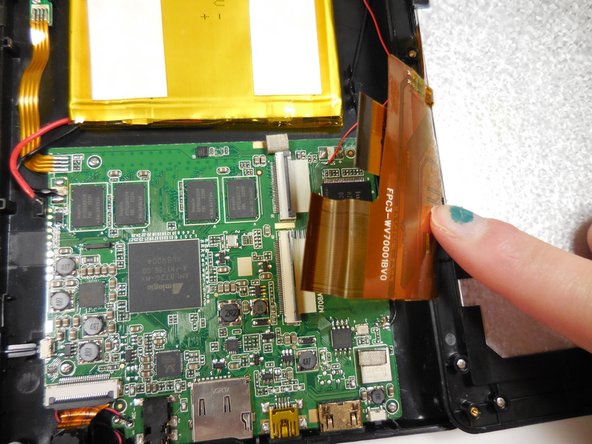
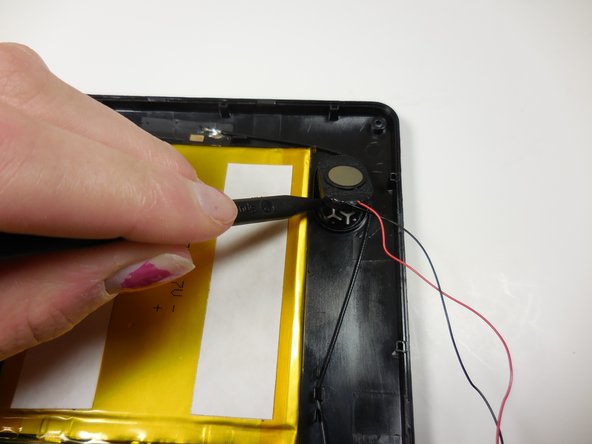
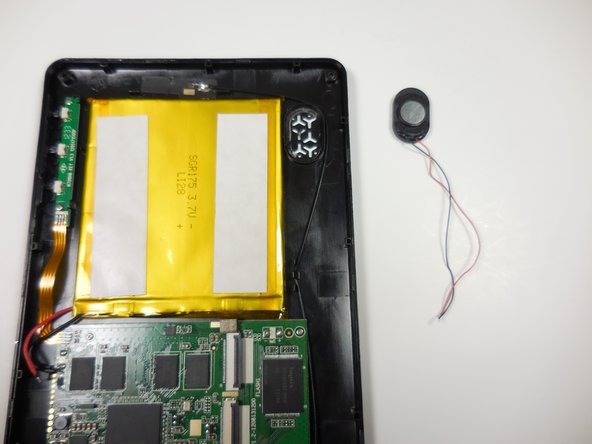
    • Desolder the black(-) and red(+) wires connecting the speaker to the motherboard using a soldering iron and tweezers to hold the wire.

    • Soldering requires a lot of heat. Do not touch the metal part of the soldering iron. Wear gloves if necessary to protect your hands. The fumes from soldering could also be toxic. Work in a well ventilated area and/or use a respirator.

  7. Onda V701 Speaker Replacement: step 7, image 1 of 3 Onda V701 Speaker Replacement: step 7, image 2 of 3 Onda V701 Speaker Replacement: step 7, image 3 of 3
    • Carefully pry the speaker assembly off of the back panel using a spudger.

    • The speaker is held on with a small amount of adhesive.

Conclusion

To reassemble your device, follow these instructions in reverse order.

Bradley Huber

Member since: 03/11/15

366 Reputation

3 Guides authored

Team

0 Comments

Add Comment

View Statistics:

Past 24 Hours: 0

Past 7 Days: 3

Past 30 Days: 6

All Time: 221