Omaker M4 Battery Replacement

What you need

  1. Omaker M4 Battery Replacement, Back Case: step 1, image 1 of 1
    • Flip the device over so the front of the speaker is facing down. Make sure to place the speaker on a flat surface

  2. Omaker M4 Battery Replacement: step 2, image 1 of 2 Omaker M4 Battery Replacement: step 2, image 2 of 2
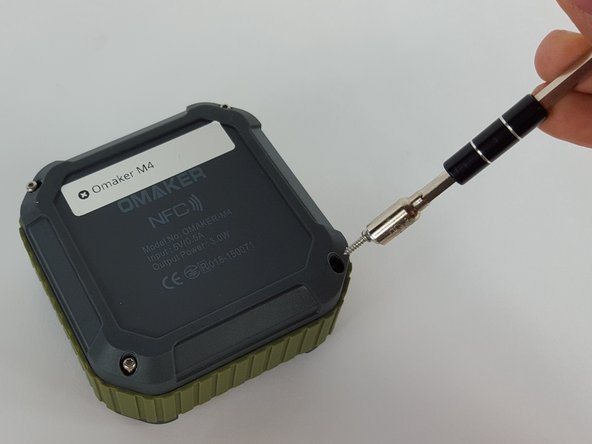
    • Use a T6 Torx screwdriver to remove the four 9mm screws from the back of the device.

  3. Omaker M4 Battery Replacement: step 3, image 1 of 2 Omaker M4 Battery Replacement: step 3, image 2 of 2
    • Use a magnet to remove the screws after unscrewing them and place them aside.

  4. Omaker M4 Battery Replacement: step 4, image 1 of 1
    • Carefully remove the back cover without breaking the battery wire.

  5. Omaker M4 Battery Replacement: step 5, image 1 of 2 Omaker M4 Battery Replacement: step 5, image 2 of 2
    Tool used on this step:
    Tweezers
    $4.99
    Buy
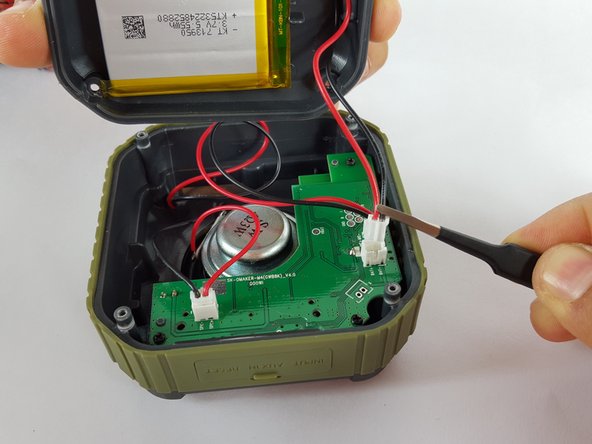
    • Remove the end of the battery connection from the motherboard by holding the end of the wire and carefully pulling it out of the socket using tweezers.

    • The battery is still attached to the back cover.

  6. Omaker M4 Battery Replacement, Battery: step 6, image 1 of 3 Omaker M4 Battery Replacement, Battery: step 6, image 2 of 3 Omaker M4 Battery Replacement, Battery: step 6, image 3 of 3
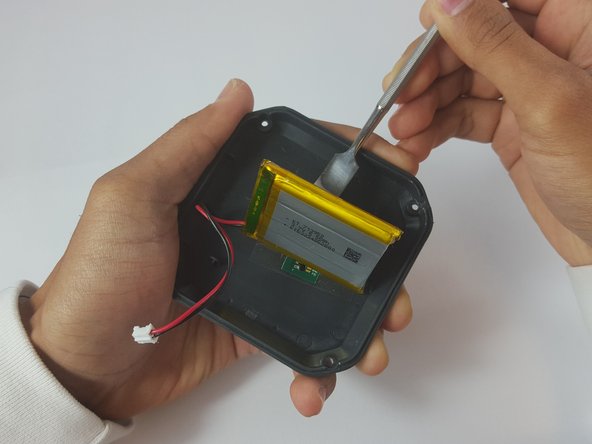
    • Use the metal spudger to carefully pry along the entire side of the battery from its connecting tape on the back cover.

Carlos Pernia

Member since: 02/10/16

170 Reputation

1 Guide authored

Team

USF Tampa, Team 2-2, Sullivan Spring 2016 Member of USF Tampa, Team 2-2, Sullivan Spring 2016

USFT-SULLIVAN-S16S2G2

3 Members

2 Guides authored

View Statistics:

Past 24 Hours: 0

Past 7 Days: 2

Past 30 Days: 19

All Time: 1,345