Introduction
After completing the prerequisite guides we will be showing you the step by step process of removing & or disconneting components of the screen.
What you need
-
-
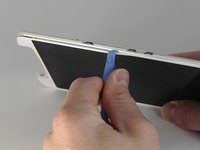
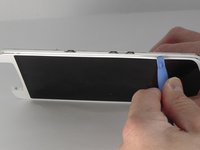
Insert the plastic opening tool into the crevice. The back cover is most easily opened by starting at this location.
 Ask FixBot
-
-
-
Gently slide the plastic opening tool around the edge of the phone to release the back cover from the phone. You may hear some snapping noises as you release the back cover.
-
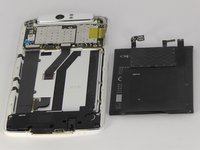
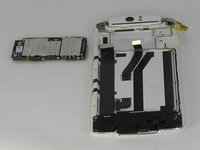
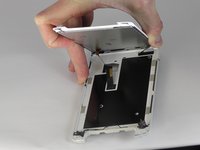
The rear case should then come free.
-
-
-
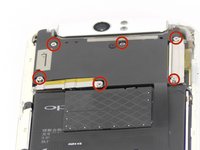
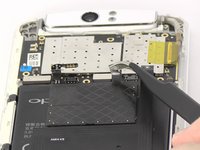
Remove the six 4mm long screws holding the motherboard in with the ph0 Phillips head screw driver.
-
-
Tool used on this step:Tweezers$4.99
-
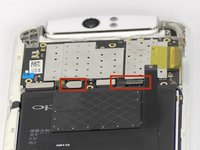
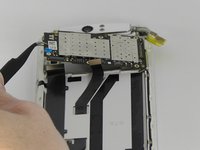
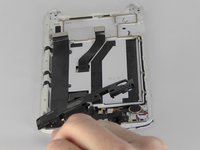
Use the tweezers or your fingers to remove the sliver plates.
-
-
-
-
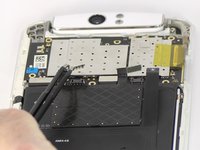
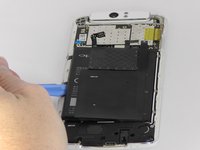
Use the blue opening tool to carefully pry the battery from the sticky tape that attaches it to the device.
-
-
Tool used on this step:Tweezers$4.99
-
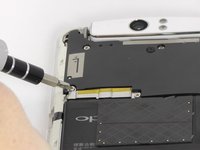
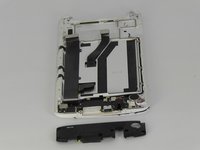
Use tweezers or fingers to remove the three connector tabs.
-
-
-
Remove the two 4mm long screws using the ph0 Phillips head screw driver.
-
Remove the six 3mm long screws using the ph0 Phillips head screw driver.
-
-
Tool used on this step:Tweezers$4.99
-
Use tweezers or your fingers to remove the plastic cover.
-
-
Tool used on this step:Tweezers$4.99
-
Use tweezers to disconnect the connector tab.
-
-
-
Use tweezers to peel the black strip from the sticky tape attached to the phone so that the black strip will slide through the phone once the screen is removed.
-
-
-
Insert the blue opening tool into the crevice between the screen and the main body of the phone. Gently slide the tool around the edge of the phone.
-
-
-
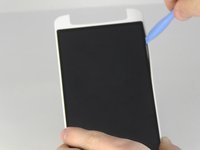
Insert the blue opening tool in between the black screen and the white border and slide it around the edge of the black screen.
-


To reassemble your device, follow these instructions in reverse order.
Cancel: I did not complete this guide.
10 other people completed this guide.
Team

USF Tampa, Team 13-5, Staggers Fall 2014 Member of USF Tampa, Team 13-5, Staggers Fall 2014
USFT-STAGGERS-F14S13G5
3 Members
8 Guides authored