Free Shipping on Domestic Orders $75+

OLPC XO-4 Touch Microphone Replacement

What you need

    1. OLPC XO-4 Touch Microphone Replacement, Battery: step 1, image 1 of 1
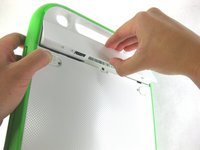
      • Turn the laptop upside-down, with the handle facing away from you.

      Ask FixBot
      Add Comment

    2. OLPC XO-4 Touch Microphone Replacement: step 2, image 1 of 2 OLPC XO-4 Touch Microphone Replacement: step 2, image 2 of 2
      • Pull the lock tabs towards the green outer edges of the laptop.

      • Hold the left lock tab in the unlock position until the battery is completely removed in the next step.

      Ask FixBot
      Add Comment

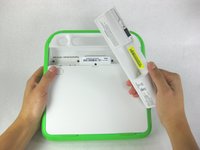
    3. OLPC XO-4 Touch Microphone Replacement: step 3, image 1 of 2 OLPC XO-4 Touch Microphone Replacement: step 3, image 2 of 2
      • Lift up on the middle of the battery to remove it from the device.

      Ask FixBot

      Add Comment

    1. OLPC XO-4 Touch Microphone Replacement, Screen Frame: step 4, image 1 of 3 OLPC XO-4 Touch Microphone Replacement, Screen Frame: step 4, image 2 of 3 OLPC XO-4 Touch Microphone Replacement, Screen Frame: step 4, image 3 of 3
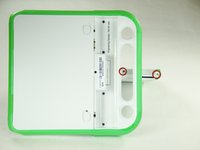
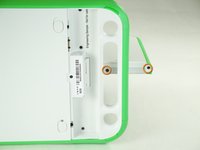
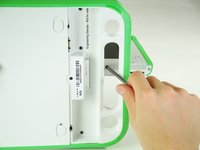
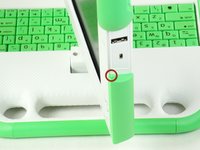
      • Remove the two 4mm Phillips #1 screws underneath the screen on the right-hand side.

      • Rotate the screen 180° and remove the other two screws.

      • You will have to put your screwdriver through the handle in order to reach the middle screw for both sides.

      Ask FixBot

      Add Comment

    2. OLPC XO-4 Touch Microphone Replacement: step 5, image 1 of 3 OLPC XO-4 Touch Microphone Replacement: step 5, image 2 of 3 OLPC XO-4 Touch Microphone Replacement: step 5, image 3 of 3
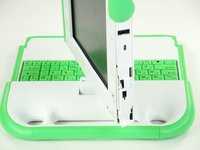
      • Remove the green side panel by pressing down on the small green button on the top and sliding the panel up.

      • Repeat the step above for the panel on the other side.

      Ask FixBot

      Add Comment

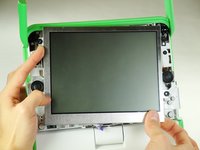
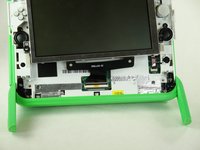
    3. OLPC XO-4 Touch Microphone Replacement: step 6, image 1 of 1
      • Be careful not to pull the bottom too far out because a ribbon cable is under the frame and can easily break.

      • Gently lift up the lower part of the frame and pull it down to free the screen frame.

      Ask FixBot
      Add Comment

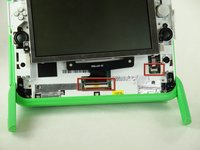
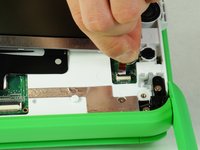
    4. OLPC XO-4 Touch Microphone Replacement: step 7, image 1 of 2 OLPC XO-4 Touch Microphone Replacement: step 7, image 2 of 2
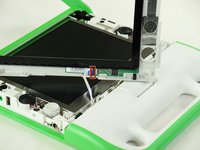
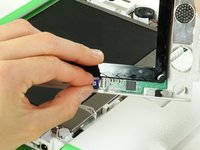
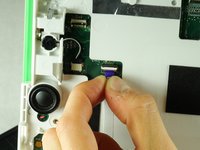
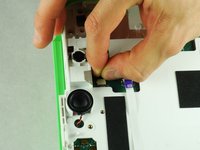
      • Lift the black connector and pull the ribbon cable out by the purple tab, freeing the frame.

      Ask FixBot
      Add Comment

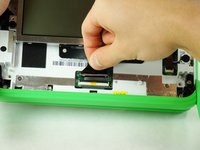
    1. OLPC XO-4 Touch Microphone Replacement, Screen: step 8, image 1 of 1
      • Remove the four 7.62mm screws using a Phillips #1 screwdriver.

      Ask FixBot
      Add Comment

    2. OLPC XO-4 Touch Microphone Replacement: step 9, image 1 of 2 OLPC XO-4 Touch Microphone Replacement: step 9, image 2 of 2
      • Be careful not to pull the screen out too far. There are two ribbon cables attached to the screen, and they can easily break.

      • Carefully lift the screen out.

      Ask FixBot

      Add Comment

    3. OLPC XO-4 Touch Microphone Replacement: step 10, image 1 of 3 OLPC XO-4 Touch Microphone Replacement: step 10, image 2 of 3 OLPC XO-4 Touch Microphone Replacement: step 10, image 3 of 3
      • Notice that the laptop in this picture has been turned 180° with the antennas now below the screen.

      • For each ribbon cable, lift up the black connector and gently pull the ribbon cables out by the plastic tabs.

      Ask FixBot

      Add Comment

    4. OLPC XO-4 Touch Microphone Replacement: step 11, image 1 of 1
      • Remove the screen from the laptop.

      Ask FixBot

      Add Comment

    1. OLPC XO-4 Touch Microphone Replacement, Back Cover: step 12, image 1 of 1
      • Remove the four 6mm screws using a Phillips #1 screwdriver.

      Ask FixBot

      Add Comment

    2. OLPC XO-4 Touch Microphone Replacement: step 13, image 1 of 2 OLPC XO-4 Touch Microphone Replacement: step 13, image 2 of 2
      • Rotate the top half of the laptop so that the back cover is facing you.

      • Pull up the tabs on the lower part of the back cover and pull it down and away from the antennas.

      • Remove the back cover by gently lifting it off of the laptop.

      Ask FixBot

      Add Comment

    1. OLPC XO-4 Touch Microphone Replacement, Motherboard: step 14, image 1 of 3 OLPC XO-4 Touch Microphone Replacement, Motherboard: step 14, image 2 of 3 OLPC XO-4 Touch Microphone Replacement, Motherboard: step 14, image 3 of 3
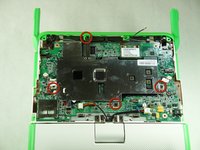
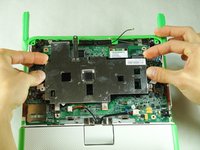
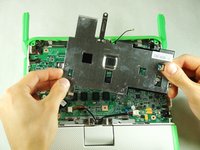
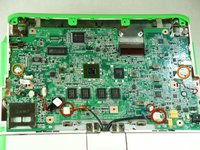
      • Remove the four black 4mm screws from the metal cover using a Phillips #1 screwdriver.

      • Remove the metal cover from the laptop.

      Ask FixBot

      Add Comment

    2. OLPC XO-4 Touch Microphone Replacement: step 15, image 1 of 3 OLPC XO-4 Touch Microphone Replacement: step 15, image 2 of 3 OLPC XO-4 Touch Microphone Replacement: step 15, image 3 of 3
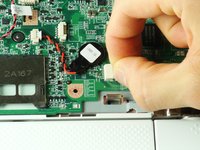
      • Pull the connectors out by holding the plastic tabs and not the wires.

      • Unplug the three wires connecting the motherboard to the bottom half of the laptop.

      • Unplug the two speaker wires from the motherboard.

      Ask FixBot

      Add Comment

    3. OLPC XO-4 Touch Microphone Replacement: step 16, image 1 of 3 OLPC XO-4 Touch Microphone Replacement: step 16, image 2 of 3 OLPC XO-4 Touch Microphone Replacement: step 16, image 3 of 3
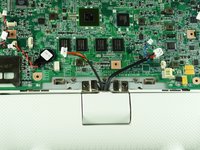
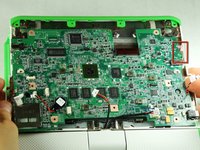
      • Turn the device over to where the screen used to be.

      • Pull out ribbon cable by holding the purple plastic tab.

      • Pull out connector with the black and white wire by holding plastic tab.

      Ask FixBot

      Add Comment

    4. OLPC XO-4 Touch Microphone Replacement: step 17, image 1 of 2 OLPC XO-4 Touch Microphone Replacement: step 17, image 2 of 2
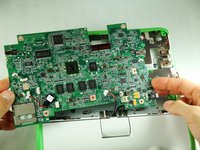
      • Move the motherboard slightly to the left so that the audio input and output jacks are out of the frame.

      • Pull the motherboard out of the laptop.

      Ask FixBot

      Add Comment

    1. OLPC XO-4 Touch Microphone Replacement, Microphone: step 18, image 1 of 3 OLPC XO-4 Touch Microphone Replacement, Microphone: step 18, image 2 of 3 OLPC XO-4 Touch Microphone Replacement, Microphone: step 18, image 3 of 3
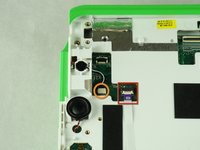
      • Locate the microphone on the front side of the laptop.

      • Gently, pull the microphone out of its socket.

      Ask FixBot

      Add Comment

Conclusion

To reassemble your device, follow these instructions in reverse order.

Cancel: I did not complete this guide.

Vignesh Kalidas

Member since: 01/25/13

1 Reputation

1 Guide authored

Team

Cal Poly, Team 3-29, Amido Winter 2013 Member of Cal Poly, Team 3-29, Amido Winter 2013

CPSU-AMIDO-W13S3G29

4 Members

90 Guides authored

0 Guide Comments

Add Comment

View Statistics:

Past 24 Hours: 1

Past 7 Days: 9

Past 30 Days: 33

All Time: 656