
Nvidia Shield Tablet Motherboard Replacement

What you need

  1. Nvidia Shield Tablet Motherboard Replacement, Rear Case: step 1, image 1 of 2 Nvidia Shield Tablet Motherboard Replacement, Rear Case: step 1, image 2 of 2
    • First, remove the stylus from your tablet.

  2. Nvidia Shield Tablet Motherboard Replacement: step 2, image 1 of 3 Nvidia Shield Tablet Motherboard Replacement: step 2, image 2 of 3 Nvidia Shield Tablet Motherboard Replacement: step 2, image 3 of 3
    Tool used on this step:
    Anti-Static Wrist Strap
    $7.95
    Buy
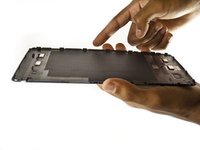
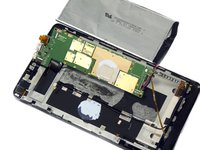
    • Set the tablet so the buttons, microSD, and stylus port are facing you.

    • Open the microSD slot.

    • Using the flat end of the spudger tool, carefully pry open the case starting from the microSD slot, slowly sliding the spudger along the inside edge of the case.

    • You may want to put on your anti-static wrist strap at this point as the motherboard will be vulnerable to physical touch and electrostatic shock after the casing is removed.

  3. Nvidia Shield Tablet Motherboard Replacement: step 3, image 1 of 2 Nvidia Shield Tablet Motherboard Replacement: step 3, image 2 of 2
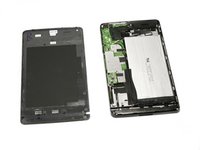
    • As you remove your case, be aware of small clips along the edges.

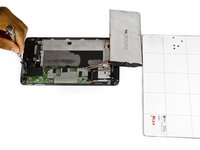
    • Finally, set the old casing aside.

  4. Nvidia Shield Tablet Motherboard Replacement, Motherboard: step 4, image 1 of 1
    Tool used on this step:
    Anti-Static Wrist Strap
    $7.95
    Buy
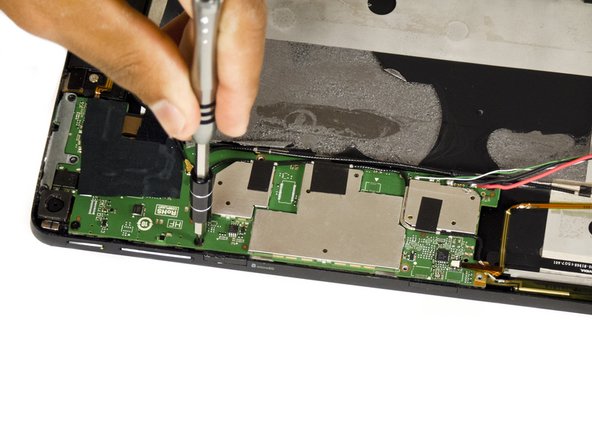
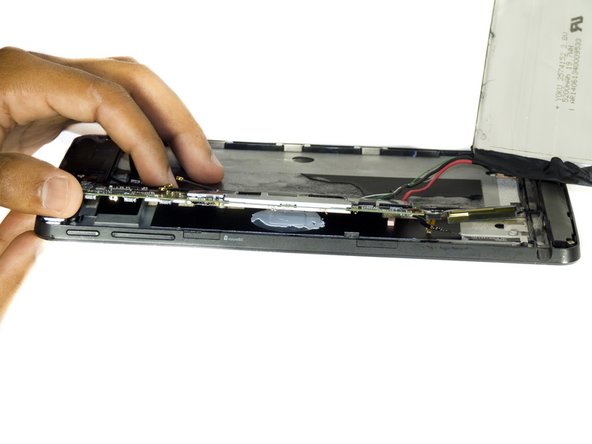
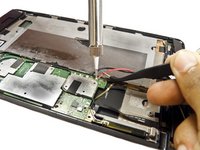
    • Carefully use the precision tweezers to unplug the ribbon cable.

    • Be sure to have your anti-static wrist strap on for this procedure.

  5. Nvidia Shield Tablet Motherboard Replacement: step 5, image 1 of 3 Nvidia Shield Tablet Motherboard Replacement: step 5, image 2 of 3 Nvidia Shield Tablet Motherboard Replacement: step 5, image 3 of 3
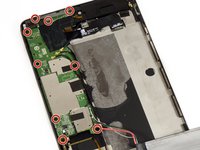
    • Remove the two 6.5 mm Phillips #00 screws and seven 3.0 mm Phillips #00 screws.

  6. Nvidia Shield Tablet Motherboard Replacement: step 6, image 1 of 3 Nvidia Shield Tablet Motherboard Replacement: step 6, image 2 of 3 Nvidia Shield Tablet Motherboard Replacement: step 6, image 3 of 3
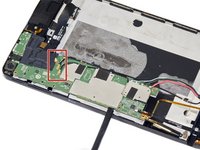
    • Use a pair of tweezers to disconnect the three black antenna cables from the motherboard.

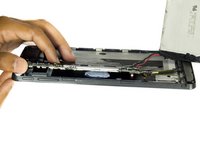
    • Use the flat end of the spudger tool to carefully pry up the motherboard.

    • In the first Shield, the stylus ribbon cable is located under the right side of board. While there are 2 additional cables for the cameras underneath the left end of the board. Be sure to loosen the cameras before lifting the board.

  7. Nvidia Shield Tablet Motherboard Replacement: step 7, image 1 of 2 Nvidia Shield Tablet Motherboard Replacement: step 7, image 2 of 2
    • Desolder the positive and negative battery cables from the motherboard.

    • Make sure to note which wire goes where, you don't want to re-solder the wires backwards!

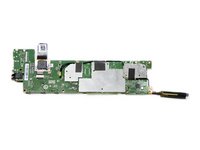
    • The motherboard should now come free.

Conclusion

To reassemble your device, follow these instructions in reverse order.

6 other people completed this guide.

Molly Bauer

Member since: 08/27/15

1,424 Reputation

6 Guides authored

Team

USF Tampa, Team 2-2, Blackwell Fall 2015 Member of USF Tampa, Team 2-2, Blackwell Fall 2015

USFT-BLACKWELL-F15S2G2

3 Members

11 Guides authored

9 Comments

Where do you obtain a new motherboard?

imprintcave - Reply

The real question is more about how to find a new shield tablet motherboard ??

willixlive - Reply

where can i buy the motherboard

Gurjot Dhaliwal - Reply

waar kan ik een nieuw shield moederbord kopen?

tom1vangestel - Reply

Hello, I'm looking for a description of the various ribbon connectors on the motherboard.

I'm also looking for a hint to solve a problem I have after replacing the screen+digitizer: the right side (half) of the touch screen does'n work.

Laurent Zanoni - Reply

Add Comment

View Statistics:

Past 24 Hours: 0

Past 7 Days: 4

Past 30 Days: 14

All Time: 9,232