
Numark TT1600 Tone Arm Replacement

What you need

  1. Numark TT1600 Tone Arm Replacement, Tone Arm: step 1, image 1 of 2 Numark TT1600 Tone Arm Replacement, Tone Arm: step 1, image 2 of 2
    • Flip over the turntable and remove the 9 screws on the outer edges.

  2. Numark TT1600 Tone Arm Replacement: step 2, image 1 of 1
    • Remove the back cover by pulling it apart.

  3. Numark TT1600 Tone Arm Replacement: step 3, image 1 of 3 Numark TT1600 Tone Arm Replacement: step 3, image 2 of 3 Numark TT1600 Tone Arm Replacement: step 3, image 3 of 3
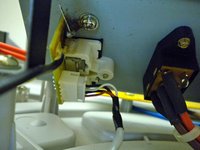
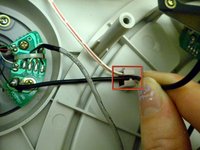
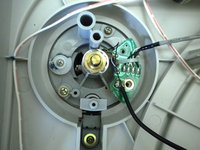
    • Remove the clip located on the backside of the audio jack housing by gently pulling it out.

    • There will be some resistance but continue to pull gently.

    • The clip is located right underneath the audio jacks.

  4. Numark TT1600 Tone Arm Replacement: step 4, image 1 of 3 Numark TT1600 Tone Arm Replacement: step 4, image 2 of 3 Numark TT1600 Tone Arm Replacement: step 4, image 3 of 3
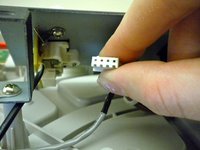
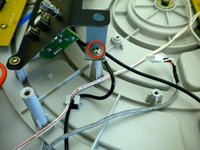
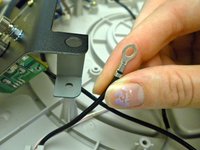
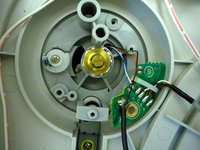
    • Remove the screw that connects the black wire of the tone arm to the base of the audio jack housing.

  5. Numark TT1600 Tone Arm Replacement: step 5, image 1 of 2 Numark TT1600 Tone Arm Replacement: step 5, image 2 of 2
    • Gently pull the wire that you just unscrewed to release it from the clip.

  6. Numark TT1600 Tone Arm Replacement: step 6, image 1 of 3 Numark TT1600 Tone Arm Replacement: step 6, image 2 of 3 Numark TT1600 Tone Arm Replacement: step 6, image 3 of 3
    • Remove the two screws connecting the circuit board to the tone arm.

  7. Numark TT1600 Tone Arm Replacement: step 7, image 1 of 2 Numark TT1600 Tone Arm Replacement: step 7, image 2 of 2
    • Remove the two remaining screws connecting the tone arm to the device.

  8. Numark TT1600 Tone Arm Replacement: step 8, image 1 of 1
    • Flip the turntable back over to the top side.

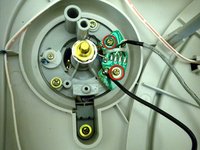
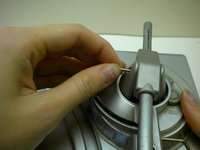
    • Remove the counter weight located at the back of the tone arm.

  9. Numark TT1600 Tone Arm Replacement: step 9, image 1 of 3 Numark TT1600 Tone Arm Replacement: step 9, image 2 of 3 Numark TT1600 Tone Arm Replacement: step 9, image 3 of 3
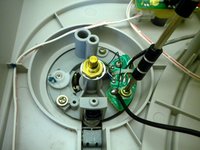
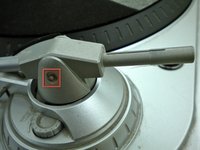
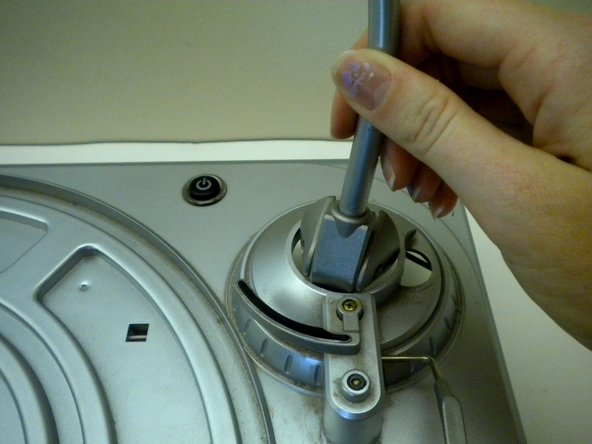
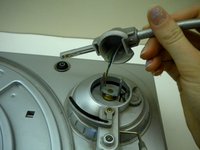
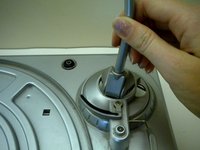
    • Push out the pin keeping the tone arm in place using a Phillips #00 screwdriver.

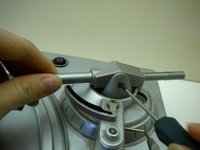
    • Once you have pushed the pin out with the screwdriver, pull the rest of it out using your hand.

  10. Numark TT1600 Tone Arm Replacement: step 10, image 1 of 3 Numark TT1600 Tone Arm Replacement: step 10, image 2 of 3 Numark TT1600 Tone Arm Replacement: step 10, image 3 of 3
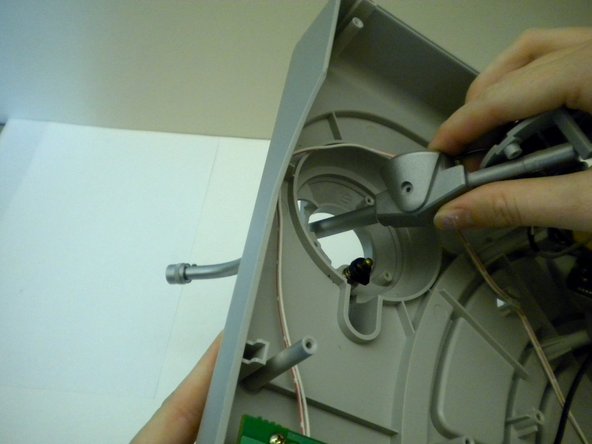
    • Pick up the tone arm and point the back end of it towards its base.

    • Push the back end of the tone arm into the hole.

    • Flip the turntable over and pull the tone arm all the way through the hole.

Conclusion

To reassemble your device, follow these instructions in reverse order.

3 other people completed this guide.

Nikolai

Member since: 10/12/11

254 Reputation

5 Guides authored

Team

Cal Poly, Team 17-14, Regan Fall 2011 Member of Cal Poly, Team 17-14, Regan Fall 2011

CPSU-REGAN-F11S17G14

4 Members

11 Guides authored

0 Comments

Add Comment

View Statistics:

Past 24 Hours: 0

Past 7 Days: 6

Past 30 Days: 28

All Time: 8,211