
Nook Tablet Speaker Assembly Replacement

What you need

  1. Nook Tablet Speaker Assembly Replacement, Back Cover: step 1, image 1 of 1
    • Flip the Nook over.

  2. Nook Tablet Speaker Assembly Replacement: step 2, image 1 of 2 Nook Tablet Speaker Assembly Replacement: step 2, image 2 of 2
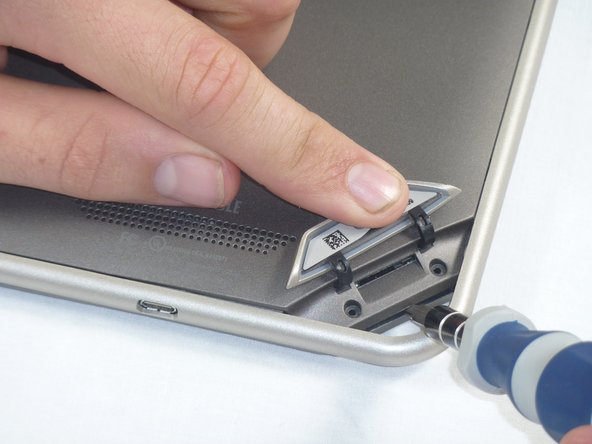
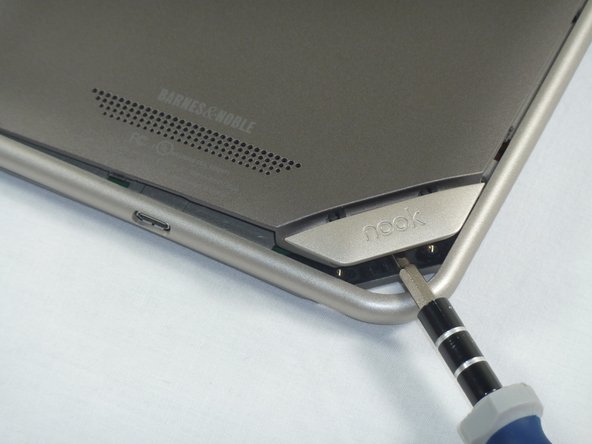
    • Lift the flap that reads "Nook" to reveal the tape that is underneath. Remove the memory card if one is present.

    • Remove the tape covering the round holes to reveal two T5 Torx screws.

    • Remove the two T5 Torx screws securing the back cover.

  3. Nook Tablet Speaker Assembly Replacement: step 3, image 1 of 2 Nook Tablet Speaker Assembly Replacement: step 3, image 2 of 2
    • Insert the flat end of a spudger between the front panel and the rear assembly.

    • Though these photos show a screwdriver, use a spudger or plastic opening tool in order to prevent damage to the device.

    • Use a spudger to lift the the back panel from the rest of the Nook.

  4. Nook Tablet Speaker Assembly Replacement: step 4, image 1 of 2 Nook Tablet Speaker Assembly Replacement: step 4, image 2 of 2
    • Slide the spudger around the edges of the Nook to loosen the back panel.

  5. Nook Tablet Speaker Assembly Replacement: step 5, image 1 of 1
    • Pull the back panel off the Nook.

  6. Nook Tablet Speaker Assembly Replacement, Taking Out the Battery: step 6, image 1 of 3 Nook Tablet Speaker Assembly Replacement, Taking Out the Battery: step 6, image 2 of 3 Nook Tablet Speaker Assembly Replacement, Taking Out the Battery: step 6, image 3 of 3
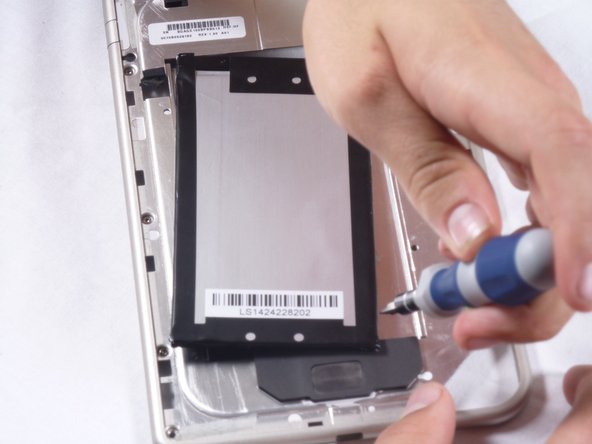
    • Set aside the motherboard and focus on the metal backing containing the battery.

    • Use the screwdriver or plastic prying tool around the edges of the battery to pry it from its slot in the metal backing.

    • The battery may be held with adhesive. Do not panic if it feels like you are prying too hard just apply careful force until it is no longer stuck.

    • Pick up the battery and remove it making sure to free the cords in the upper left hand corner by sliding it out rather than lifting it.

  7. Nook Tablet Speaker Assembly Replacement, Notes for Reassembly: step 7, image 1 of 1
    • When replacing the motherboard make sure that the speaker assembly component (small rectangular piece) is in place. It is not attached and needs to be properly aligned.

  8. Nook Tablet Speaker Assembly Replacement, Removing Speaker Assembly: step 8, image 1 of 1
    • Using your hands pull the square speaker assembly component off the motherboard.

  9. Nook Tablet Speaker Assembly Replacement, Replacing Speaker Assembly: step 9, image 1 of 1
    • Now place the new speaker assembly component back in the same square location.

    • As Step 12 mentions, make sure to realign the speaker assembly correctly in the square.

Josh Fisher

Member since: 09/26/12

9 Reputation

1 Guide authored

Team

Cal Poly, Team 1-4, Propen Fall 2012 Member of Cal Poly, Team 1-4, Propen Fall 2012

CPSU-PROPEN-F12S1G4

4 Members

14 Guides authored

View Statistics:

Past 24 Hours: 0

Past 7 Days: 0

Past 30 Days: 13

All Time: 2,102