Introduction
This guide will show you how to remove the back cover revealing the battery. This will allow you to access the inside of the nook tablet and will act as prerequisite for most of the other guides
What you need
-
-
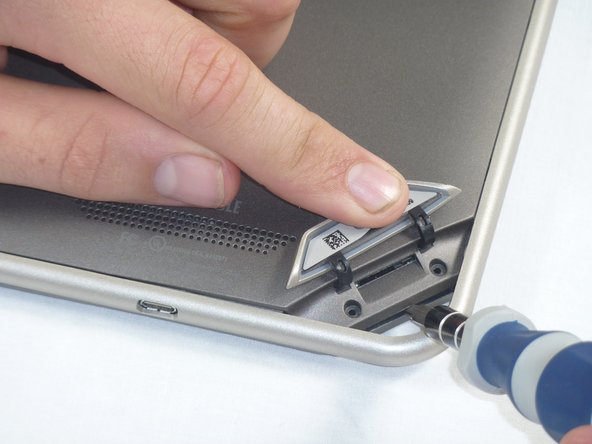
Lift the flap that reads "Nook" to reveal the tape that is underneath. Remove the memory card if one is present.
-
Remove the tape covering the round holes to reveal two T5 Torx screws.
-
Remove the two T5 Torx screws securing the back cover.
-
-
-
-
Insert the flat end of a spudger between the front panel and the rear assembly.
-
Use a spudger to lift the the back panel from the rest of the Nook.
-


To reassemble your device, line up the piece that was removed with how it was on before and then just firmly press down till it snaps into place.
Cancel: I did not complete this guide.
5 other people completed this guide.
Team

Cal Poly, Team 1-4, Propen Fall 2012 Member of Cal Poly, Team 1-4, Propen Fall 2012
CPSU-PROPEN-F12S1G4
4 Members
14 Guides authored