
Nook HD Back and Front Casing Replacement

Connor Pickert and
Last updated on Dec 26, 2015
Views: 3.2K
View statistics:
- Past 24 Hours:
- 7
- Past 7 Days:
- 25
- Past 30 Days:
- 97
- All Time:
- 3,207
Comments: 1
1 comment on steps.
Completed: 6 7
6 people have marked this guide "completed." Will you be next?
7 people have marked this guide "completed." Including you — great job!
Favorites: 3 4
3 people have favorited (and subscribed to) this guide. Will you be next?
4 people have favorited (and subscribed to) this guide — including you!
Introduction
Go to step 1 ↓We will take apart the Nook HD's paneling to reveal the internal components. This guide may be used as a prerequisite for other Nook HD guides.
What you need


-
-
-
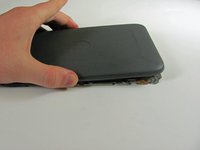
Be sure the device is powered off. Clean the device to prevent any dirt and dust from entering into the device.
-
Use the plastic opening tool to gently pry the plastic screen frame away from the screen. Run the plastic opening tool along the interior edge of the screen until the screen frame is completely separated from the glass.
-
The screen frame is held onto the Nook by a set of tab that run around the outside of the frame. There may also be a line of rubber cement around the Nook under the screen frame. If your Nook has this, you will have to dig deep to separate the frame from the Nook.
 Ask FixBot
-
-
-
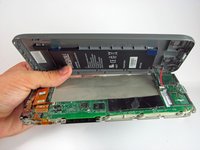
Use a T5 screwdriver to remove the seventeen 5.0 millimeter screws from the back casing.
-
-
-
-
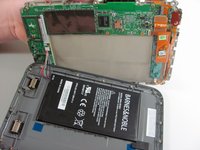
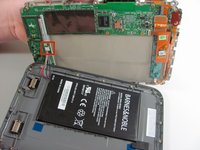
Use the plastic opening tool to gently unclip the wire from the pins by pulling the white connector up.
-
-




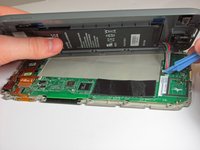
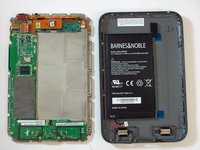
To reassemble your device, follow these instructions in reverse order.
Cancel: I did not complete this guide.
6 other people completed this guide.
Team

Cal Poly, Team 3-43, Maness Spring 2014 Member of Cal Poly, Team 3-43, Maness Spring 2014
CPSU-MANESS-S14S3G43
5 Members
60 Guides authored
