Free Shipping on Domestic Orders $75+

Nintendo Wii Drive Board Fuse Replacement

What you need

    1. Nintendo Wii Drive Board Fuse Replacement, Faceplate: step 1, image 1 of 2 Nintendo Wii Drive Board Fuse Replacement, Faceplate: step 1, image 2 of 2
      • Use a metal spudger to remove the white plastic screw covers stuck to the lower case near the front of the Wii.

      Ask FixBot

      Add Comment

    2. Nintendo Wii Drive Board Fuse Replacement: step 2, image 1 of 1
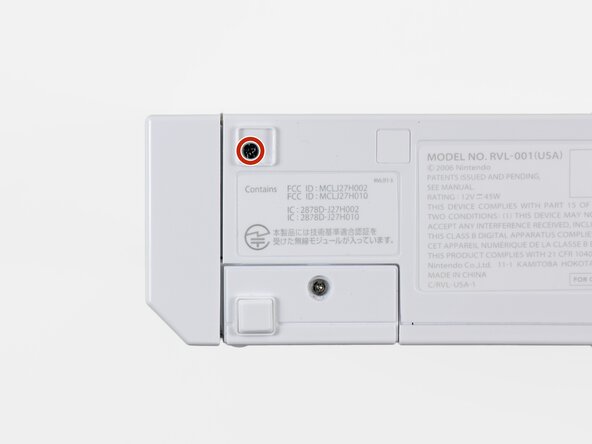
      • Remove the two 8.3 mm Tri-Point screws hidden under the covers you just removed.

      Ask FixBot

      Add Comment

    3. Nintendo Wii Drive Board Fuse Replacement: step 3, image 1 of 1
      • Remove the single 5.9 mm Phillips screw under the controller port door nearest the faceplate.

      Ask FixBot

      Add Comment

    4. Nintendo Wii Drive Board Fuse Replacement: step 4, image 1 of 1
      • Use a metal spudger to remove the rubber foot stuck to the side of the Wii near the DVD drive opening.

      Ask FixBot

      Add Comment

    5. Nintendo Wii Drive Board Fuse Replacement: step 5, image 1 of 1
      • Remove the single 5.9 mm Phillips screw hidden under the foot you just removed.

      Ask FixBot

      Add Comment

    6. Nintendo Wii Drive Board Fuse Replacement: step 6, image 1 of 2 Nintendo Wii Drive Board Fuse Replacement: step 6, image 2 of 2
      Tool used on this step:
      Tweezers
      $4.99
      Buy
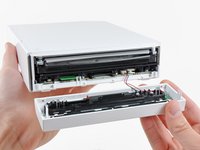
      • Carefully pull the faceplate away from the front of the Wii.

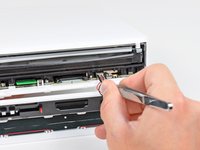
      • Use a pair of tweezers to disconnect the LED cable's plastic connector from the motherboard.

      • Remove the faceplate.

      Ask FixBot

      Add Comment

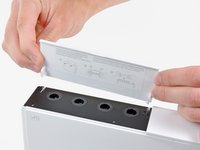
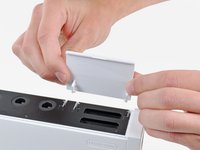
    1. Nintendo Wii Drive Board Fuse Replacement, Outer Case: step 7, image 1 of 3 Nintendo Wii Drive Board Fuse Replacement, Outer Case: step 7, image 2 of 3 Nintendo Wii Drive Board Fuse Replacement, Outer Case: step 7, image 3 of 3
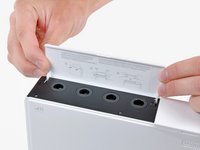
      • Open the controller port cover until it is perpendicular to the black controller port bezel.

      • Pull the controller port cover straight up to release it from the outer case.

      • Repeat this procedure for the memory card port cover.

      Ask FixBot

      Add Comment

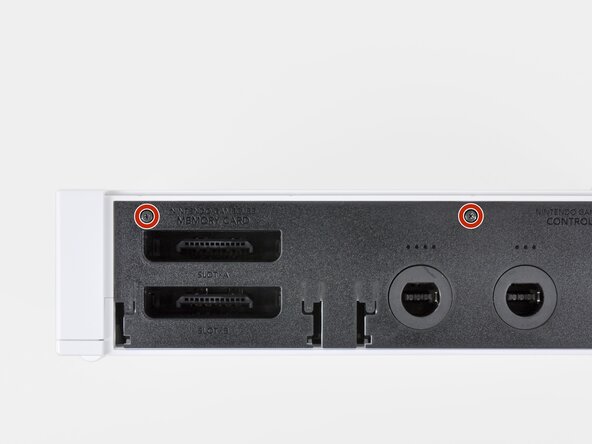
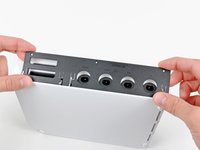
    2. Nintendo Wii Drive Board Fuse Replacement: step 8, image 1 of 2 Nintendo Wii Drive Board Fuse Replacement: step 8, image 2 of 2
      • Remove the two remaining 4.1 mm Phillips screws along the top edge of the black plastic controller port bezel.

      • Lift the bezel from the long edge furthest away from the controller ports and remove it from the Wii.

      Ask FixBot

      Add Comment

    3. Nintendo Wii Drive Board Fuse Replacement: step 9, image 1 of 1
      • Remove the two 5 mm Phillips screws above the controller ports.

      Ask FixBot

      Add Comment

    4. Nintendo Wii Drive Board Fuse Replacement: step 10, image 1 of 1
      • Use a metal spudger to remove the three highlighted screw covers stuck to the side of the Wii.

      Ask FixBot

      Add Comment

    5. Nintendo Wii Drive Board Fuse Replacement: step 11, image 1 of 1
      • Remove the following screws:

      • Two 5 mm Phillips screws

      • One 8.2 mm Tri-Point screw

      Ask FixBot

      Add Comment

    6. Nintendo Wii Drive Board Fuse Replacement: step 12, image 1 of 1
      • Use a metal spudger to remove the two rubber feet stuck to the bottom face of the Wii near the rear ports.

      Ask FixBot

      Add Comment

    7. Nintendo Wii Drive Board Fuse Replacement: step 13, image 1 of 1
      Tool used on this step:
      iFixit Precision 4 mm Screwdriver Bit
      $2.99
      Buy
      • Remove the two 8.2 mm Tri-Point screws hidden under the feet you just removed.

      • You may use a 4 mm hex nut driver to extend your bit into the recesses and reach the screws.

      Ask FixBot

      Add Comment

    8. Nintendo Wii Drive Board Fuse Replacement: step 14, image 1 of 1
      • Lift the outer case straight up off the body of the Wii.

      Ask FixBot

      Add Comment

    1. Nintendo Wii Drive Board Fuse Replacement, DVD Drive: step 15, image 1 of 2 Nintendo Wii Drive Board Fuse Replacement, DVD Drive: step 15, image 2 of 2
      • Remove the small Phillips screw securing the battery door to the bottom panel.

      • This screw is captive to the battery door.

      • Pull the battery door out of the Wii.

      • The system time will be reset once you remove the battery door.

      • This is a good time to change the CR2032 battery if it hasn't been changed recently.

      Ask FixBot

      Add Comment

    2. Nintendo Wii Drive Board Fuse Replacement: step 16, image 1 of 1
      • Remove the 8.2 mm Tri-Point screw that was hidden beneath the battery door.

      Ask FixBot

      Add Comment

    3. Nintendo Wii Drive Board Fuse Replacement: step 17, image 1 of 1
      • Remove the two 8.2 mm Tri-Point screws securing the DVD drive shield near the controller ports.

      Ask FixBot

      Add Comment

    4. Nintendo Wii Drive Board Fuse Replacement: step 18, image 1 of 1
      • Be cautious as you remove the DVD shield, the edges are sharp and could cut you

      • Lift the DVD drive shield upward and remove it from the Wii.

      Ask FixBot

      Add Comment

    5. Nintendo Wii Drive Board Fuse Replacement: step 19, image 1 of 1
      • Remove the four 9 mm Phillips screws securing the DVD drive to the bottom panel.

      Ask FixBot

      Add Comment

    6. Nintendo Wii Drive Board Fuse Replacement: step 20, image 1 of 1
      • Lift the side of the DVD drive opposite the controller ports enough to access the cables on its bottom face.

      • Carefully pull the DVD drive power cable out from under the plastic shroud near the heat sink.

      Ask FixBot

      Add Comment

    7. Nintendo Wii Drive Board Fuse Replacement: step 21, image 1 of 1
      • Pull the DVD drive power cable away from its socket on the DVD drive.

      Ask FixBot

      Add Comment

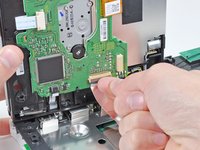
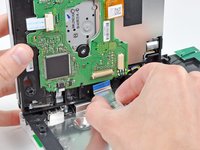
    8. Nintendo Wii Drive Board Fuse Replacement: step 22, image 1 of 2 Nintendo Wii Drive Board Fuse Replacement: step 22, image 2 of 2
      • Use your fingernail to flip up the retaining flap on the DVD drive ribbon cable socket.

      • Be sure you are prying up on the retaining flap, not the socket itself.

      • Pull the DVD drive ribbon cable out of its socket.

      • Remove the DVD drive from the Wii.

      Ask FixBot

      Add Comment

    1. Nintendo Wii Drive Board Fuse Replacement, Drive Board Fuses: step 23, image 1 of 1
      • Measure across each fuse with a continuity meter.

      • If either fuse is open, you will need to replace it with an 0603 fuse; if one is not available, you can use a 0-ohm resistor or jumper wire for testing purposes.

      Ask FixBot

      Add Comment

Conclusion

To reassemble your device, follow these instructions in reverse order.

Cancel: I did not complete this guide.

17 other people completed this guide.

bushing

Member since: 04/23/10

10,502 Reputation

13 Guides authored

4 Guide Comments

Soldering jumpers on those fuses is easier said than done. The left-hand fuse follows the same trace all the way to the larger solder pad above, so don't worry about bridging. But it looks like there's a cap or diode along the trace of the right-hand fuse, so solder carefully! This worked great, and got my Wii drive back to spinning without spending $80 on a new drive.

Robert Allshouse - Reply Share

If anyone could give specifications for the fuses needed, it would be very much appreciated... 0603 Fuses come in different amp ratings. I saw one person suggest elsewhere that after research he found that the ones used in this repair are 2A 0603 fuses, can anyone confirm this please before I get the wrong ones?

Thanks in advance,

James @ Retro Gaming Repair UK

Retro Gaming Repair - Reply Share

I found a datasheet for littelfuse which labels the fuse as 2A. The datasheet can be found here

http://www.littelfuse.com/data/en/data_s....

Hope this helps.

Another tip for after you know the fuse is blown instead of removing the fuse and jumpering it add a little solder on both sides of the fuse then use a lead from a resister heating up the solder and push the lead from a resistor into it then do the same for the other side.

randyhenke - Reply Share

this guide assumes you have one revision of the board....i have another revision and can only find one of the resistors

dude105tanki - Reply Share

Add Comment

View Statistics:

Past 24 Hours: 11

Past 7 Days: 52

Past 30 Days: 214

All Time: 69,692