Free Shipping on Domestic Orders $75+

Nintendo Wii DVD Drive Replacement

Prerequisite Only
This is a prerequisite-only guide! This guide is part of another procedure and isn’t meant to be used alone.

What you need

    1. Nintendo Wii DVD Drive Replacement, Faceplate: step 1, image 1 of 2 Nintendo Wii DVD Drive Replacement, Faceplate: step 1, image 2 of 2
      • Use a metal spudger to remove the white plastic screw covers stuck to the lower case near the front of the Wii.

      Ask FixBot

      Add Comment

    2. Nintendo Wii DVD Drive Replacement: step 2, image 1 of 1
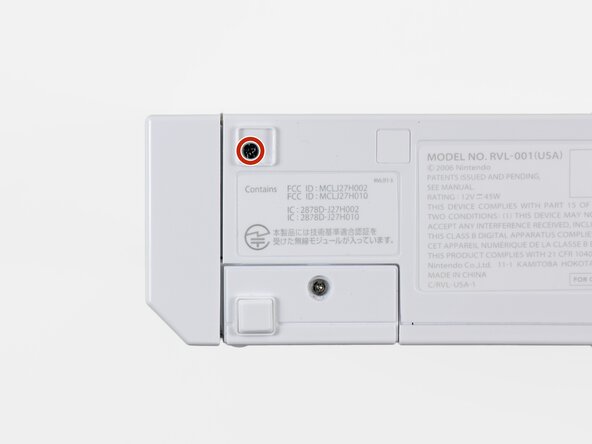
      • Remove the two 8.3 mm Tri-Point screws hidden under the covers you just removed.

      Ask FixBot

      Add Comment

    3. Nintendo Wii DVD Drive Replacement: step 3, image 1 of 1
      • Remove the single 5.9 mm Phillips screw under the controller port door nearest the faceplate.

      Ask FixBot

      Add Comment

    4. Nintendo Wii DVD Drive Replacement: step 4, image 1 of 1
      • Use a metal spudger to remove the rubber foot stuck to the side of the Wii near the DVD drive opening.

      Ask FixBot

      Add Comment

    5. Nintendo Wii DVD Drive Replacement: step 5, image 1 of 1
      • Remove the single 5.9 mm Phillips screw hidden under the foot you just removed.

      Ask FixBot

      Add Comment

    6. Nintendo Wii DVD Drive Replacement: step 6, image 1 of 2 Nintendo Wii DVD Drive Replacement: step 6, image 2 of 2
      Tool used on this step:
      Tweezers
      $4.99
      Buy
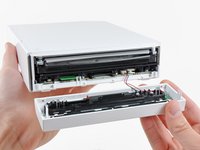
      • Carefully pull the faceplate away from the front of the Wii.

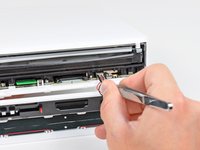
      • Use a pair of tweezers to disconnect the LED cable's plastic connector from the motherboard.

      • Remove the faceplate.

      Ask FixBot

      Add Comment

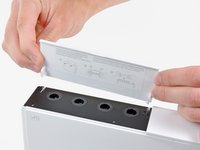
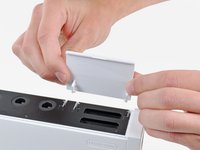
    1. Nintendo Wii DVD Drive Replacement, Outer Case: step 7, image 1 of 3 Nintendo Wii DVD Drive Replacement, Outer Case: step 7, image 2 of 3 Nintendo Wii DVD Drive Replacement, Outer Case: step 7, image 3 of 3
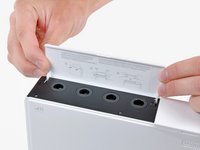
      • Open the controller port cover until it is perpendicular to the black controller port bezel.

      • Pull the controller port cover straight up to release it from the outer case.

      • Repeat this procedure for the memory card port cover.

      Ask FixBot

      Add Comment

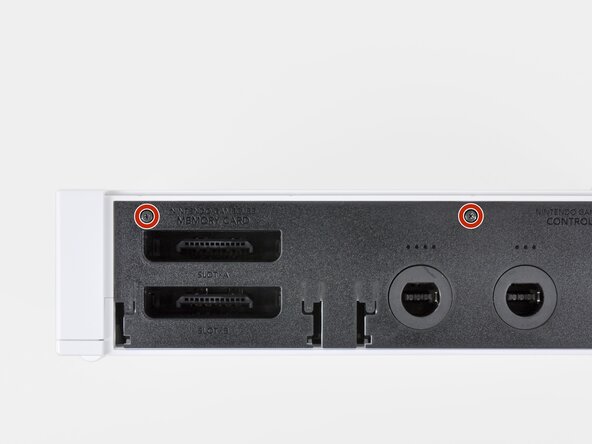
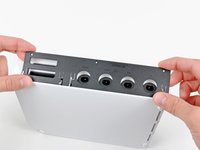
    2. Nintendo Wii DVD Drive Replacement: step 8, image 1 of 2 Nintendo Wii DVD Drive Replacement: step 8, image 2 of 2
      • Remove the two remaining 4.1 mm Phillips screws along the top edge of the black plastic controller port bezel.

      • Lift the bezel from the long edge furthest away from the controller ports and remove it from the Wii.

      Ask FixBot

      Add Comment

    3. Nintendo Wii DVD Drive Replacement: step 9, image 1 of 1
      • Remove the two 5 mm Phillips screws above the controller ports.

      Ask FixBot

      Add Comment

    4. Nintendo Wii DVD Drive Replacement: step 10, image 1 of 1
      • Use a metal spudger to remove the three highlighted screw covers stuck to the side of the Wii.

      Ask FixBot

      Add Comment

    5. Nintendo Wii DVD Drive Replacement: step 11, image 1 of 1
      • Remove the following screws:

      • Two 5 mm Phillips screws

      • One 8.2 mm Tri-Point screw

      Ask FixBot

      Add Comment

    6. Nintendo Wii DVD Drive Replacement: step 12, image 1 of 1
      • Use a metal spudger to remove the two rubber feet stuck to the bottom face of the Wii near the rear ports.

      Ask FixBot

      Add Comment

    7. Nintendo Wii DVD Drive Replacement: step 13, image 1 of 1
      Tool used on this step:
      iFixit Precision 4 mm Screwdriver Bit
      $2.99
      Buy
      • Remove the two 8.2 mm Tri-Point screws hidden under the feet you just removed.

      • You may use a 4 mm hex nut driver to extend your bit into the recesses and reach the screws.

      Ask FixBot

      Add Comment

    8. Nintendo Wii DVD Drive Replacement: step 14, image 1 of 1
      • Lift the outer case straight up off the body of the Wii.

      Ask FixBot

      Add Comment

    1. Nintendo Wii DVD Drive Replacement, DVD Drive: step 15, image 1 of 2 Nintendo Wii DVD Drive Replacement, DVD Drive: step 15, image 2 of 2
      • Remove the small Phillips screw securing the battery door to the bottom panel.

      • This screw is captive to the battery door.

      • Pull the battery door out of the Wii.

      • The system time will be reset once you remove the battery door.

      • This is a good time to change the CR2032 battery if it hasn't been changed recently.

      Ask FixBot

      Add Comment

    2. Nintendo Wii DVD Drive Replacement: step 16, image 1 of 1
      • Remove the 8.2 mm Tri-Point screw that was hidden beneath the battery door.

      Ask FixBot

      Add Comment

    3. Nintendo Wii DVD Drive Replacement: step 17, image 1 of 1
      • Remove the two 8.2 mm Tri-Point screws securing the DVD drive shield near the controller ports.

      Ask FixBot

      Add Comment

    4. Nintendo Wii DVD Drive Replacement: step 18, image 1 of 1
      • Be cautious as you remove the DVD shield, the edges are sharp and could cut you

      • Lift the DVD drive shield upward and remove it from the Wii.

      Ask FixBot

      Add Comment

    5. Nintendo Wii DVD Drive Replacement: step 19, image 1 of 1
      • Remove the four 9 mm Phillips screws securing the DVD drive to the bottom panel.

      Ask FixBot

      Add Comment

    6. Nintendo Wii DVD Drive Replacement: step 20, image 1 of 1
      • Lift the side of the DVD drive opposite the controller ports enough to access the cables on its bottom face.

      • Carefully pull the DVD drive power cable out from under the plastic shroud near the heat sink.

      Ask FixBot

      Add Comment

    7. Nintendo Wii DVD Drive Replacement: step 21, image 1 of 1
      • Pull the DVD drive power cable away from its socket on the DVD drive.

      Ask FixBot

      Add Comment

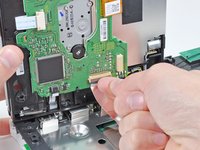
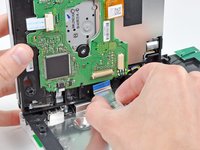
    8. Nintendo Wii DVD Drive Replacement: step 22, image 1 of 2 Nintendo Wii DVD Drive Replacement: step 22, image 2 of 2
      • Use your fingernail to flip up the retaining flap on the DVD drive ribbon cable socket.

      • Be sure you are prying up on the retaining flap, not the socket itself.

      • Pull the DVD drive ribbon cable out of its socket.

      • Remove the DVD drive from the Wii.

      Ask FixBot

      Add Comment

Conclusion

To reassemble your device, follow these instructions in reverse order.

Cancel: I did not complete this guide.

44 other people completed this guide.

8 Guide Comments

My problem was an object that had been lodged in the drive - in fact, I didn't need to replace the drive. I successfully followed thru step 19, and at that point, I was able to extract the foreign object through the gaps in the disc housing. Then I reversed the steps through to the start and everything is working again.

JJones - Reply Share

I used this to access the drive area where I successfully identified and removed a plastic toy 50p coin my 2 yr old had carefully inserted in it; The Wii works again now

I am v gratefuil for these excellent instructions

And a tip - use a computer/laptop to view; an iphone was a wee (Wii?) bit too small!

david simpson - Reply Share

You can also download our free iPad app.

David Hodson - Reply Share

Your instructions were very thorough, and my Wii now works again, thanks!

Robotai - Reply Share

I’ve replaced the drive & receive the same error.

it doesn’t appear to read the disc.

Could it be the ribbon cable needs checking or

do you need to run a WII update as the device realises a hardware change and it won’t work until

an update has been run.

Brendon J - Reply Share

Add Comment

View Statistics:

Past 24 Hours: 6

Past 7 Days: 24

Past 30 Days: 147

All Time: 126,889