Free Shipping on Domestic Orders $75+

Nintendo Switch Motherboard Replacement

Archived Guide
This guide is retained solely for historical purposes. Use the updated version of the guide to perform your repair.

What you need

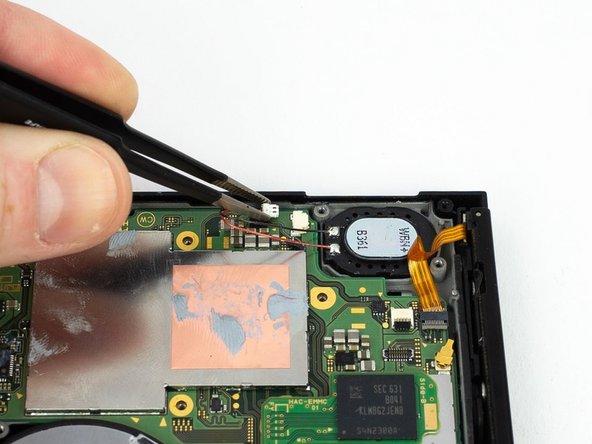
    1. Nintendo Switch Motherboard Replacement, Motherboard: step 1, image 1 of 2 Nintendo Switch Motherboard Replacement, Motherboard: step 1, image 2 of 2
      • Disconnect the right loudspeaker from the motherboard.

      Ask FixBot

      Add Comment

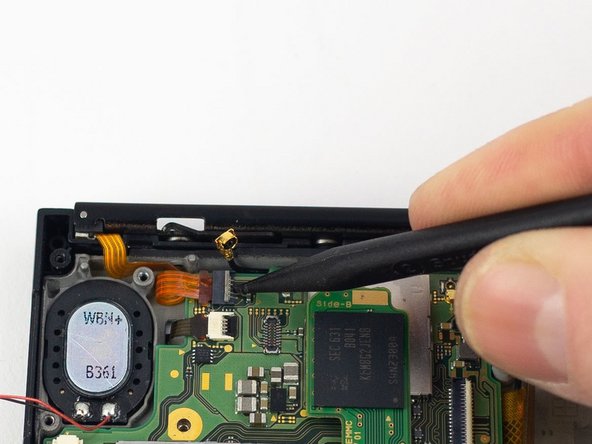
    2. Nintendo Switch Motherboard Replacement: step 2, image 1 of 2 Nintendo Switch Motherboard Replacement: step 2, image 2 of 2
      • Disconnect the left speaker from the motherboard.

      Ask FixBot
      Add Comment

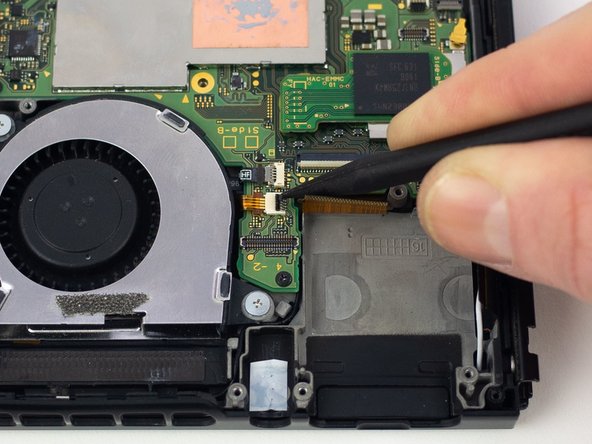
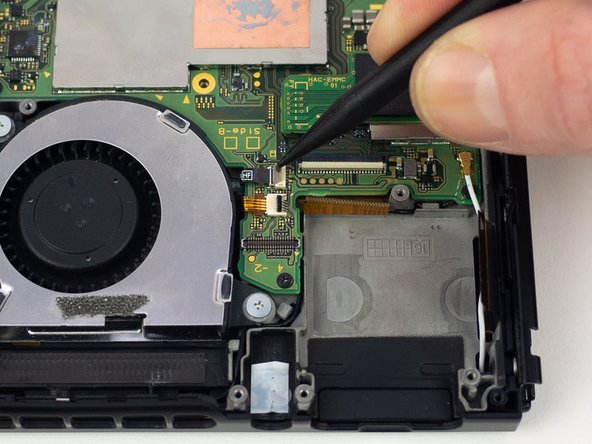
    3. Nintendo Switch Motherboard Replacement: step 3, image 1 of 2 Nintendo Switch Motherboard Replacement: step 3, image 2 of 2
      • Use a spudger to flip up the small beige locking flap on the display ZIF connector.

      Ask FixBot

      Add Comment

    4. Nintendo Switch Motherboard Replacement: step 4, image 1 of 2 Nintendo Switch Motherboard Replacement: step 4, image 2 of 2
      • Use the pointed end of a spudger to slide the display ribbon cable out of the ZIF connector.

      Ask FixBot

      Add Comment

    5. Nintendo Switch Motherboard Replacement: step 5, image 1 of 2 Nintendo Switch Motherboard Replacement: step 5, image 2 of 2
      • Use a spudger to flip up the small black locking flap on the power/volume button ZIF connector.

      Ask FixBot

      Add Comment

    6. Nintendo Switch Motherboard Replacement: step 6, image 1 of 2 Nintendo Switch Motherboard Replacement: step 6, image 2 of 2
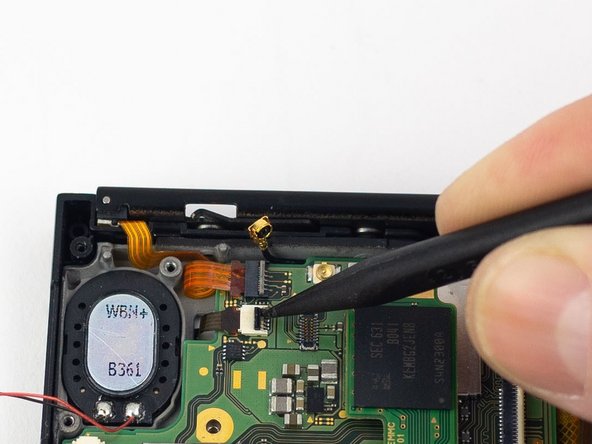
      • Use a spudger to flip up the small gray locking flap on the fan ZIF connector.

      Ask FixBot
      Add Comment

    7. Nintendo Switch Motherboard Replacement: step 7, image 1 of 2 Nintendo Switch Motherboard Replacement: step 7, image 2 of 2
      • Use the flat end of a spudger to disconnect the white coaxial antenna cable from the motherboard.

      Ask FixBot

      Add Comment

    8. Nintendo Switch Motherboard Replacement: step 8, image 1 of 2 Nintendo Switch Motherboard Replacement: step 8, image 2 of 2
      • Use the flat end of a spudger to disconnect the black coaxial antenna cable from the motherboard.

      Ask FixBot

      Add Comment

    9. Nintendo Switch Motherboard Replacement: step 9, image 1 of 2 Nintendo Switch Motherboard Replacement: step 9, image 2 of 2
      • Use a spudger to flip up the small gray locking flap on the right Joy-Con rail ZIF connector.

      Ask FixBot

      Add Comment

    10. Nintendo Switch Motherboard Replacement: step 10, image 1 of 2 Nintendo Switch Motherboard Replacement: step 10, image 2 of 2
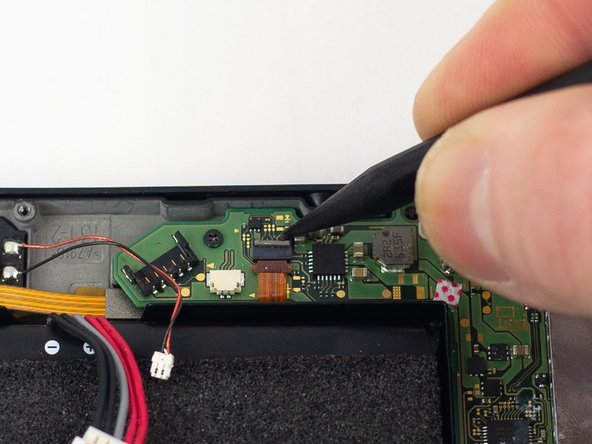
      • Use a spudger to flip up the small black locking flap on the ZIF connector.

      Ask FixBot
      Add Comment

    11. Nintendo Switch Motherboard Replacement: step 11, image 1 of 2 Nintendo Switch Motherboard Replacement: step 11, image 2 of 2
      • Use a spudger to flip up the small gray locking flap on the left Joy-Con rail ZIF connector.

      Ask FixBot

      Add Comment

    12. Nintendo Switch Motherboard Replacement: step 12, image 1 of 1
      • Remove the four 2.50 mm JIS #000 screws from the motherboard.

      • Remove the two 3.14 mm JIS #000 screws from the USB-C port.

      Ask FixBot

      Add Comment

    13. Nintendo Switch Motherboard Replacement: step 13, image 1 of 1
      • Gently lift and wiggle the motherboard to remove.

      Ask FixBot

      Add Comment

Conclusion

To reassemble your device, follow these instructions in reverse order.

Cancel: I did not complete this guide.

Blake Klein

Member since: 01/29/17

75,435 Reputation

50 Guides authored

0 Guide Comments

Add Comment

View Statistics:

Past 24 Hours: 0

Past 7 Days: 3

Past 30 Days: 10

All Time: 166