Nintendo Switch Battery Replacement

Blake Klein and
Last updated on Aug 14, 2025
Views: 215
View statistics:
- Past 24 Hours:
- 3
- Past 7 Days:
- 5
- Past 30 Days:
- 20
- All Time:
- 215
Comments: 0
No one has left comments on this guide. Will you be first?
Go to guide commentsCompleted: 0 1
No one has marked this guide "completed." Will you be the first?
1 person has marked this guide "completed." It's you — great job!
Favorites: 0 1
No one has favorited (and subscribed to) this guide. Will you be the first?
1 person has favorited (and subscribed to) this guide — and that's you!
Archived Guide
This guide is retained solely for historical purposes. Use the updated version of the guide to perform your repair.
Introduction
Go to step 1 ↓Follow this guide to replace the battery in a Nintendo Switch gaming console.
The battery is heavily glued in and will require adhesive remover to make replacement possible.
Before disassembling your device, discharge the battery below 25%. The battery can catch fire and/or explode if accidentally punctured, but the chances of that happening are much lower if discharged.
If your battery is swollen, do not heat your Switch. Use a dropper, or syringe, to inject isopropyl alcohol (90+%) underneath the battery to weaken the adhesive. Swollen batteries can be dangerous, so wear eye protection and exercise due caution if attempting removal yourself. Take it to a professional if you’re not sure how to proceed.
What you need
Fix Kit
This kit contains all the parts and tools needed to complete this guide.

Parts


Tools
-
-
Spudger4.9
-
-
-


Video Overview
-
-
-
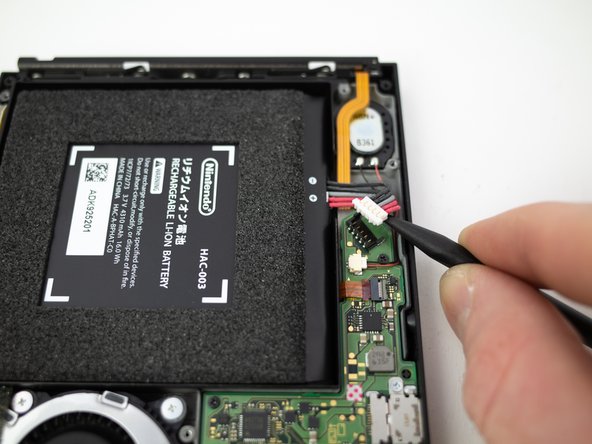
Insert the pointed end of a spudger underneath the white connector and pry upwards to disconnect the battery from the motherboard.
 Ask FixBot
-
-
Tool used on this step:iFixit Adhesive Remover$19.99
-
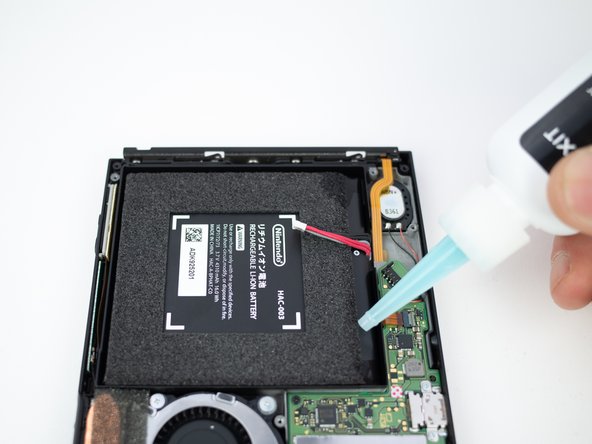
Apply a small amount of adhesive remover or isopropyl alcohol (approximately 1 ml) evenly along one edge of the battery cell.
-
Tilt the switch so the liquid solvent spreads underneath the battery.
-
Wait 2-3 minutes for the solvent to break down the adhesive underneath the battery before you proceed to the next step.
-
-
-
Tool used on this step:Tesa 61395 Tape$8.95
-
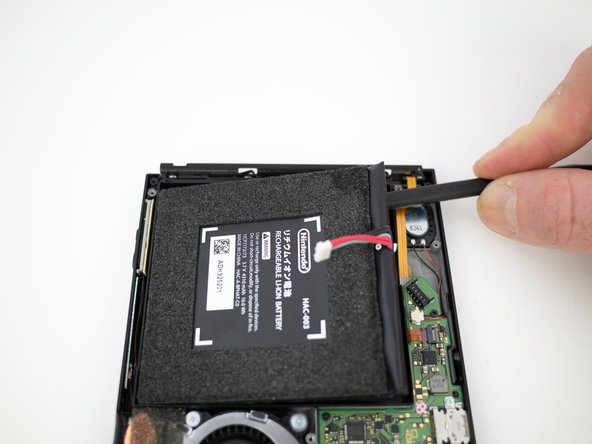
Remove the battery from the Switch console.
-
-







To reassemble your device, follow these instructions in reverse order.