
Nintendo Switch Battery Replacement

Taylor Bledsoe and
Last updated on May 7, 2024
Views: 13K
View statistics:
- Past 24 Hours:
- 2
- Past 7 Days:
- 22
- Past 30 Days:
- 62
- All Time:
- 13,071
Comments: 8
4 comments on steps, 4 guide comments.
Go to guide commentsCompleted: 12 13
12 people have marked this guide "completed." Will you be next?
13 people have marked this guide "completed." Including you — great job!
Favorites: 2 3
2 people have favorited (and subscribed to) this guide. Will you be next?
3 people have favorited (and subscribed to) this guide — including you!
Archived Guide
This guide is retained solely for historical purposes. Use the updated version of the guide to perform your repair.
Community-Contributed Guide
An awesome member of our community made this guide. It was not created by iFixit staff.
Introduction
Go to step 1 ↓Nintendo claims that the battery replacement shouldn't be performed by the user, but it's actually a fairly simple repair.
What you need
Fix Kit
This kit contains all the parts and tools needed to complete this guide.

Parts


Tools
-
-
Phillips #00 Screwdriver4.9
The screws that you use this for are very precise and very tight, make sure your screwdriver is sharp enough
-
Metal Spudger (Long, thin, flat)$2.994.9
This is for prying the battery off, make sure it's the long, thin, metal spudger.
-
iSesamo Opening Tool$10.994.9
Just for assisting in removing the back casing, if you're having trouble using your nails and/or don't want to risk damage to the housing using another tool.
-
-


-
-
-
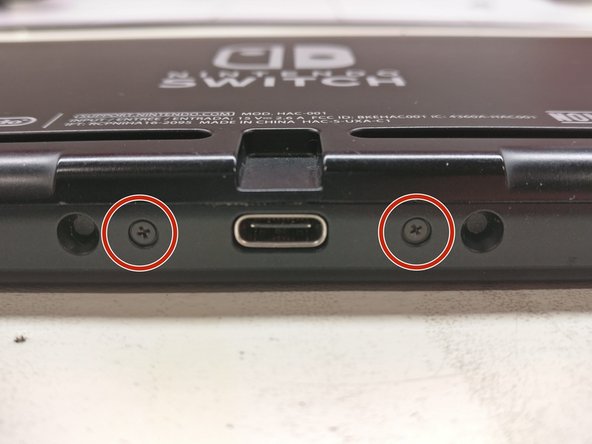
Using the Y1 Screwdriver, remove the four tri-point screws on the back of the device, in the corners; then a single screw on top, and two screws on either side of the charging port.
 Ask FixBot
-
-
-
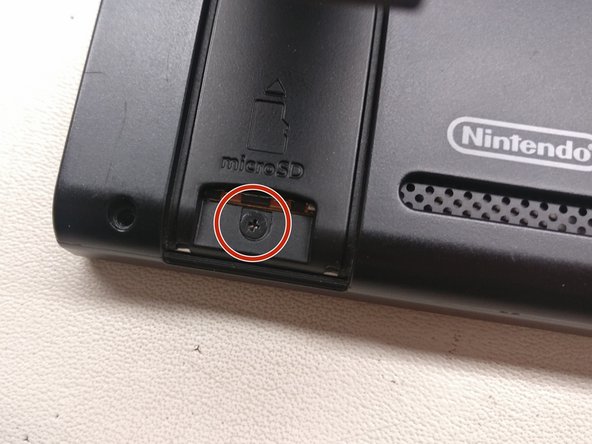
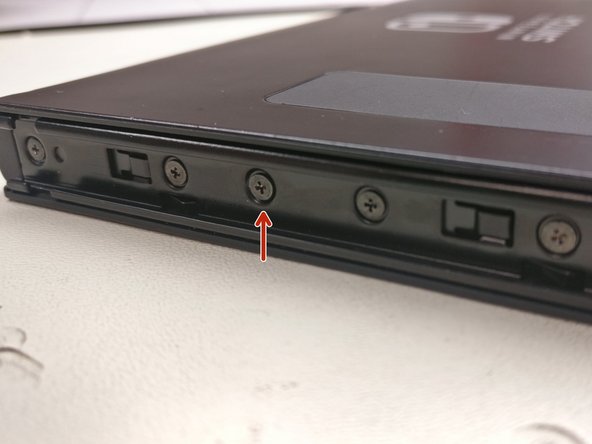
Be sure to lift up the kickstand and remove this sneaky little screw around the SD card slot, and then the center screws on both sides of the device, where the Joycon brackets are screwed in place.
-
-
-
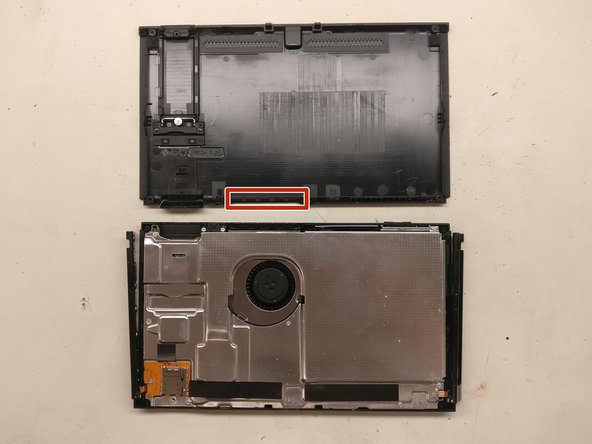
With the myriad of screws removed, you should now be able to pop the back cover off with minimal prying; you might need an iSesamo style spudger to get it started , just make sure you're careful around the fan exhaust, (marked in the photo) there's some tiny clips that you wouldn't want to pull off with too much force.
-
-
-
-
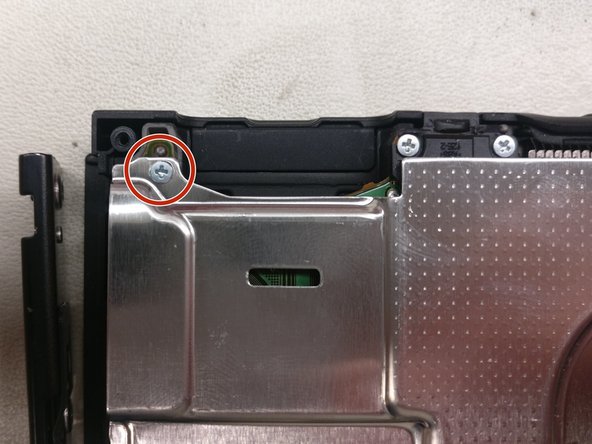
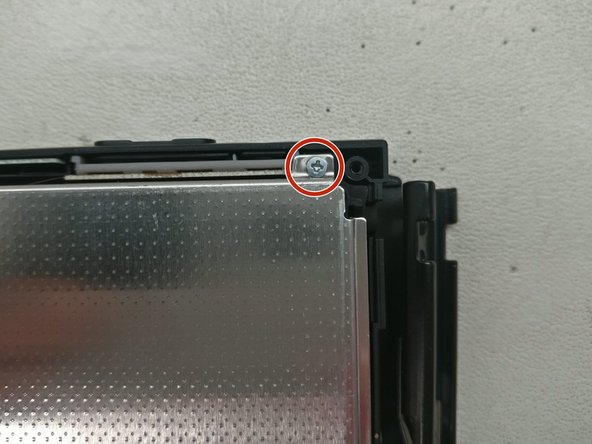
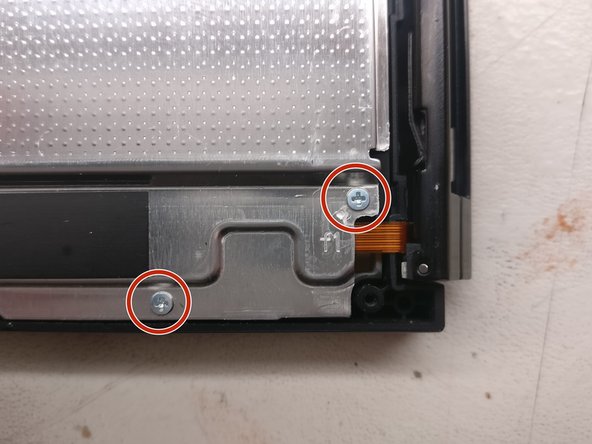
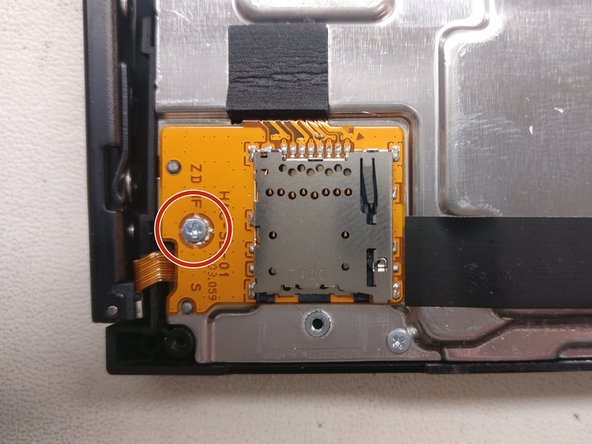
Remove the circled screws on the back of the metal plate, as indicated by the photos, but don't attempt to pull it off yet.
-
-
Tool used on this step:Tweezers$4.99
-
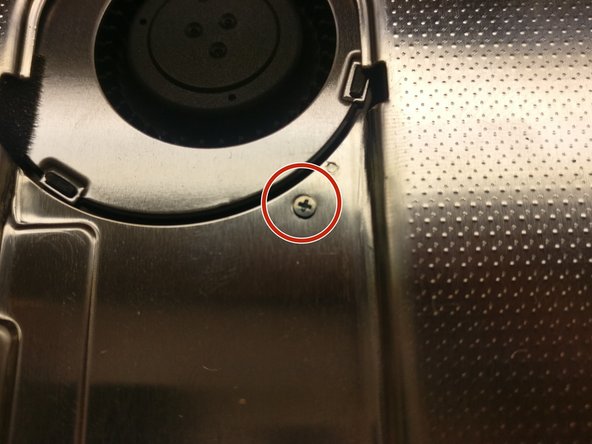
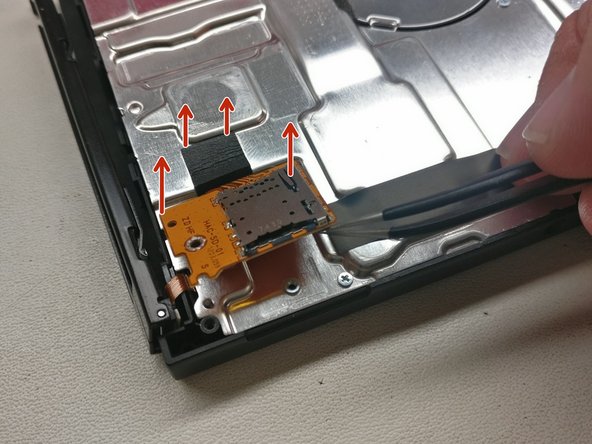
Take out the center screw, near the blower fan, and the screw in the small SD card reader assembly. Then using tweezers or a spudger, carefully remove the SD card reader and detach the flex cable from the board; you can do this by carefully sliding a spudger under the area covered by the foam and gently prying up. it comes off fairly easily.
-
-
-
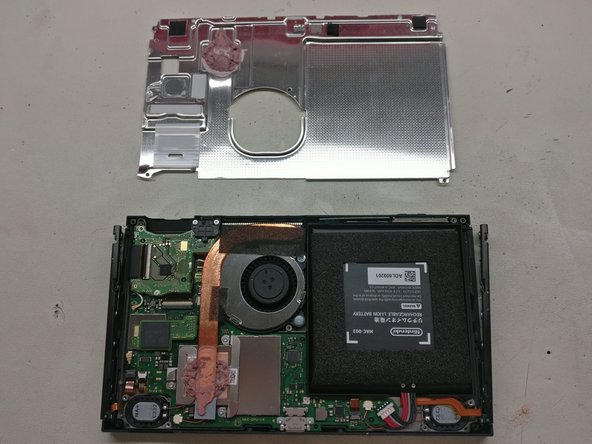
You can now gently pull the metal plate off and set it aside, revealing the tightly designed internals of the switch, along with your battery.
-
-
-
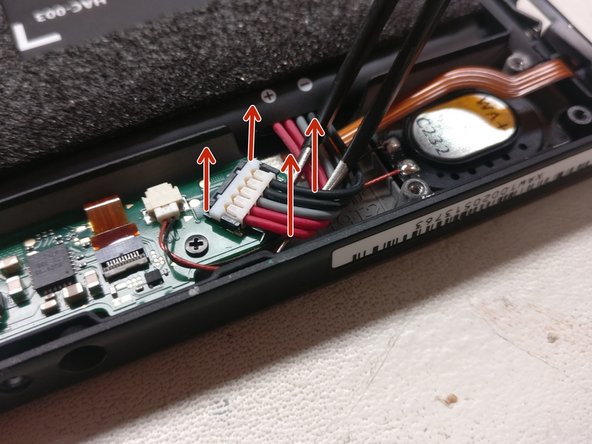
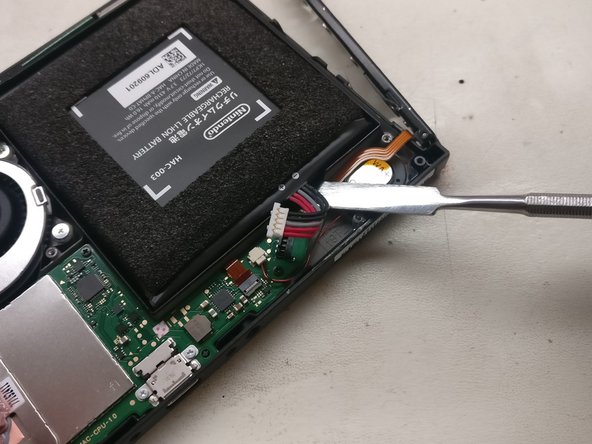
To remove the battery, take some tweezers or a spudger and carefully pop the connector off vertically; it looks like it might come out perpendicular to the board, but it comes straight off with some gentle prying from underneath.
-
-
-
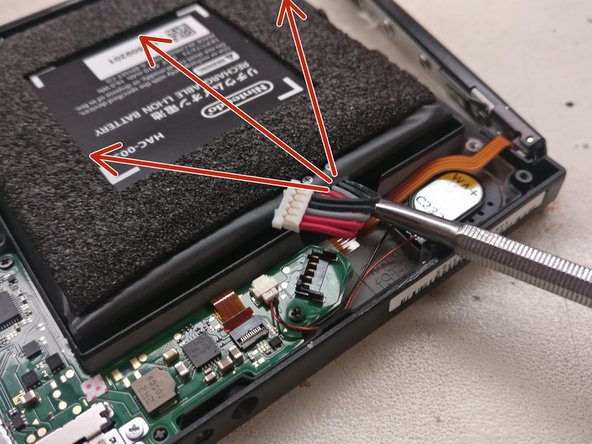
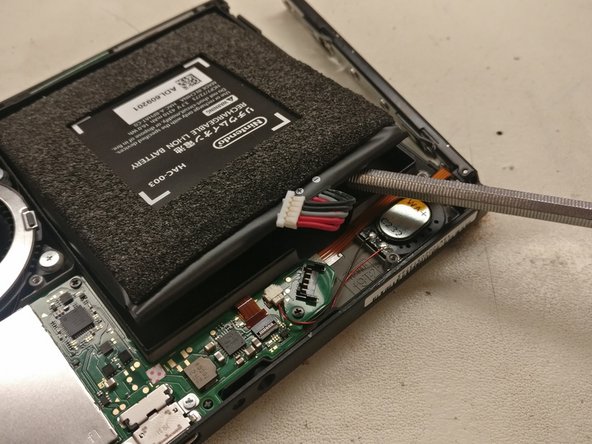
Now finally, use the long flat tipped spudger and use it to carefully separate the battery's adhesive by going in at a low angle in several different directions, I found that going in towards one side, then the other, then down the middle worked well. don't stick it underneath and pry upwards, just separate the adhesive and it comes right out.
-
-













To reassemble your device, follow these instructions in reverse order.
Cancel: I did not complete this guide.
12 other people completed this guide.

4 Guide Comments
There is no need to remove all the screws on the joy con bracket.Only the 3rd one down from the top is securing the rear clamshell on both sides.
To get the 4 screws out of the back cover, I had to use a Y0 tri-point screwdriver instead of a Y1.
I need the black piece that snaps the white battery plug onto the motherboard as I accidentally damaged it while trying to remove the adhesive. What is it called and where can I get it? Now the black piece has 4 contacts instead 5 so one of the Ground wires isn’t connected. The Switch still powers up but I’m worried that it could cause issues later or charging issues.
