Introduction
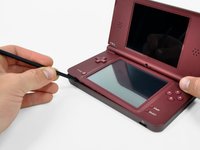
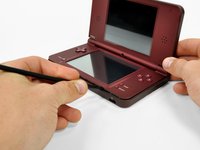
See the action on your DSi XL with a new lower LCD screen.
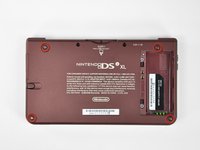
What you need
-
-
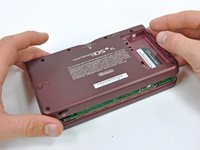
Remove the two Phillips screws securing the battery cover to the back of the handheld console.
-
Lift the battery cover off the back of the DSi XL.
-
-
-
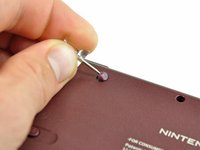
Remove the four rubber screw covers on the lower case by prying them up with a push pin.
-
-
-
-
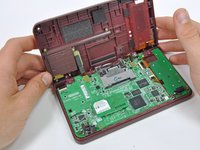
With the console still upside-down, open the DSi XL slightly.
-
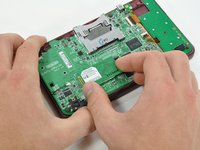
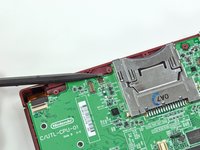
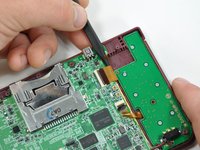
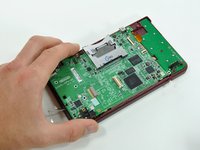
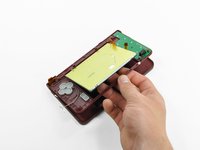
Push the lower display away from the upper case.
-
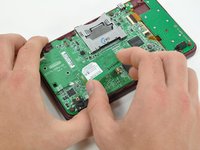
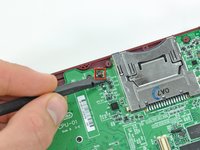
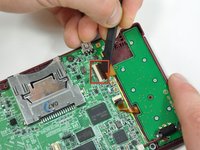
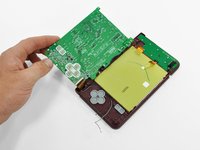
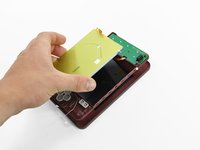
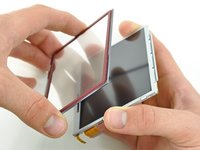
Remove the lower display from the DSi XL.
-
-
-
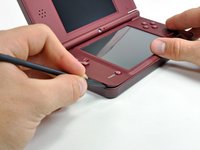
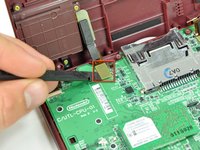
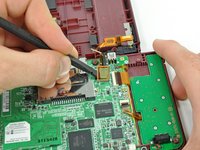
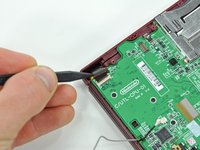
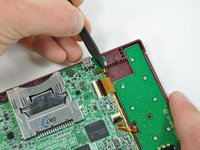
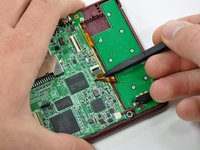
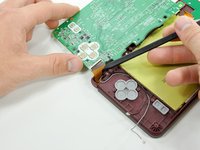
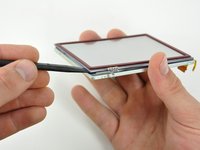
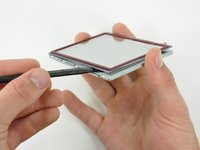
Insert a spudger between the touchscreen and top right corner of the display.
-
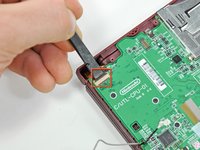
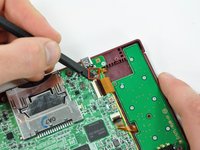
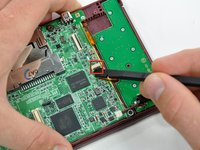
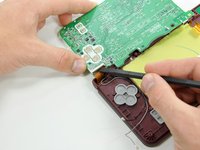
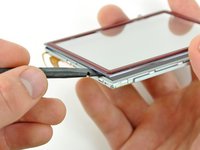
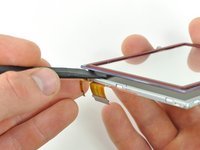
Slide the spudger down the right side of the display to free the edge of the touchscreen.
-


To reassemble your device, follow these instructions in reverse order.
Cancel: I did not complete this guide.
15 other people completed this guide.

3 Guide Comments
DSI XL Lower LCD ZIF Socket replacement - Please help!!
Hi All, I have a DSi XL which i am trying to rescue from someone who has done a bad job of attempting a repair! It has been taken apart, although the guy didn't know how ZIF sockets work and has broken two of them. The 37 pin Lower LCD ZIF socket, and the 15 pin power board ZIF socket. I am experienced electronic engineer and and hand soldered SMD components before so i think i can replace these and get this DSi working again. My only problem is, i cannot find any reference to exactly what these sockets are or where to buy some! Can anyone offer any information about these sockets at all? I really want to get hold of some and get this back in action. Any help locatin the correct parts would be very very welcomed.
Many thanks in advance all
Matt Stroud
Great set of instructions - Thanks
Replaced the lower screen for the first time with no problems
Thanks
Hello and thanks for sharing.
I have two units of this model.
The first one sunk in water and I’m not sure it can be fixed (can it?)
The other one’s lower screen got a slight crack when it was hit by the kids using it with the device pen, and the touch response has been limited since. I was wondering if I can take out only the touch layer of the sunken device’s screen and install it on the new one.
Thanks.