
Nintendo DS Bottom LCD Screen Replacement

dnguye26 and 8 other contributors
Last updated on Feb 4, 2025
Views: 54K
View statistics:
- Past 24 Hours:
- 25
- Past 7 Days:
- 147
- Past 30 Days:
- 621
- All Time:
- 54,164
Comments: 16
14 comments on steps, 2 guide comments.
Go to guide commentsCompleted: 25 26
25 people have marked this guide "completed." Will you be next?
26 people have marked this guide "completed." Including you — great job!
Favorites: 19 20
19 people have favorited (and subscribed to) this guide. Will you be next?
20 people have favorited (and subscribed to) this guide — including you!
Introduction
Go to step 1 ↓After removing the circuit board, the bottom LCD screen can easily be removed from the Nintendo DS.
What you need


-
-
-
Remove the cartridge from the console.
-
Use a Phillips #00 Screwdriver to remove the screw securing the battery door to the rear case.
-
Remove the battery door.
 Ask FixBot
-
-
-
Use a plastic opening tool or spudger to pry out the battery from the bottom. If a plastic opening tool or spudger isn't available, your fingernails may work.
-
-
-
-
-
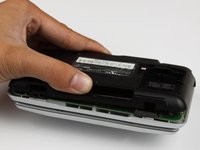
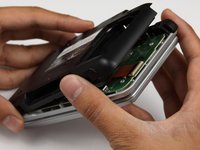
With your hands, pry the back panel off the main case.
-
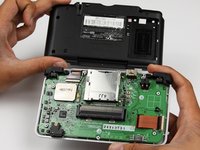
Separate the back from the front, and set it aside.
-
-
-
-
Using a Phillips #00 screwdriver, remove the four screws on the circuit board.
-
-
-
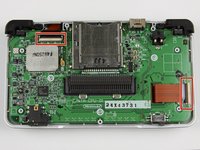
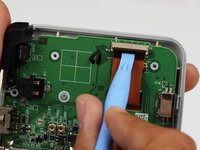
Unlock the two large ribbon cables by moving the black clip up.
-
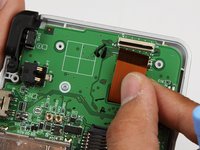
Carefully pull the ribbon cables down and out with your fingers.
-
-
Tool used on this step:Tweezers$4.99
-
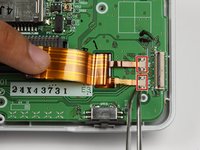
Locate the two small ribbon cables, beneath the rightmost large ribbon cable.
-
Slide the locks for the small ribbon cables down to the side, and remove the cables.
-
-
-
-
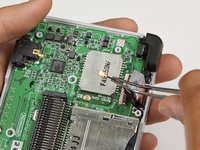
Locate the Wifi antenna pigtail connector.
-
Remove the antenna by grasping it at the head with tweezers. Using a slight rocking motion, pull up to dislodge the connector.
-
-
-
Feed the ribbon cables through the opening on the board.
-
Pull up and remove the circuit board, and set it aside.
-
-
-
-
-
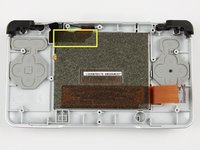
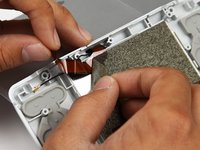
Peel off the black cushion foam on the bottom touch screen to expose the ribbon cable.
-
Gently lift the screen out of the base.
-
-










To reassemble your device, follow these instructions in reverse order.
Cancel: I did not complete this guide.
25 other people completed this guide.

Team

Cal Poly, Team 18-3, Maness Fall 2009 Member of Cal Poly, Team 18-3, Maness Fall 2009
CPSU-MANESS-F09S18G3
4 Members
60 Guides authored
2 Guide Comments
I like it but add a step 12 maybe, to see how to put in a new screen.
Why was this unfinished guide published?
Or was it just mistitled?
"How to 'almost' remove the lower screen"
