Introduction
So you managed to break your circle pad and can't play your favorite games? Don't fear, the circle pad can be replaced!
What you need
-
-
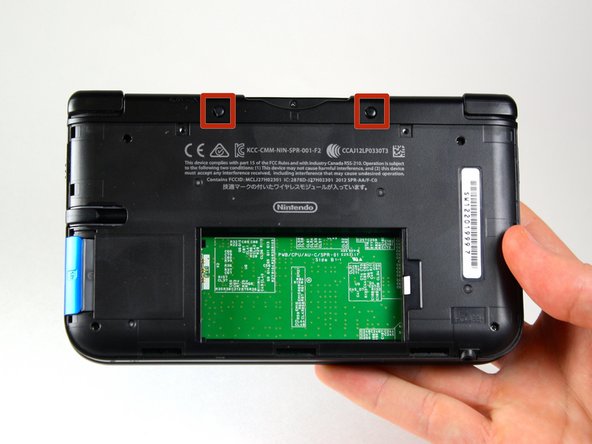
Loosen the two #0 Phillips 4.2 mm-length screws located at the top of the back cover.
-
-
-
Hold the device so that the cover is facing up.
-
Using a plastic opening tool, pry off the cover starting at the top right corner.
-
Hold the edge of the cover to ensure it does not reattach.
-
Look for the small section below the stylus compartment. Pry off the cover at that point if it is still attached.
-
Take off the cover of the device and set it aside.
-
-
-
Insert the plastic opening tool into the opening located on the right side of the battery.
-
Pry off the battery from the lower casing.
-
Lift the battery out of the case and set aside.
-
-
-
Using tweezers pull out the rubber bumpers that are located at the top of the device on either side of the game cartridge compartment.
-
-
-
-
Remove the 2.3 mm screw located above the game cartridge slot with a Phillips #00 screwdriver.
-
-
-
Make sure the SD card has been removed. With a plastic opening tool pry off the lower case starting at the bottom edge and working around the perimeter.
-
Two ribbon cables connect the case to the circuit board. Be careful to not pull the case too hard and rip the ribbon cables.
-
-
-
Remove the ribbon cables located underneath the left and right bumpers by prying up the base of the cables with a plastic opening tool.
-
Completely remove the lower case from the rest of the device and set aside.
-
-
-
Position the device such that the game cartridge slot is located at the top.
-
Locate the circle pad on the right side of the device.
-
Remove the two 7.5 mm screws on the upper left and the bottom right corners.
-
-
-
Using a plastic opening tool pop off the circle pad joystick.
-
Do not use excessive force with the plastic opening tool. There is a ribbon attaching the circle pad joystick to the motherboard that will remain attached.
-
-
-
Using the flat head side of the spudger carefully lift up the retaining flap that attaches the circle pad ribbon to the motherboard.
-
Remove the ribbon and circle pad joystick.
-


Team

Cal Poly, Team 9-13, Regan Spring 2014 Member of Cal Poly, Team 9-13, Regan Spring 2014
CPSU-REGAN-S14S9G13
5 Members
44 Guides authored