Introduction
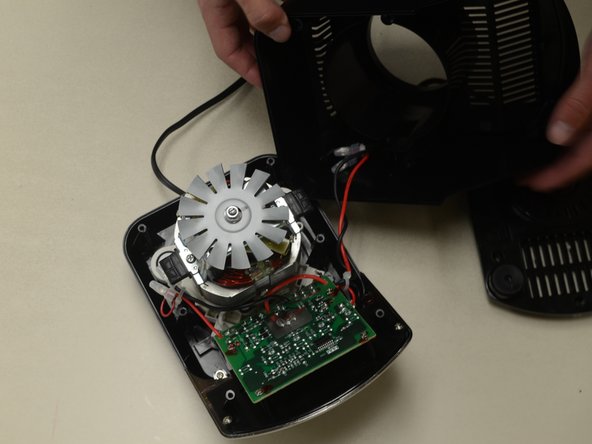
This guide will show how to replace the circuit board in your Ninja Professional Blender, in the event that it stops working. The removal process requires the removal of four screws and the desolder of five components.
What you need
-
-
Remove the five screws (13mm long, 6mm head diameter) using a Phillips #2 screwdriver.
-
-
-
-
Remove these four screws (10mm long, 5mm head diameter) using a Phillips #2 screwdriver.
-
-
-
Using a pair of scissors or wire cutters, cut the zip tie holding these wires.
-
This will give the circuit board more range of motion.
-
-
-
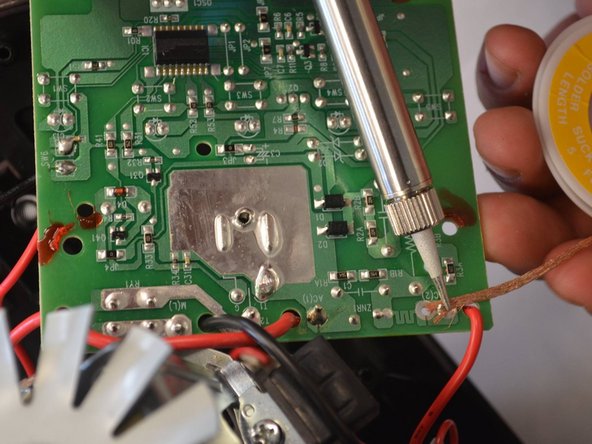
After the wires have cooled enough to touch, carefully slide the circuit board free of the wires.
-
NOTE: keep track of which pad each wire was soldered to. This is important for your blender to function.
-


To reassemble your device, follow these instructions in reverse order, but solder the wires back to the board.
To reassemble your device, follow these instructions in reverse order, but solder the wires back to the board.
Cancel: I did not complete this guide.
2 other people completed this guide.
Team

Cal Poly, Team 24-2, Lancaster Spring 2015 Member of Cal Poly, Team 24-2, Lancaster Spring 2015
CPSU-LANCASTER-S15S24G2
4 Members
6 Guides authored
4 Comments
Where can I buy de circuito board?
Where can i buy the circuit board ?