
Nikon Coolpix S4000 Screen Replacement

What you need

  1. Nikon Coolpix S4000 Screen  Replacement, Battery: step 1, image 1 of 1
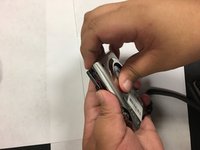
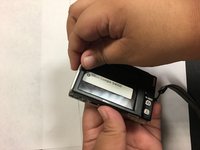
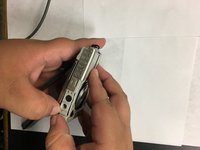
    • Slide the battery door open with a finger or thumb and release it so the door opens.

  2. Nikon Coolpix S4000 Screen  Replacement: step 2, image 1 of 1
    • Push the orange tab back and the battery will pop out.

  3. Nikon Coolpix S4000 Screen  Replacement, Casing: step 3, image 1 of 3 Nikon Coolpix S4000 Screen  Replacement, Casing: step 3, image 2 of 3 Nikon Coolpix S4000 Screen  Replacement, Casing: step 3, image 3 of 3
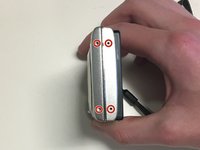
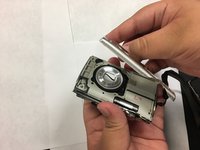
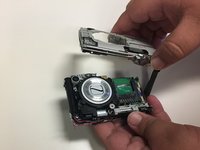
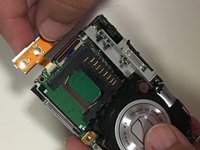
    • Remove four 2mm Phillips #000 screws.

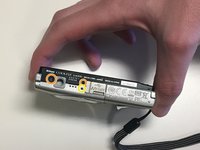
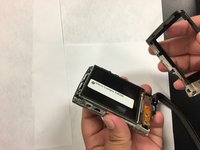
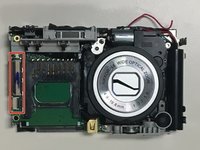
    • Remove two black 3mm Phillips #000 screws.

    • Remove one 4mm Phillips #000 screws.

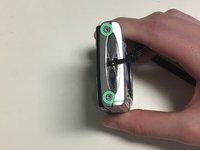
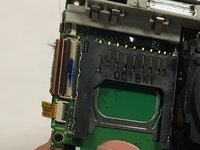
    • Remove two silver 3mm Phillips #000 screws.

  4. Nikon Coolpix S4000 Screen  Replacement: step 4, image 1 of 2 Nikon Coolpix S4000 Screen  Replacement: step 4, image 2 of 2
    • Use your fingers, or a spudger, to lift up one end of the casing and then pry the two pieces apart.

  5. Nikon Coolpix S4000 Screen  Replacement: step 5, image 1 of 3 Nikon Coolpix S4000 Screen  Replacement: step 5, image 2 of 3 Nikon Coolpix S4000 Screen  Replacement: step 5, image 3 of 3
    • Turn the camera over.

    • Use your fingers, or spudger, to lift one end of the back casing and pry it apart from back of the camera.

  6. Nikon Coolpix S4000 Screen  Replacement, Lens Casing: step 6, image 1 of 1
    • Remove the single 3mm Phillips #000 screw from the back of the camera.

  7. Nikon Coolpix S4000 Screen  Replacement: step 7, image 1 of 2 Nikon Coolpix S4000 Screen  Replacement: step 7, image 2 of 2
    • Turn the camera over and pry the lens casing off by slipping your fingers, or spudger, under the lip of the casing.

    • Desolder the two wires connecting the casing to the motherboard.

    • Work carefully so that you do not break the soldered wires.

  8. Nikon Coolpix S4000 Screen  Replacement, Screen: step 8, image 1 of 1
    • Remove the single 2mm Phillips #000 screw.

  9. Nikon Coolpix S4000 Screen  Replacement: step 9, image 1 of 3 Nikon Coolpix S4000 Screen  Replacement: step 9, image 2 of 3 Nikon Coolpix S4000 Screen  Replacement: step 9, image 3 of 3
    • Use the flat end of a spudger to lift up the black tabs on the ZIF connectors.

    • Pull the ribbon cables out of the ZIF connectors.

  10. Nikon Coolpix S4000 Screen  Replacement: step 10, image 1 of 2 Nikon Coolpix S4000 Screen  Replacement: step 10, image 2 of 2
    • Grabbing the top left corner of the screen, pull it up until the screen comes completely off.

Conclusion

To reassemble your device, follow these instructions in reverse order.

0 Comments

Add Comment

View Statistics:

Past 24 Hours: 1

Past 7 Days: 1

Past 30 Days: 5

All Time: 267