Introduction
This guide walks through removing the Nike+ Sportbands outer shell, screen assembly, motherboard, and finally the battery. The repair requires careful prying with small tools and working around fragile soldered connections.
What you need
-
-
Begin by removing the Nike+ Sport-band. This gives you access to the plastic housing so you can begin disassembly.
 Ask FixBot
-
-
-
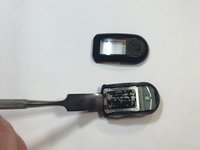
Finish the disassembly of your NikePlus Sportband by utilizing the metal spudger tool on the short edge to pry the external body pieces apart.
-
-
-
After the cover had been removed, use the metal spudger tool to remove the body of the device from the casing.
-
-
Tool used on this step:Tweezers$4.99
-
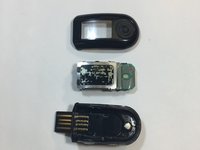
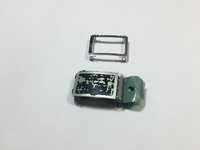
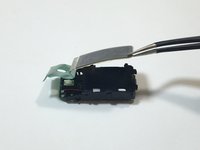
Use the metal tweezers to pry the screen casing from the body of the device.
-
The screen casing is fastened to the body of the device by four clips located in each corner of the casing. Make sure not to bend them.
-
-
-
-
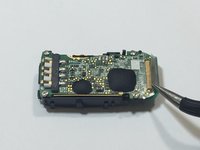
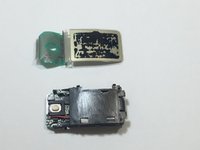
Flip the body of the device over so that the screen is now on the bottom.
-
The display ribbon cable is soldered to the motherboard. We were able to peel up the ribbon cable with a pair of tweezers.
-
-
-
Flip the body of the device back over so that the screen is facing up.
-
Using the tweezers, gently lift the screen from body of the device.
-
-
-
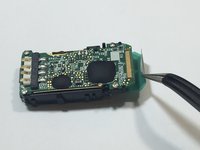
Remove the four highlighted screws from the motherboard using the Philips screwdriver.
-
-
Tool used on this step:Tweezers$4.99
-
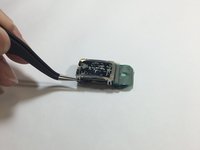
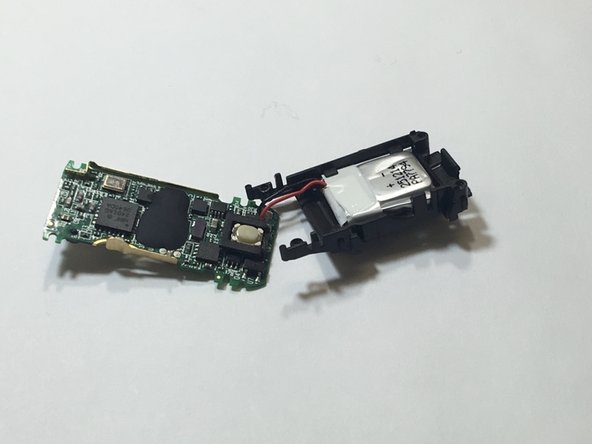
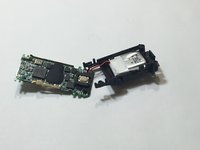
Use the metal tweezers to lift the motherboard out of the device.
-
-
-
Continue lifting the motherboard until the battery and its wires are visible. Tweezers can help lift the board enough to expose the battery area.
-
-
-
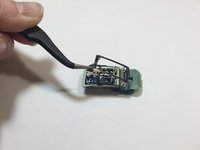
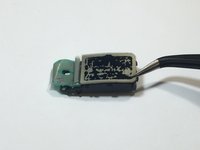
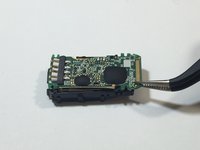
Gently lay the motherboard upside down exposing the underside of the motherboard.
-
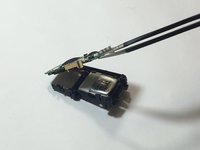
The red and black battery wires may need to be desoldered from the board. Check out the How To Solder and Desolder Connections guide for some helpful tips on this.
-
Using the flat edge of a spudger separate the battery from the body of the band.
-
Then replace it with a new battery, which you can get on Amazon (3.7v Li-Pro small battery 50mah).
-


To reassemble your device, follow these instructions in reverse order.
Cancel: I did not complete this guide.
One other person completed this guide.
Team

IUPUI, Team 9-9, Wilson Spring 2016 Member of IUPUI, Team 9-9, Wilson Spring 2016
IUPUI-WILSON-S16S9G9
5 Members
4 Guides authored