Nest x Yale Lock Speaker Replacement

What you need

  1. Nest x Yale Lock Speaker Replacement, Speaker: step 1, image 1 of 3 Nest x Yale Lock Speaker Replacement, Speaker: step 1, image 2 of 3 Nest x Yale Lock Speaker Replacement, Speaker: step 1, image 3 of 3
    • Get the lock device and turn it around.

    • Take out the black cover by removing the screws as shown in picture #1 and pull it out gently just so.

    • All 3 screws are 0.25 inches high and are phillip screws.

    • Doing so gains access to the motherboard as shown in picture #3.

  2. Nest x Yale Lock Speaker Replacement: step 2, image 1 of 2 Nest x Yale Lock Speaker Replacement: step 2, image 2 of 2
    • On the white connector in picture #1, push down using a pointed tip object and then remove the connection using tweezers.

    • For the wider connection in picture #2, lift up the black switch and remove the connection using tweezers.

  3. Nest x Yale Lock Speaker Replacement: step 3, image 1 of 2 Nest x Yale Lock Speaker Replacement: step 3, image 2 of 2
    • Take out the motherboard by unscrewing the screws holding it shown in picture #1.

    • The screws are phillips and are 0.25 inches.

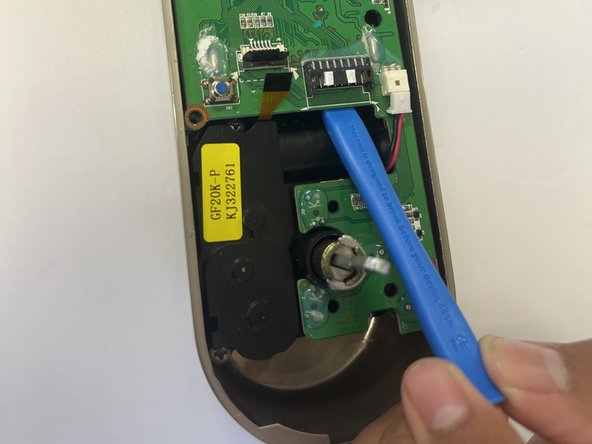
    • After removing the screw on the motherboard, pry the motherboard out using a prying tool shown in picture #2.

  4. Nest x Yale Lock Speaker Replacement: step 4, image 1 of 1
    • The small black part on the down right side of the motherboard is the audio.

Conclusion

To reassemble your device, follow these instructions in reverse order.

Christopher Gonzalez

Member since: 09/26/22

313 Reputation

3 Guides authored

Team

0 Comments

Add Comment

View Statistics:

Past 24 Hours: 0

Past 7 Days: 1

Past 30 Days: 13

All Time: 252