
Nabi 2 Back Cover Removal

Amy and
Last updated on May 10, 2016
Views: 315
View statistics:
- Past 24 Hours:
- 0
- Past 7 Days:
- 1
- Past 30 Days:
- 7
- All Time:
- 315
Comments: 0
No one has left comments on this guide. Will you be first?
Go to guide commentsCompleted: 1 2
1 person has marked this guide "completed." Will you be next?
2 people have marked this guide "completed." Including you — great job!
Favorites: 0 1
No one has favorited (and subscribed to) this guide. Will you be the first?
1 person has favorited (and subscribed to) this guide — and that's you!
Prerequisite Only
This is a prerequisite-only guide! This guide is part of another procedure and isn’t meant to be used alone.
Action Shots
Be an action hero! This guide needs images that better demonstrate how to perform specific actions.
Introduction
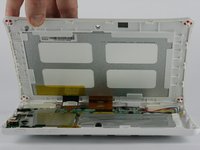
Go to step 1 ↓This guide shows how to safely remove the back of the of the Nabi 2. This repair guide is the starting point to replace or repair the internal components of the tablet. There are two important things to keep in mind when following this guide. First, when prying apart the plastic clips to separate the front and the back of the device, do so carefully and slowly to ensure that the clips do not break. Secondly, once the clips are removed, carefully separate the halves so that you do not damage the display cables.
What you need
Tools


-
-
-
-
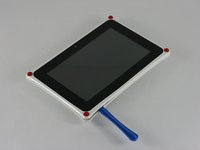
With a PH00 screwdriver, remove the four outermost screws from the back of the tablet.
-
-
-
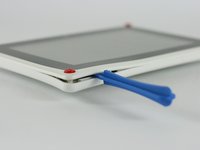
Carefully, insert a plastic opening tool into the seam of the device and begin gently prying the two plastic pieces apart.
-
Work the tool all the way around the device. Small plastic clips should release. If they do not, gently apply outwards pressure until the clips give.
-


 Ask FixBot


To reassemble your device, follow these instructions in reverse order.
Cancel: I did not complete this guide.
One other person completed this guide.

Team

USF Tampa, Team 4-3, Lacy Spring 2016 Member of USF Tampa, Team 4-3, Lacy Spring 2016
USFT-LACY-S16S4G3
4 Members
84 Guides authored
