
Free Shipping on Domestic Orders $75+

NEC Turbo Express Disassembly

What you need

  1. NEC Turbo Express Disassembly, Separate front/rear shells: step 1, image 1 of 3 NEC Turbo Express Disassembly, Separate front/rear shells: step 1, image 2 of 3 NEC Turbo Express Disassembly, Separate front/rear shells: step 1, image 3 of 3
    • Remove battery cover

    • Remove 6 PH0 screws

    • Do not attempt to separate the two halves

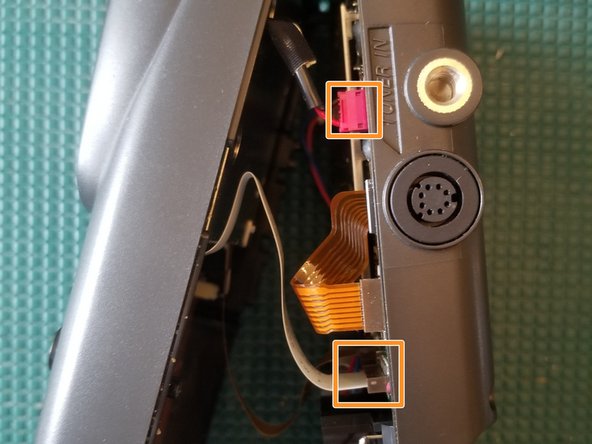
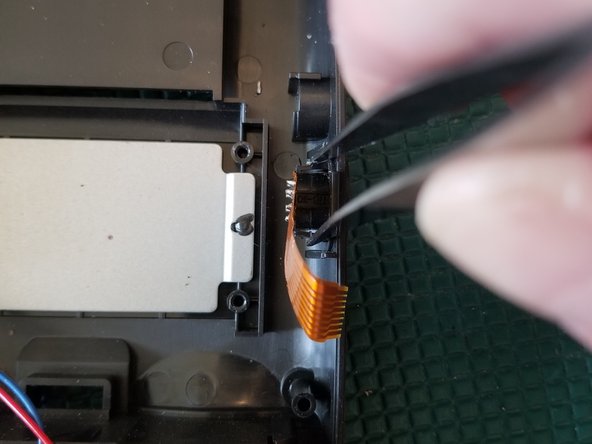
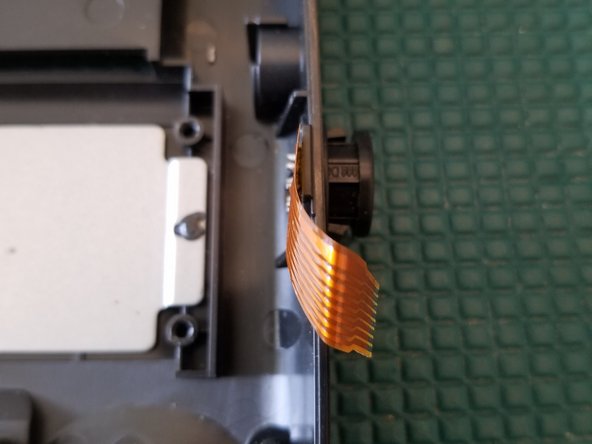
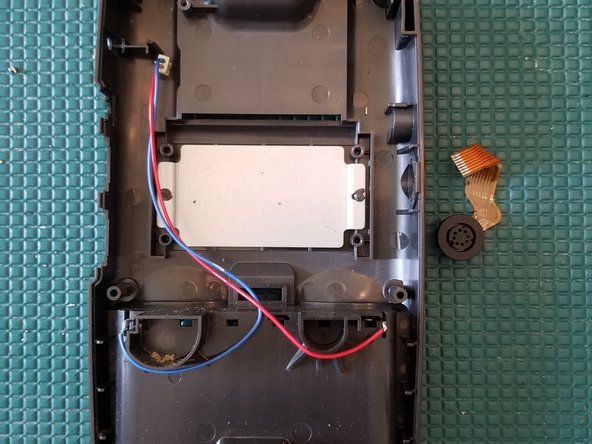
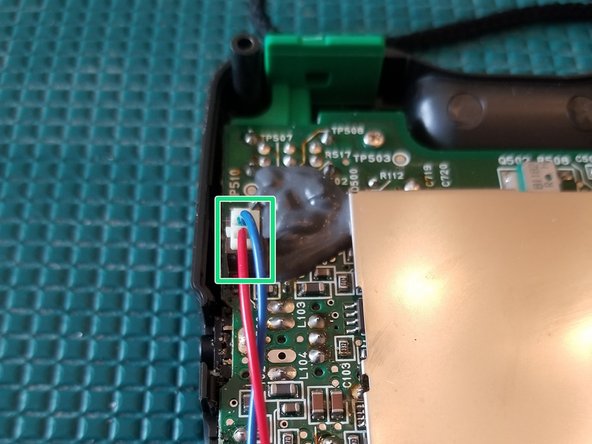
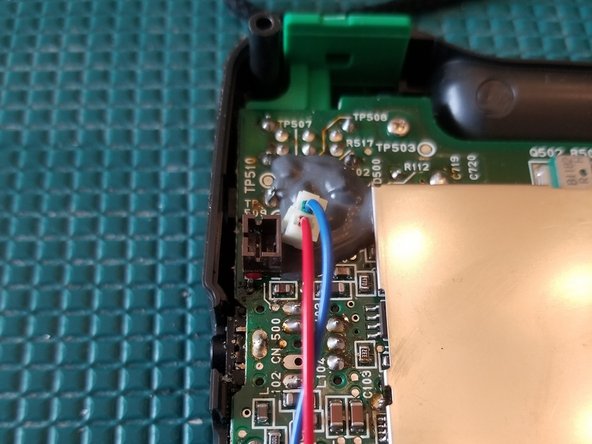
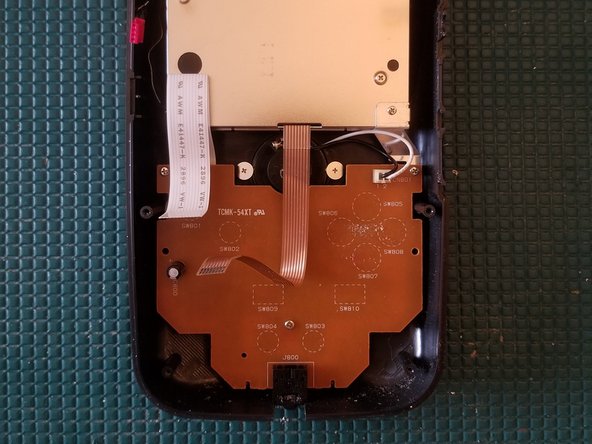
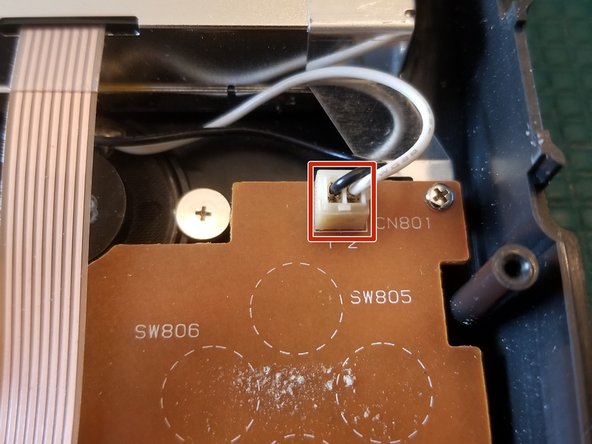
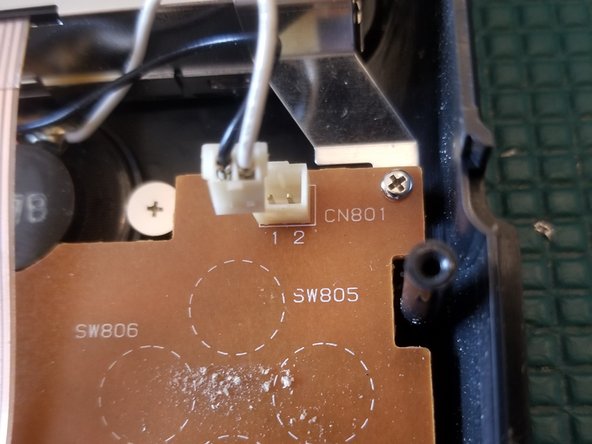
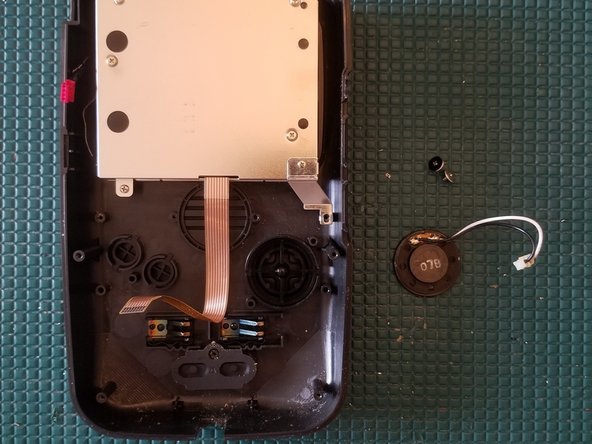
    • Disconnect the 2 FFC ribbon cables and wire connector

    • There's another ribbon cable, not shown in photo, next to the white one

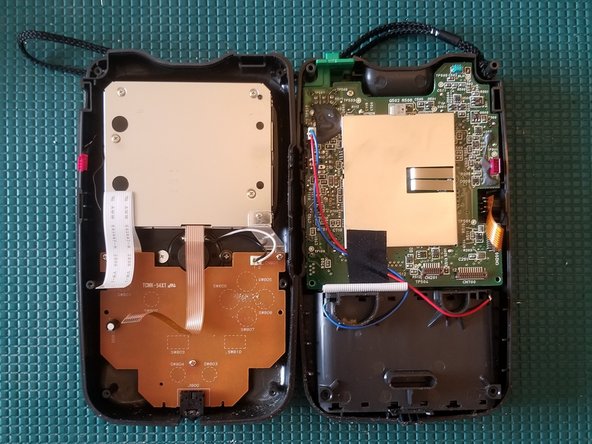
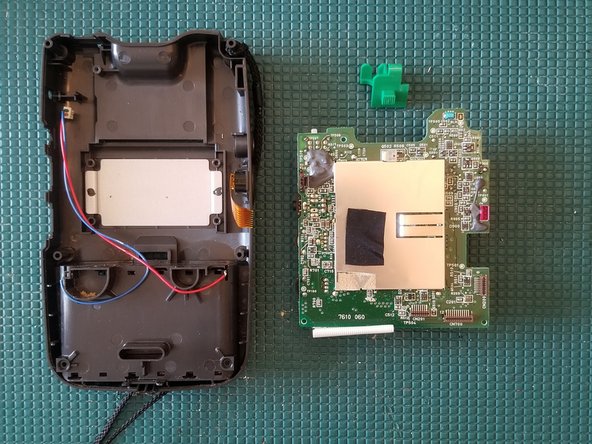
    • You can now separate the two halves

    Ask FixBot

    Add Comment

  2. NEC Turbo Express Disassembly, Disconnect TV tuner FFC cable: step 2, image 1 of 3 NEC Turbo Express Disassembly, Disconnect TV tuner FFC cable: step 2, image 2 of 3 NEC Turbo Express Disassembly, Disconnect TV tuner FFC cable: step 2, image 3 of 3
    • Disconnect FFC ribbon cable

    Ask FixBot

    Add Comment

  3. NEC Turbo Express Disassembly, Remove TV Tuner Port: step 3, image 1 of 3 NEC Turbo Express Disassembly, Remove TV Tuner Port: step 3, image 2 of 3 NEC Turbo Express Disassembly, Remove TV Tuner Port: step 3, image 3 of 3
    Tool used on this step:
    Tweezers
    $4.99
    Buy
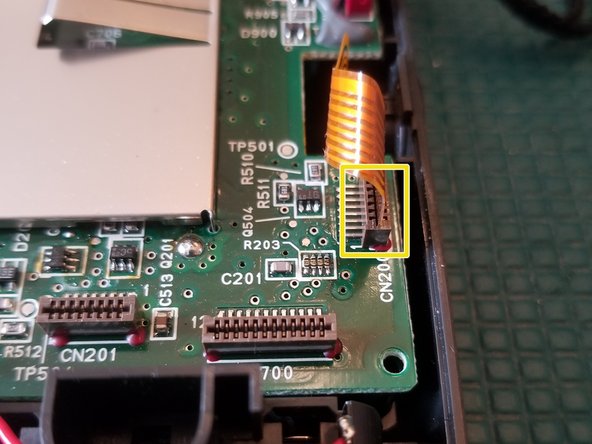
    • With a pair of tweezers, pinch the retaining tabs inward and push through the shell
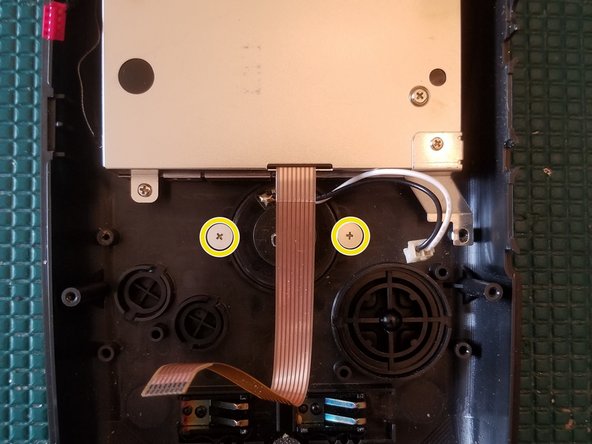
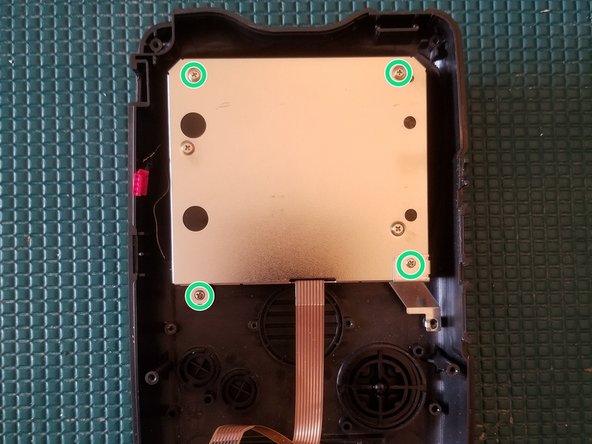
    • This can be done with the rear motherboard still in place.

    Ask FixBot

    Add Comment

  4. NEC Turbo Express Disassembly, Disconnect battery cable: step 4, image 1 of 2 NEC Turbo Express Disassembly, Disconnect battery cable: step 4, image 2 of 2
    • Disconnect cable

    Ask FixBot

    Add Comment

  5. NEC Turbo Express Disassembly, Disconnect battery cable: step 5, image 1 of 2 NEC Turbo Express Disassembly, Disconnect battery cable: step 5, image 2 of 2
    • Remove tape

    • Keep it close to reuse during reassembly

    Ask FixBot

    Add Comment

  6. NEC Turbo Express Disassembly, Remove rear PCB: step 6, image 1 of 3 NEC Turbo Express Disassembly, Remove rear PCB: step 6, image 2 of 3 NEC Turbo Express Disassembly, Remove rear PCB: step 6, image 3 of 3
    • Remove PH0 screw

    • Gently lift the PCB up
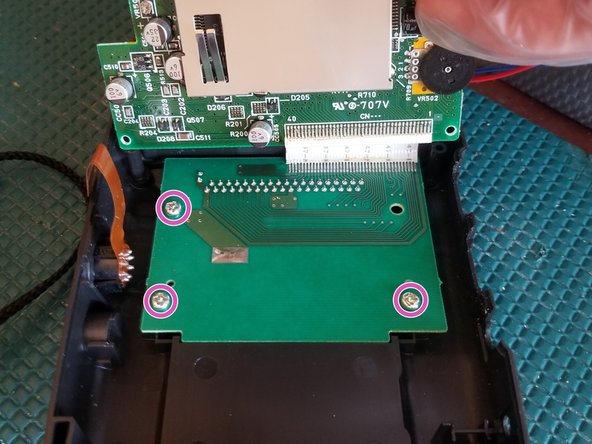
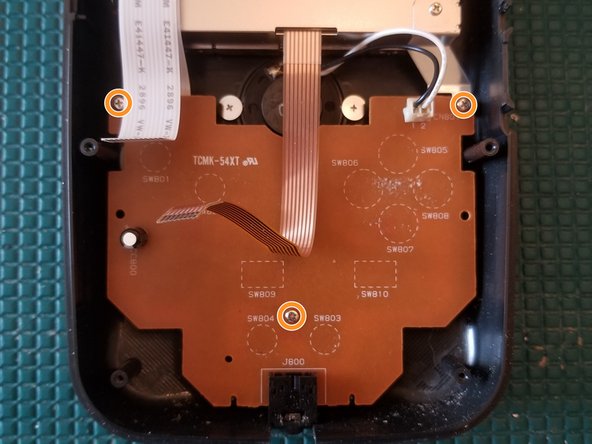
    • Remove 3 PH2 screws

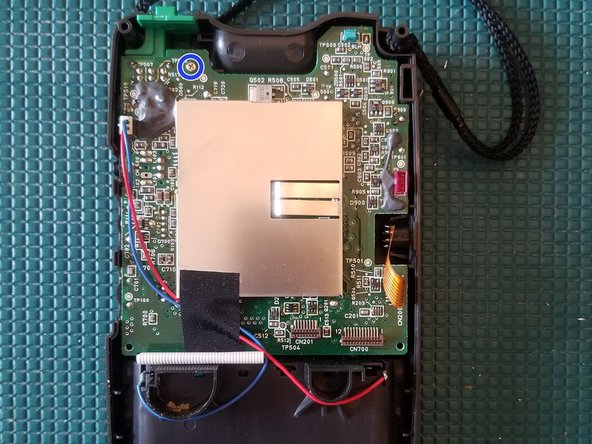
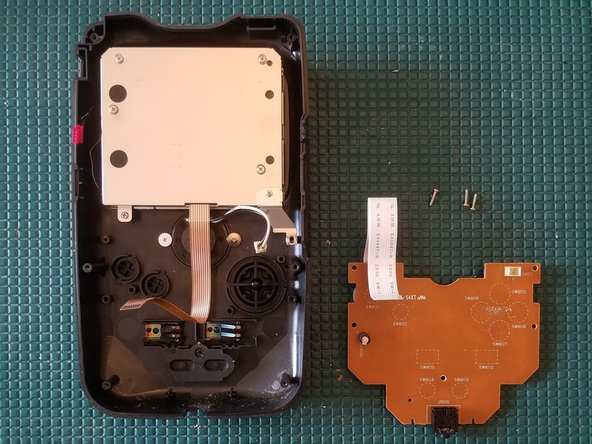
    • You can now remove the entire rear PCB

    Ask FixBot

    Add Comment

  7. NEC Turbo Express Disassembly, Disconnect speaker: step 7, image 1 of 3 NEC Turbo Express Disassembly, Disconnect speaker: step 7, image 2 of 3 NEC Turbo Express Disassembly, Disconnect speaker: step 7, image 3 of 3
    • Disconnect wire plug

    Ask FixBot

    Add Comment

  8. NEC Turbo Express Disassembly, Remove front PCB: step 8, image 1 of 2 NEC Turbo Express Disassembly, Remove front PCB: step 8, image 2 of 2
    • Remove 3 PH0 screws

    • You can now remove the front PCB

    Ask FixBot

    Add Comment

  9. NEC Turbo Express Disassembly, Remove speaker: step 9, image 1 of 2 NEC Turbo Express Disassembly, Remove speaker: step 9, image 2 of 2
    • Remove 2 PH0 screws

    • You can now remove the speaker

    Ask FixBot

    Add Comment

  10. NEC Turbo Express Disassembly, Remove screen: step 10, image 1 of 1
    • Remove 4 PH0 screws

    • You can now remove the screen

    Ask FixBot

    Add Comment

Conclusion

To reassemble your device, follow these instructions in reverse order.

Cancel: I did not complete this guide.

One other person completed this guide.

Navy Vet 2015

Member since: 06/25/15

8,177 Reputation

15 Guides authored

1 Guide Comment

Could you tell me the size of the 6 exterior screws? I lost mine. Thanks.

The Machine Shed - Reply Share

Add Comment

View Statistics:

Past 24 Hours: 2

Past 7 Days: 18

Past 30 Days: 44

All Time: 1,798