Introduction
If your Motorola V190 cellular phone screen does not display any image, is cracked, or has broken pixels, follow this guide to replace the display screen. The display screen shows menus, videos, text messages, and your call history.
Make sure to power down your phone before beginning.
What you need
-
-
Remove the four 6.3mm TR6 Torx screws surrounding the screen.
-
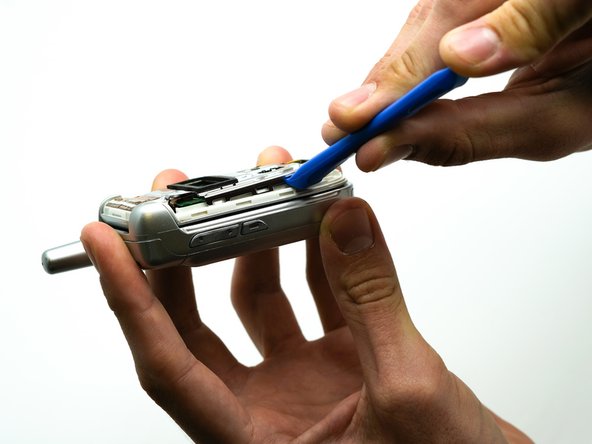
Use the iFixit opening tool to separate the casing.
-
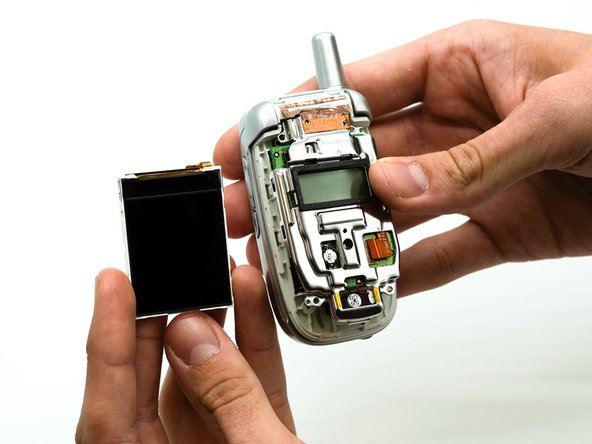
Remove the face plate by pulling it from the top hinge.
 Ask FixBot
-
-
-
Tool used on this step:Tweezers$4.99
-
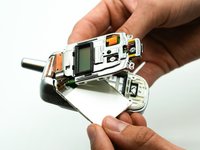
Use the precision tweezers set to remove the black rectangular piece from the phone casing.
-
-
-
Use the precision tweezers set to remove the rectangular ribbon from the green display board.
-


To reassemble your device, follow these instructions in reverse order.

Team

University of North Texas, Team S1-G1, Friess Fall 2019 Member of University of North Texas, Team S1-G1, Friess Fall 2019
UNT-FRIESS-F19S1G1
2 Members
10 Guides authored