
Installing Motorola Slvr L7 Front Panel

What you need

  1. Installing Motorola Slvr L7 Front Panel, Front Panel: step 1, image 1 of 1
    • Push down on the black tab located at the top center of the Motorola phone

  2. Installing Motorola Slvr L7 Front Panel: step 2, image 1 of 1
    • Remove the battery by pulling the battery from the top center.

  3. Installing Motorola Slvr L7 Front Panel: step 3, image 1 of 1
    • Remove the four T6 2 mm TX Torx screws

  4. Installing Motorola Slvr L7 Front Panel: step 4, image 1 of 2 Installing Motorola Slvr L7 Front Panel: step 4, image 2 of 2
    • Insert the flat end of a plastic opening tool and pry the metal cover up off the phone.

  5. Installing Motorola Slvr L7 Front Panel: step 5, image 1 of 2 Installing Motorola Slvr L7 Front Panel: step 5, image 2 of 2
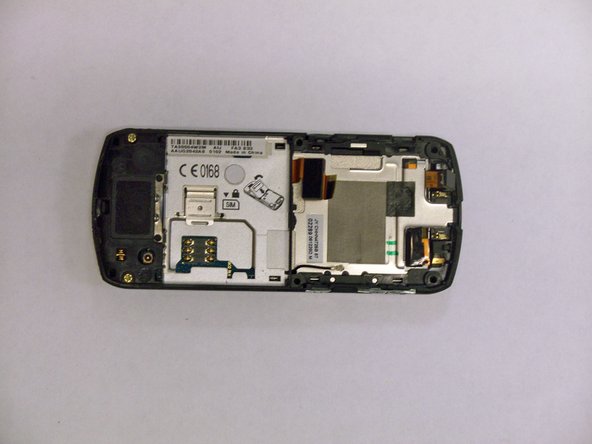
    • Carefully, disconnect the two connectors from their sockets on the motherboard using the flat end of a plastic opening tool.

  6. Installing Motorola Slvr L7 Front Panel: step 6, image 1 of 1
    • Use a plastic opening tool to pry the antenna cable connectors from its respective socket on the motherboard.

    • De-route the antenna cable by pulling it out.

  7. Installing Motorola Slvr L7 Front Panel: step 7, image 1 of 1
    • Use a spudger to lift and remove the black plastic screw cover at the bottom of the phone near the speaker

    • The cover is attached by adhesive, so some force may be required.

  8. Installing Motorola Slvr L7 Front Panel: step 8, image 1 of 2 Installing Motorola Slvr L7 Front Panel: step 8, image 2 of 2
    • Insert the flat end of a spudger and pry the frame off the phone.

    • The frame is attached by adhesive, so some force may be required

Jorge Trujillo

Member since: 05/19/11

520 Reputation

4 Guides authored

Team

View Statistics:

Past 24 Hours: 0

Past 7 Days: 1

Past 30 Days: 15

All Time: 2,979