Introduction
With this guide, you will be able to replace the headphone jack in a few simple steps.
What you need
-
-
You can remove the outer cover on the back of the phone by using a plastic opening tool. After removal the inner back cover will be exposed as shown.
-
This part is moderately difficult, especially if you've never taken the outer back cover off before this point.
-
It may take you several tries, but please be patient. The cover is surprisingly flexible, but not enough to withstand a lot of pressure.
-
-
-
Shut down the phone.
-
Push SIM card until it pops out.
-
Remove SIM card.
-
Be careful as to not damage the microSD memory card. Unlike the SIM card, pushing this in may not spring release, as there may not be an eject mechanism.
-
If there is no spring release eject mechanism, hopefully your microSD card has a ridge/raised edge that you can push on with your fingernail or plastic/rubber tool to push the card out. This may be difficult - be patient and do not use excessive force/sharp tools that could cause permanent damage and permanent loss of data.
-
-
-
Using a T5 Torx screwdriver head, take out the 14 screws (3.5 mm diameter and 5 mm long) that hold the back plate in place.
-
Make sure to keep all of the screws together, as they are very easily lost.
-
The magnetic project mat or a container is a great way to keep all the little metal screws as well as other small metal pieces from being lost.
-
-
-
-
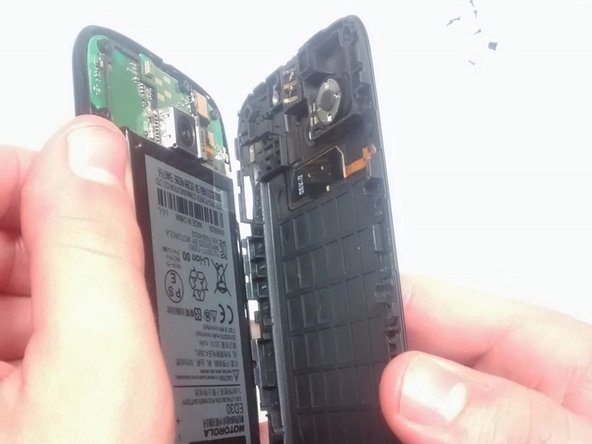
Use the plastic opening tool to take out the inner back cover after all the screws have been removed.
-
This will expose the motherboard and the attached battery.
-
Take note that once the inner back cover is removed the volume and power buttons on the side can easily fall out or be removed.
-
-
-
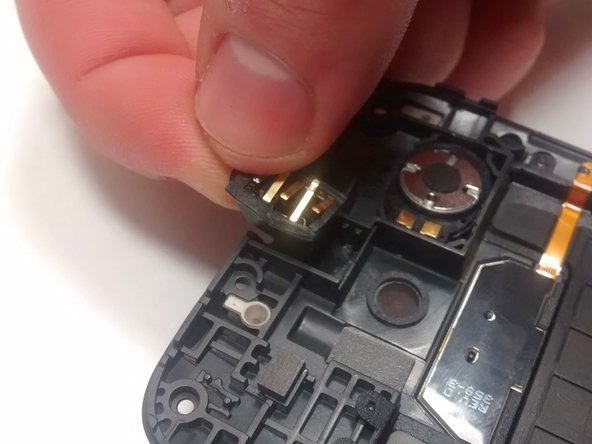
The headphone jack is located on the inside of the inner back case. It is directly in the middle and has approximately 5 gold strips that stick out. Located in green highlighted circle.
-
Be careful not to touch the gold strips. They are delicate and easily broken and ruined.
-
-
-
You can use a plastic opening tool, spudger, or your fingers to remove the headphone jack. A plastic opening tool is shown in the picture so that you are able to see the process.
-
On the top of the headphone jack (where the plastic opening tool is) there is a hole. This is where you will put your tool for taking the piece out.
-
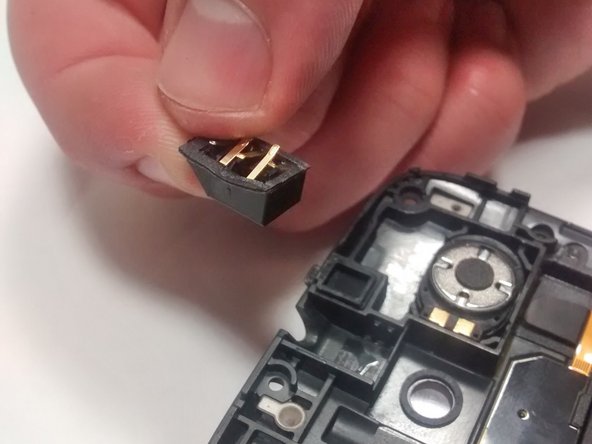
Gently pry the jack loose. It should pop out with little to no trouble.
-
-
-
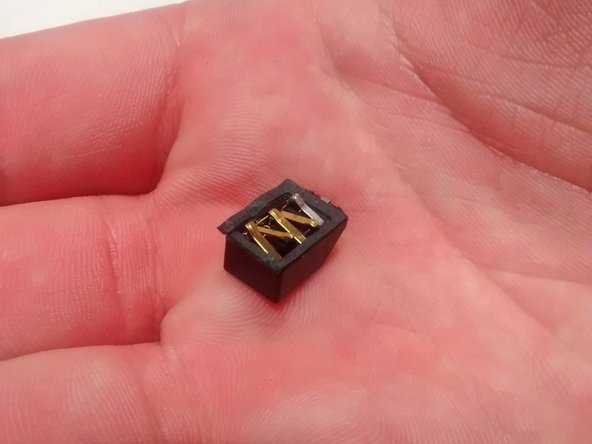
This will be your end result.
-
To replace, take the new headphone jack and line it up with hole. Gently press until it is all the way in and does not wiggle when jostled.
-


To reassemble your device, follow these instructions in reverse order.
To reassemble your device, follow these instructions in reverse order.
Cancel: I did not complete this guide.
13 other people completed this guide.
Team

USF Tampa, Team 1-6, Brown Fall 2014 Member of USF Tampa, Team 1-6, Brown Fall 2014
USFT-BROWN-F14S1G6
4 Members
17 Guides authored
5 Comments
Thank you so much! Clear and simple.
My phone kept thinking that it had a hands-free plugged in, so would intermittently mute the microphone and earpiece. Once I had taken it apart, I found some tiny metal shards under the headphone jack connections. I have no idea where they had come from, but removing them fixed the problem.
I did not know that changing the audio jack is possible. I thought it is attached to the back cover! Thank you so much!
Good clear instructions, but I would add that it is necessary to remove the SIM before removing the inner cover.