
Motorola Moto 360 3rd Gen Multi-Action Button Replacement

What you need

  1. Motorola Moto 360 3rd Gen Multi-Action Button Replacement, Lower Case: step 1, image 1 of 2 Motorola Moto 360 3rd Gen Multi-Action Button Replacement, Lower Case: step 1, image 2 of 2
    • Use a T4 Torx screwdriver to remove the four 4.2 mm screws securing the lower case.

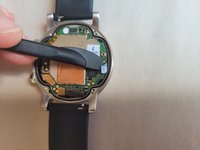
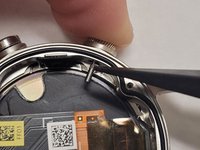
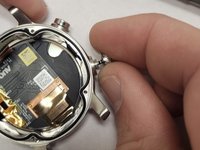
    • Gently pry the case open with a halberd spudger if the case will not release after removing the bolts.

    • Do not remove the lower case completely yet; this could damage cables connected to the lower case.

  2. Motorola Moto 360 3rd Gen Multi-Action Button Replacement: step 2, image 1 of 1
    • Raise the cover without straining the connected ribbon cable.

    • Disconnect the ribbon cable from the motherboard with a halberd spudger.

  3. Motorola Moto 360 3rd Gen Multi-Action Button Replacement, Multi-Action Button: step 3, image 1 of 2 Motorola Moto 360 3rd Gen Multi-Action Button Replacement, Multi-Action Button: step 3, image 2 of 2
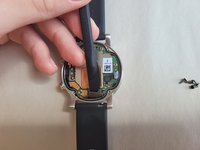
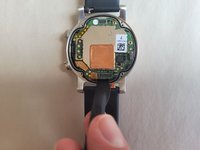
    • Disconnect the right (small, black head) and bottom right (wide, orange head) ribbon cables.
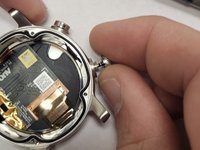
    • No need to disconnect the left or bottom left ribbons.

  4. Motorola Moto 360 3rd Gen Multi-Action Button Replacement: step 4, image 1 of 3 Motorola Moto 360 3rd Gen Multi-Action Button Replacement: step 4, image 2 of 3 Motorola Moto 360 3rd Gen Multi-Action Button Replacement: step 4, image 3 of 3
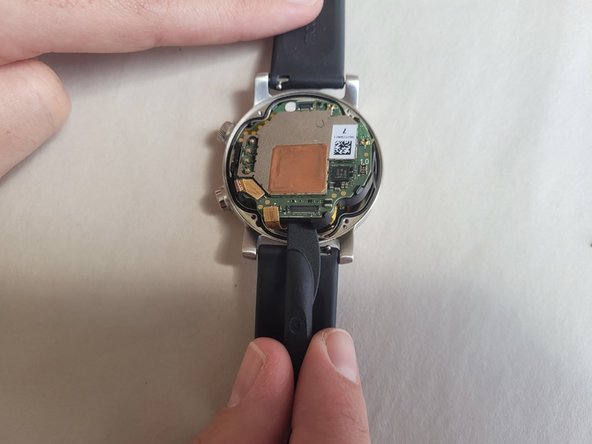
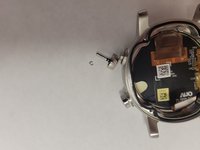
    • Gently remove the motherboard using a halberd spudger.

    • The best area to pry is at the bottom of the motherboard, right under one of the ribbons that was just disconnected.

  5. Motorola Moto 360 3rd Gen Multi-Action Button Replacement: step 5, image 1 of 3 Motorola Moto 360 3rd Gen Multi-Action Button Replacement: step 5, image 2 of 3 Motorola Moto 360 3rd Gen Multi-Action Button Replacement: step 5, image 3 of 3
    Tool used on this step:
    Tweezers
    $4.99
    Buy
    • While pushing the Multi-Action Button inwards, use tweezers to remove the c-clamp holding the button in place.

    • The c-clamp is a very tiny object, be cautious of losing it.

    • Remove the Multi-Action Button.

  6. Motorola Moto 360 3rd Gen Multi-Action Button Replacement: step 6, image 1 of 2 Motorola Moto 360 3rd Gen Multi-Action Button Replacement: step 6, image 2 of 2
    • Insert the new Multi-Action Button in place of the older Multi-Action Button.

    • Attach the c-clamp back around the Multi-Action Button while it is being pushed inwards.

Conclusion

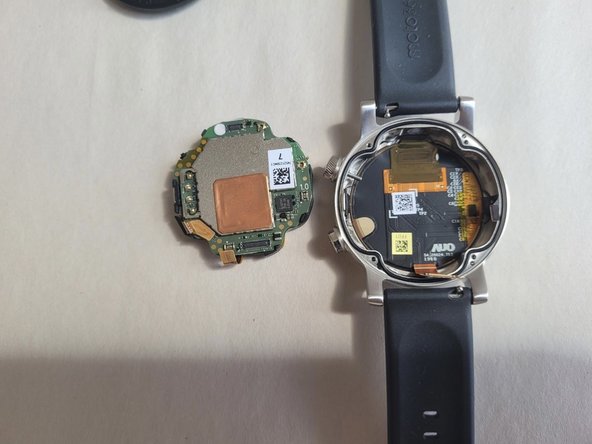
To reassemble your device, follow these instructions in reverse order.

0 Comments

Add Comment

View Statistics:

Past 24 Hours: 0

Past 7 Days: 0

Past 30 Days: 3

All Time: 66