Free Shipping on Domestic Orders $75+

Motorola Droid RAZR Rear Case Replacement

What you need

    1. Motorola Droid RAZR Rear Case Replacement, Back Cover: step 1, image 1 of 2 Motorola Droid RAZR Rear Case Replacement, Back Cover: step 1, image 2 of 2
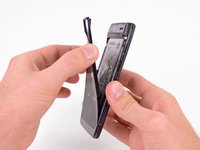
      • Insert a plastic opening tool between the back cover and rear case at the lower left edge of the back cover.

      • Pry the back cover up with the plastic opening tool to free the plastic clips.

      • Continue prying along the left edge of the back cover towards the top of the phone.

      Ask FixBot

      Add Comment

    2. Motorola Droid RAZR Rear Case Replacement: step 2, image 1 of 3 Motorola Droid RAZR Rear Case Replacement: step 2, image 2 of 3 Motorola Droid RAZR Rear Case Replacement: step 2, image 3 of 3
      • Work the plastic opening tool across the top of the back case to free the plastic clips.

      • The top edge of the back case is very thin. Pry carefully to avoid cracking or snapping it.

      • Continue prying down the right side of the back cover to free the remaining clips.

      Ask FixBot

      Add Comment

    3. Motorola Droid RAZR Rear Case Replacement: step 3, image 1 of 3 Motorola Droid RAZR Rear Case Replacement: step 3, image 2 of 3 Motorola Droid RAZR Rear Case Replacement: step 3, image 3 of 3
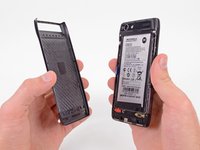
      • Pull the back cover away from the phone to remove it.

      • The back cover is attached to the battery with a generous amount of adhesive, so you may have to use quite a bit of force to separate the two pieces.

      • The battery must remain in the phone and not come off with the back cover or you will break the power lead.

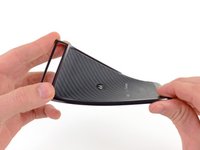
      • Since the back cover is made of Kevlar, it can handle a fair amount of twisting and tugging without breaking.

      Ask FixBot

      Add Comment

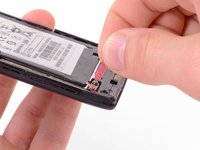
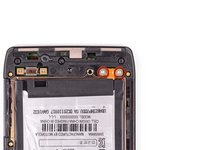
    1. Motorola Droid RAZR Rear Case Replacement, Battery: step 4, image 1 of 2 Motorola Droid RAZR Rear Case Replacement, Battery: step 4, image 2 of 2
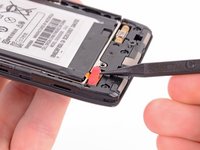
      • Use the tip of a spudger to lift up the red silicone cover over the battery terminal screws and remove it.

      Ask FixBot

      Add Comment

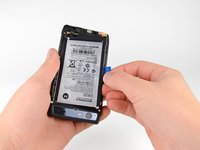
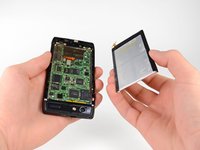
    2. Motorola Droid RAZR Rear Case Replacement: step 5, image 1 of 3 Motorola Droid RAZR Rear Case Replacement: step 5, image 2 of 3 Motorola Droid RAZR Rear Case Replacement: step 5, image 3 of 3
      • Remove the two 3.3 mm T5 Torx battery terminal screws.

      • Grab the blue battery removal tab and lift the battery out to remove it.

      • There is quite a bit of adhesive securing the battery to the motherboard. Work slowly to avoid deforming the battery.

      • Your phone will have a number of metal EMI shields on the motherboard, rather than the bare ICs seen here.

      Ask FixBot

      Add Comment

    1. Motorola Droid RAZR Rear Case Replacement, Camera Cover: step 6, image 1 of 2 Motorola Droid RAZR Rear Case Replacement, Camera Cover: step 6, image 2 of 2
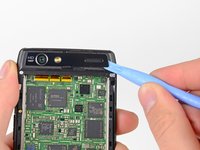
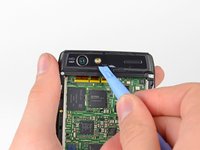
      • Use a heat gun or hair dryer to soften the adhesive underneath the camera cover.

      • The following steps were performed without the use of a heat gun. Notice that the camera cover cracks very easily if you do not heat the adhesive that holds it in place.

      • Gently pry up the bottom edge of the camera cover with a plastic opening tool.

      • Carefully slide the plastic opening tool across the bottom edge to free it from the adhesive.

      • Continue to use the heat gun as needed to soften the adhesive as you remove the camera cover.

      Ask FixBot

      Add Comment

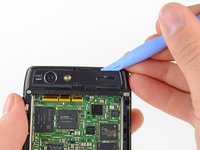
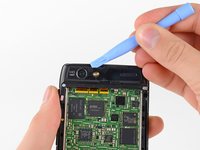
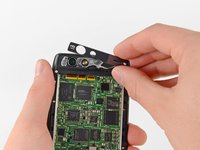
    2. Motorola Droid RAZR Rear Case Replacement: step 7, image 1 of 3 Motorola Droid RAZR Rear Case Replacement: step 7, image 2 of 3 Motorola Droid RAZR Rear Case Replacement: step 7, image 3 of 3
      • Insert the plastic opening tool underneath the top edge of the camera cover.

      • Gently pry the camera cover up as you slide the plastic opening tool across the top edge to free it from the adhesive.

      • Remove the camera cover.

      Ask FixBot

      Add Comment

    1. Motorola Droid RAZR Rear Case Replacement, Rear Case: step 8, image 1 of 1
      • Remove the six screws securing the rear case to the rest of the phone:

      • three 6.7 mm silver T3 Torx screws at the top,

      • four 4.0 mm gold T3 Torx screws in the middle,

      • and three 4.5 mm black T5 Torx screws at the bottom.

      Ask FixBot

      Add Comment

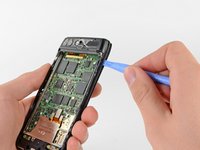
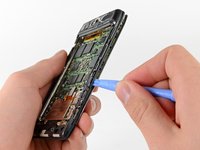
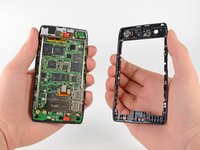
    2. Motorola Droid RAZR Rear Case Replacement: step 9, image 1 of 3 Motorola Droid RAZR Rear Case Replacement: step 9, image 2 of 3 Motorola Droid RAZR Rear Case Replacement: step 9, image 3 of 3
      • Insert a plastic opening tool between the rear case and the motherboard assembly.

      • Work your way down the side of the phone and gently pry the rear case up.

      • Separate the rear case from the motherboard assembly.

      Ask FixBot

      Add Comment

Conclusion

To reassemble your device, follow these instructions in reverse order.

Cancel: I did not complete this guide.

3 other people completed this guide.

David Hodson

Member since: 04/13/10

156,659 Reputation

127 Guides authored

0 Guide Comments

Add Comment

View Statistics:

Past 24 Hours: 1

Past 7 Days: 11

Past 30 Days: 50

All Time: 7,558