
Motorola Atrix HD Motherboard Replacement

What you need

  1. Motorola Atrix HD Motherboard Replacement, Battery: step 1, image 1 of 3 Motorola Atrix HD Motherboard Replacement, Battery: step 1, image 2 of 3 Motorola Atrix HD Motherboard Replacement, Battery: step 1, image 3 of 3
    • Before disassembling the phone, remove the SIM card and the MICRO-SD card, if equipped.

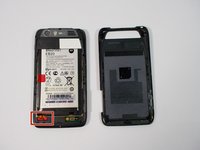
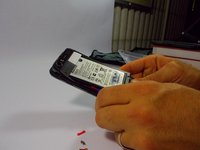
    • Begin taking apart the device by prying apart the back cover from the assembly using the plastic opening tool.

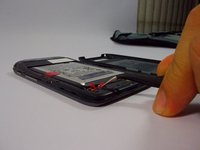
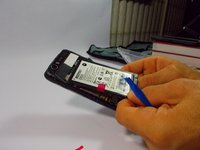
    • Continue working around the edge of the phone using the plastic opening tool.

    • When all the edges have been lifted apart, use your hands or plastic opening tool to peel the back plate from the battery. There are small adhesive strips between the back cover and the battery, so take care not to crack the back cover while prying open.

  2. Motorola Atrix HD Motherboard Replacement: step 2, image 1 of 1
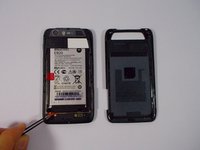
    • The adhesive strips are shown in the orange boxes. Be sure not to use too much force to pull off the back cover, or you may risk snapping the back cover.

  3. Motorola Atrix HD Motherboard Replacement: step 3, image 1 of 3 Motorola Atrix HD Motherboard Replacement: step 3, image 2 of 3 Motorola Atrix HD Motherboard Replacement: step 3, image 3 of 3
    • Remove the red rubber screw cover with a pair of tweezers

  4. Motorola Atrix HD Motherboard Replacement: step 4, image 1 of 2 Motorola Atrix HD Motherboard Replacement: step 4, image 2 of 2
    • Use the T-5 Torx bit to remove the two silver 3.3 mm screws with integrated washers.

  5. Motorola Atrix HD Motherboard Replacement: step 5, image 1 of 1
    • Lift the battery leads to the upward position. The ribbon cable is very thin, be gentle.

  6. Motorola Atrix HD Motherboard Replacement: step 6, image 1 of 3 Motorola Atrix HD Motherboard Replacement: step 6, image 2 of 3 Motorola Atrix HD Motherboard Replacement: step 6, image 3 of 3
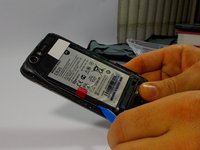
    • Use the plastic opening tool around the edges to loosen the battery.

    • Once the battery is loose, carefully lift from the bottom edge and remove the battery.

  7. Motorola Atrix HD Motherboard Replacement: step 7, image 1 of 1
    • The battery may now be removed.

  8. Motorola Atrix HD Motherboard Replacement, Rear Chassis: step 8, image 1 of 3 Motorola Atrix HD Motherboard Replacement, Rear Chassis: step 8, image 2 of 3 Motorola Atrix HD Motherboard Replacement, Rear Chassis: step 8, image 3 of 3
    • Begin by removing the back cover using the plastic opening tool. There are adhesive strips attached to the back cover, so take care when prying case to prevent cracking

    • The adhesive strips may stay on the back cover or the battery.

  9. Motorola Atrix HD Motherboard Replacement: step 9, image 1 of 2 Motorola Atrix HD Motherboard Replacement: step 9, image 2 of 2
    • The back case portion may be removed after the battery has been removed.

    • Use the T5 Torx screwdriver to remove the 10 coarse-thread 5mm screws

  10. Motorola Atrix HD Motherboard Replacement: step 10, image 1 of 3 Motorola Atrix HD Motherboard Replacement: step 10, image 2 of 3 Motorola Atrix HD Motherboard Replacement: step 10, image 3 of 3
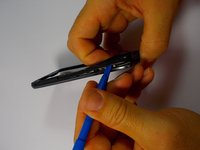
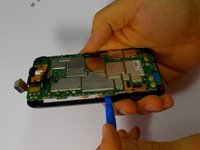
    • Now with the screws removed, use the plastic opening tool to lift the edges of the front assembly.

    • Continue to use the plastic opening tool around the edges of the device to remove the front assembly.

    • The speaker is located in the upper corner of the case. It it attached with adhesive and can be removed by gently prying with the plastic opening tool

  11. Motorola Atrix HD Motherboard Replacement, Touchscreen and LCD display: step 11, image 1 of 2 Motorola Atrix HD Motherboard Replacement, Touchscreen and LCD display: step 11, image 2 of 2
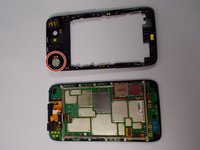
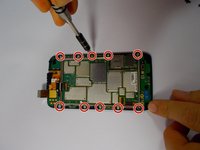
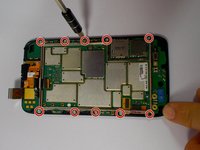
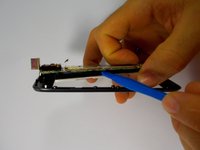
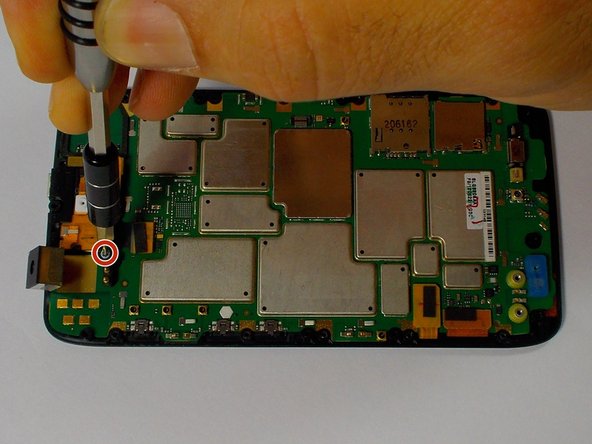
    • Begin by removing the 10 Torx T5 motherboard baseplate screws

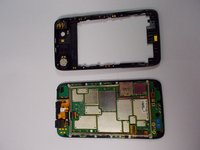
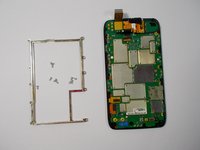
    • The back chassis can now be removed.

  12. Motorola Atrix HD Motherboard Replacement: step 12, image 1 of 2 Motorola Atrix HD Motherboard Replacement: step 12, image 2 of 2
    • Remove the 10 Torx T5 screws, that hold the metal frame to the motherboard.

  13. Motorola Atrix HD Motherboard Replacement: step 13, image 1 of 3 Motorola Atrix HD Motherboard Replacement: step 13, image 2 of 3 Motorola Atrix HD Motherboard Replacement: step 13, image 3 of 3
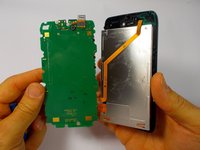
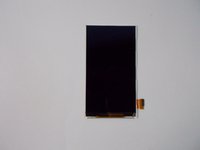
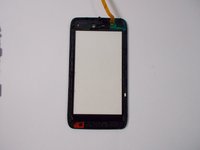
    • After following the steps to access the motherboard, you are ready to remove the touchscreen and LCD display.

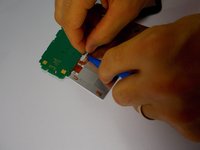
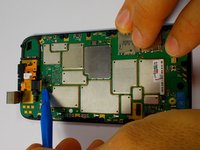
    • Use the plastic opening tool to separate the LCD display from the motherboard.

    • The touchscreen may separate from the LCD, however they are both connected to the motherboard as one unit.

  14. Motorola Atrix HD Motherboard Replacement: step 14, image 1 of 3 Motorola Atrix HD Motherboard Replacement: step 14, image 2 of 3 Motorola Atrix HD Motherboard Replacement: step 14, image 3 of 3
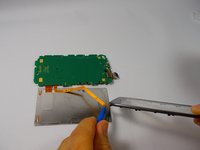
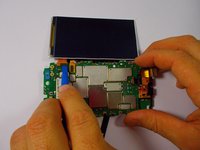
    • Remove the ribbon cable from the back of the lcd using the plastic opening tool or spudger.

    • Use care removing the ribbon cables. They are very thin and are broken easily.

  15. Motorola Atrix HD Motherboard Replacement: step 15, image 1 of 2 Motorola Atrix HD Motherboard Replacement: step 15, image 2 of 2
    • Remove the ribbon cable connecting the LCD display to the motherboard, be mindful that the ribbon cable is very thin.

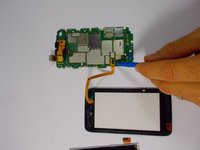
    • With the LCD display removed, remove the ribbon cable connecting the touchscreen to the motherboard

  16. Motorola Atrix HD Motherboard Replacement: step 16, image 1 of 2 Motorola Atrix HD Motherboard Replacement: step 16, image 2 of 2
    • The LCD display and the touchscreen may now be replaced.

  17. Motorola Atrix HD Motherboard Replacement, Front and Rear Camera: step 17, image 1 of 3 Motorola Atrix HD Motherboard Replacement, Front and Rear Camera: step 17, image 2 of 3 Motorola Atrix HD Motherboard Replacement, Front and Rear Camera: step 17, image 3 of 3
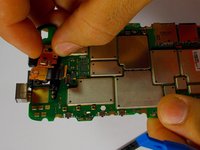
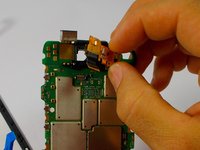
    • Remove the three Torx T5 screws that locks the front facing camera to the motherboard.

    • Use the plastic opening tool to lift the ribbon cable from the motherboard.

  18. Motorola Atrix HD Motherboard Replacement: step 18, image 1 of 3 Motorola Atrix HD Motherboard Replacement: step 18, image 2 of 3 Motorola Atrix HD Motherboard Replacement: step 18, image 3 of 3
    • Lift the rear camera our of the motherboard.

  19. Motorola Atrix HD Motherboard Replacement: step 19, image 1 of 2 Motorola Atrix HD Motherboard Replacement: step 19, image 2 of 2
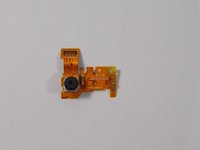
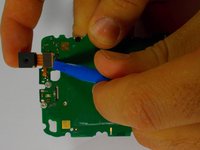
    • Use the plastic opening tool to lift the ribbon cable connector from the motherboard.

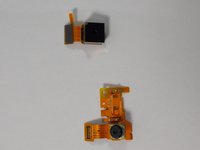
    • Now both front and rear cameras have been removed.

  20. Motorola Atrix HD Motherboard Replacement, Motherboard: step 20, image 1 of 2 Motorola Atrix HD Motherboard Replacement, Motherboard: step 20, image 2 of 2
    • Now the motherboard is ready to be replaced and reassembled in reverse order.

Conclusion

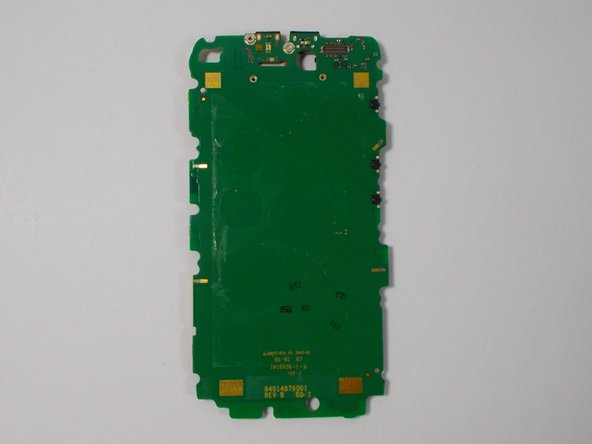
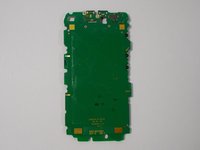
To reassemble your device, follow these instructions in reverse order.

5 other people completed this guide.

Gabriel Agaman

Member since: 10/28/15

597 Reputation

3 Guides authored

Team

UMass Dartmouth, Team 1-8, Miles Fall 2015 Member of UMass Dartmouth, Team 1-8, Miles Fall 2015

UMASSD-MILES-F15S1G8

3 Members

10 Guides authored

0 Comments

Add Comment

View Statistics:

Past 24 Hours: 0

Past 7 Days: 0

Past 30 Days: 1

All Time: 751