
Motherboard Replacement

What you need

  1. Motherboard Replacement, Back Cover: step 1, image 1 of 3 Motherboard Replacement, Back Cover: step 1, image 2 of 3 Motherboard Replacement, Back Cover: step 1, image 3 of 3
    • Insert the plastic opening tool into the middle of the bottom edge of the device. The tool should be inserted within the seam between the back and front covers.

    • Slide the opening tool to the right and slowly continue to separate the back cover from the device.

    • Avoid prying on the buttons, as they are easily damaged.

  2. Motherboard Replacement: step 2, image 1 of 1
    • Pull the cover off of the device once about three quarters of the cover has been pried open using the plastic opening tool.

  3. Motherboard Replacement, Battery: step 3, image 1 of 1
    • Remove masking tape from the battery.

  4. Motherboard Replacement: step 4, image 1 of 3 Motherboard Replacement: step 4, image 2 of 3 Motherboard Replacement: step 4, image 3 of 3
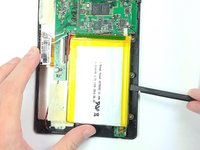
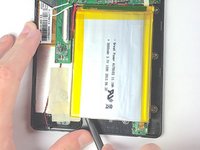
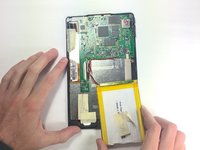
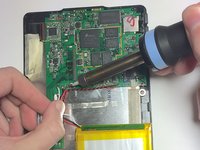
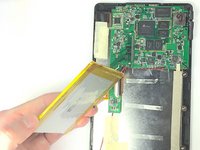
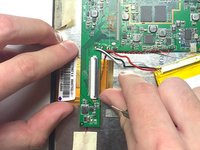
    • Pry the battery from the base using the nylon spudger and move it away from the motherboard.

    • Handle the battery with care to avoid damaging it.

  5. Motherboard Replacement: step 5, image 1 of 3 Motherboard Replacement: step 5, image 2 of 3 Motherboard Replacement: step 5, image 3 of 3
    • De-solder the three contact points and remove the battery.

    • See the following guide for instructions on how to solder. How To Solder and Desolder Connections

    • Use caution when operating the soldering iron.

  6. Motherboard Replacement, Motherboard: step 6, image 1 of 3 Motherboard Replacement, Motherboard: step 6, image 2 of 3 Motherboard Replacement, Motherboard: step 6, image 3 of 3
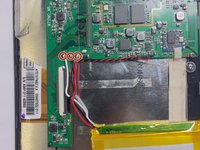
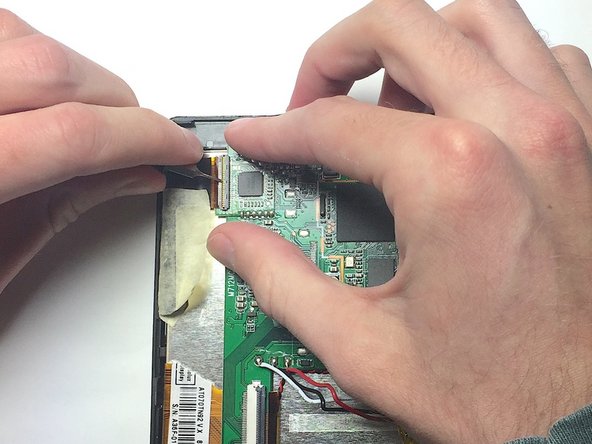
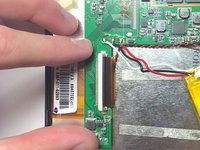
    • Remove the two ZIF connectors attached to the motherboard by flipping up the black tabs before pulling the ribbon cable away.

    • Only use a fingernail or nylon spudger to flip up the retaining flap. Using metal tools may damage delicate components.

  7. Motherboard Replacement: step 7, image 1 of 1
    • Use the nut driver and J00 bit to remove the three 4 mm screws.

  8. Motherboard Replacement: step 8, image 1 of 3 Motherboard Replacement: step 8, image 2 of 3 Motherboard Replacement: step 8, image 3 of 3
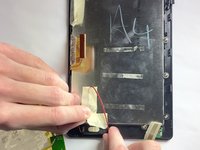
    • Peel back metal tape that is hiding the auxiliary port wires.

    • Remove tape that is holding the speaker wires in place.

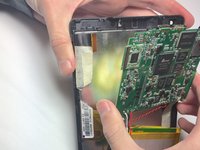
    • Lift up on the motherboard to release it from the tablet.

Conclusion

To reassemble your device, follow these instructions in reverse order.

One other person completed this guide.

Connor Fisher

Member since: 11/04/16

212 Reputation

1 Guide authored

Team

Baylor, Team 4-1, Williams Fall 2016 Member of Baylor, Team 4-1, Williams Fall 2016

BU-WILLIAMS-F16S4G1

4 Members

14 Guides authored

0 Comments

Add Comment

View Statistics:

Past 24 Hours: 0

Past 7 Days: 2

Past 30 Days: 8

All Time: 274