Shop the Holiday Gift Guide
Free Shipping on Domestic Orders $75+

Monoprice Select Mini V2 3D Printer Heating Element and Temperature Sensor Replacement

Views: 3.9K

View statistics:

Past 24 Hours:
3
Past 7 Days:
35
Past 30 Days:
132
All Time:
3,922
Comments: 3

3 guide comments.

Go to guide comments
Completed: 1

1 person has marked this guide "completed." Will you be next?

Favorites: 1

1 person has favorited (and subscribed to) this guide. Will you be next?

Time Required: 45 minutes
Difficulty: Moderate
Featured Student Guide

This guide has been the hard work of our awesome students and is found to be exceptionally cool by the iFixit staff.

Monoprice Select Mini V2 3D Printer Heating Element and Temperature Sensor Replacement

Introduction

Go to step 1 ↓

The heating element and temperature sensor are very important in a 3D printer. The former helps to melt the printing material to allow construction, and the latter monitors the temperature of the hot end. When both are faulty, the printer will begin to fail and require replacement.

That is the purpose of this guide: to help to replace both the heating element and the temperature sensor. Additionally, if only one of the two components need replacement, the parts of each step involving the other element can be ignored.

What you need

Tools

    1. Monoprice Select Mini V2 3D Printer Heating Element and Temperature Sensor Replacement, Heating Element and Temperature Sensor: step 1, image 1 of 3 Monoprice Select Mini V2 3D Printer Heating Element and Temperature Sensor Replacement, Heating Element and Temperature Sensor: step 1, image 2 of 3 Monoprice Select Mini V2 3D Printer Heating Element and Temperature Sensor Replacement, Heating Element and Temperature Sensor: step 1, image 3 of 3
      • Use needle nose pliers to remove the two spring clips on either side of the shroud covering the hotend.

      • Remove the fan with your hand.

      Ask FixBot

      Add Comment

    2. Monoprice Select Mini V2 3D Printer Heating Element and Temperature Sensor Replacement: step 2, image 1 of 3 Monoprice Select Mini V2 3D Printer Heating Element and Temperature Sensor Replacement: step 2, image 2 of 3 Monoprice Select Mini V2 3D Printer Heating Element and Temperature Sensor Replacement: step 2, image 3 of 3
      • Remove the two 18 mm Phillips head screws that secure the shroud.

      • Remove the hot end from the shroud.

      Ask FixBot

      Add Comment

    3. Monoprice Select Mini V2 3D Printer Heating Element and Temperature Sensor Replacement: step 3, image 1 of 3 Monoprice Select Mini V2 3D Printer Heating Element and Temperature Sensor Replacement: step 3, image 2 of 3 Monoprice Select Mini V2 3D Printer Heating Element and Temperature Sensor Replacement: step 3, image 3 of 3
      • Use a small utility knife to cut the insulation covering the heater block.

      • The intent is to access what is under the insulation, not to fully remove it. Fully removing the insulation will likely damage it.

      Ask FixBot

      Add Comment

    4. Monoprice Select Mini V2 3D Printer Heating Element and Temperature Sensor Replacement: step 4, image 1 of 3 Monoprice Select Mini V2 3D Printer Heating Element and Temperature Sensor Replacement: step 4, image 2 of 3 Monoprice Select Mini V2 3D Printer Heating Element and Temperature Sensor Replacement: step 4, image 3 of 3
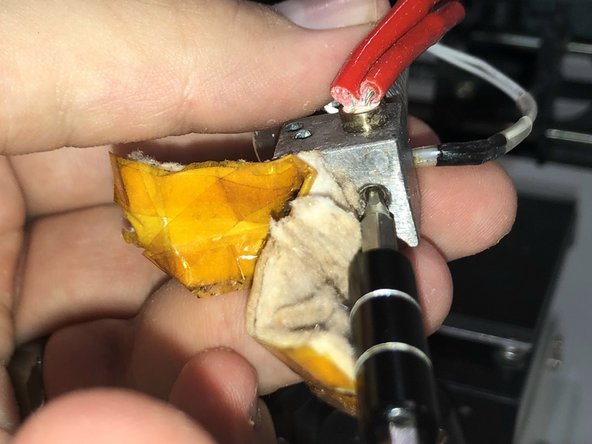
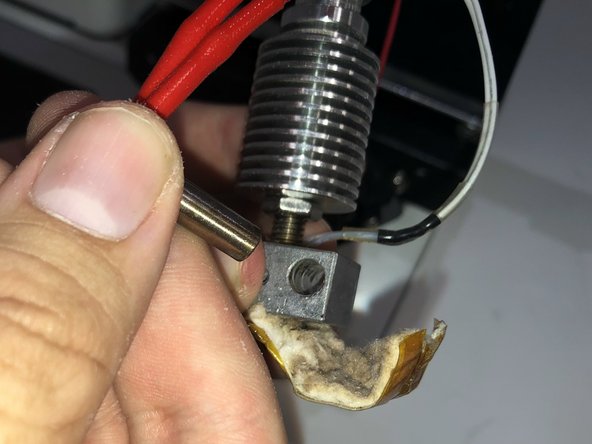
      • Pull back the insulation until you have access to the grub screw at the bottom of the heater block.

      • Use the hex driver to loosen the grub screw.

      • Remove the heating element from the heater block.

      Ask FixBot

      Add Comment

    5. Monoprice Select Mini V2 3D Printer Heating Element and Temperature Sensor Replacement: step 5, image 1 of 2 Monoprice Select Mini V2 3D Printer Heating Element and Temperature Sensor Replacement: step 5, image 2 of 2
      • Use the dull side of a utility blade to scrape away excess thermal compound holding the temperature sensor in place.

      • Remove the temperature sensor.

      • The thermal compound is simply the dried paste surrounding the hole where the temperature sensor is located.

      Ask FixBot

      Add Comment

    6. Monoprice Select Mini V2 3D Printer Heating Element and Temperature Sensor Replacement: step 6, image 1 of 2 Monoprice Select Mini V2 3D Printer Heating Element and Temperature Sensor Replacement: step 6, image 2 of 2
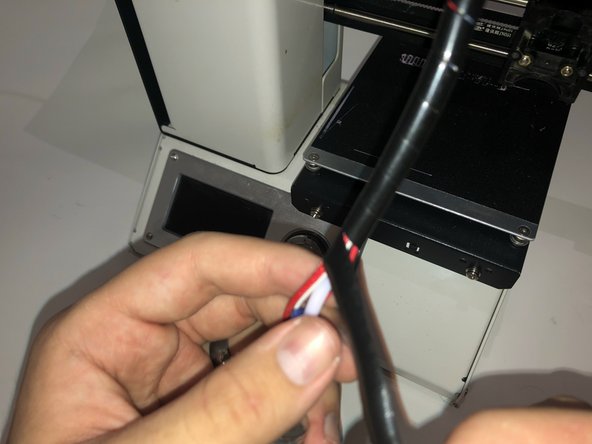
      • Unwind the spiral wrap from the wires leading from the hotend to the printer body.

      Ask FixBot

      Add Comment

    7. Monoprice Select Mini V2 3D Printer Heating Element and Temperature Sensor Replacement: step 7, image 1 of 2 Monoprice Select Mini V2 3D Printer Heating Element and Temperature Sensor Replacement: step 7, image 2 of 2
      • Lay the printer in its back to access the bottom panel.

      • Remove the six 8 mm Phillips head screws, and carefully remove the bottom panel.

      • Do not disconnect any wires in this step.

      Ask FixBot

      Add Comment

    8. Monoprice Select Mini V2 3D Printer Heating Element and Temperature Sensor Replacement: step 8, image 1 of 3 Monoprice Select Mini V2 3D Printer Heating Element and Temperature Sensor Replacement: step 8, image 2 of 3 Monoprice Select Mini V2 3D Printer Heating Element and Temperature Sensor Replacement: step 8, image 3 of 3
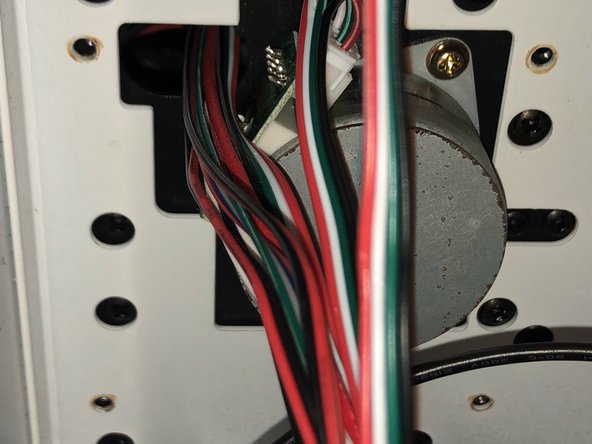
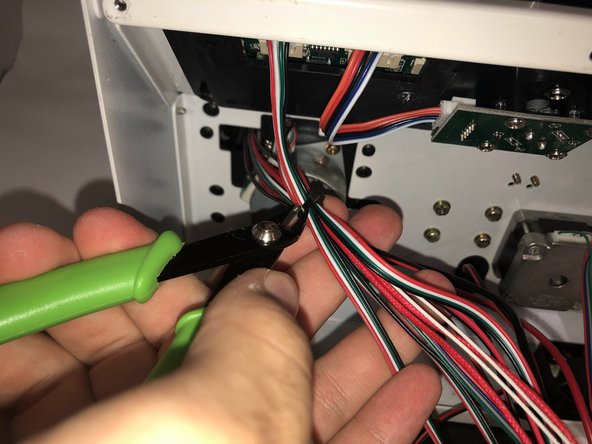
      • Clip the zip ties holding the wire bundle together.

      Ask FixBot

      Add Comment

    9. Monoprice Select Mini V2 3D Printer Heating Element and Temperature Sensor Replacement: step 9, image 1 of 3 Monoprice Select Mini V2 3D Printer Heating Element and Temperature Sensor Replacement: step 9, image 2 of 3 Monoprice Select Mini V2 3D Printer Heating Element and Temperature Sensor Replacement: step 9, image 3 of 3
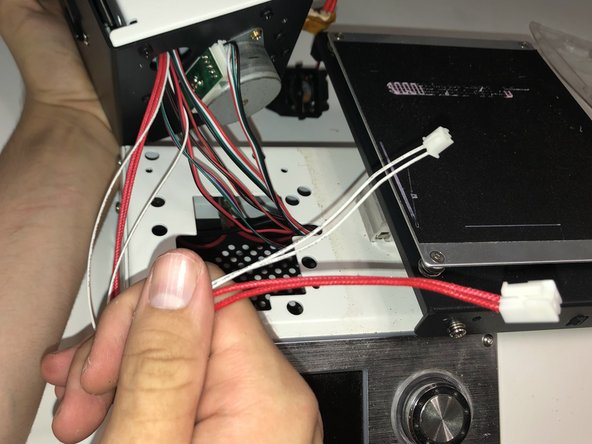
      • Locate the pair of thick red wires for the heating element and the pair of thin white wires for the temperature sensor.

      • Find where each pair of wires connects to the main board and disconnect them with a pair of needle nose pliers.

      • The large connector for the heating element has a clip that will need to be depressed to disconnect the wires.

      Ask FixBot

      Add Comment

    10. Monoprice Select Mini V2 3D Printer Heating Element and Temperature Sensor Replacement: step 10, image 1 of 2 Monoprice Select Mini V2 3D Printer Heating Element and Temperature Sensor Replacement: step 10, image 2 of 2
      • Remove the four Phillips head screws holding the vertical section of the printer to the base.

      • These screws are screwed in tightly, be careful not to strip them while removing them.

      • These screws, though also 8 mm, have a slightly smaller diameter than the ones holding on the bottom panel. Keep them separate to avoid mixing them up.

      Ask FixBot

      Add Comment

    11. Monoprice Select Mini V2 3D Printer Heating Element and Temperature Sensor Replacement: step 11, image 1 of 2 Monoprice Select Mini V2 3D Printer Heating Element and Temperature Sensor Replacement: step 11, image 2 of 2
      • Remove the vertical portion of the printer from the base.

      • Feed the wires for the heating element and the temperature sensor through the hole in the base.

      Ask FixBot

      Add Comment

    12. Monoprice Select Mini V2 3D Printer Heating Element and Temperature Sensor Replacement: step 12, image 1 of 3 Monoprice Select Mini V2 3D Printer Heating Element and Temperature Sensor Replacement: step 12, image 2 of 3 Monoprice Select Mini V2 3D Printer Heating Element and Temperature Sensor Replacement: step 12, image 3 of 3
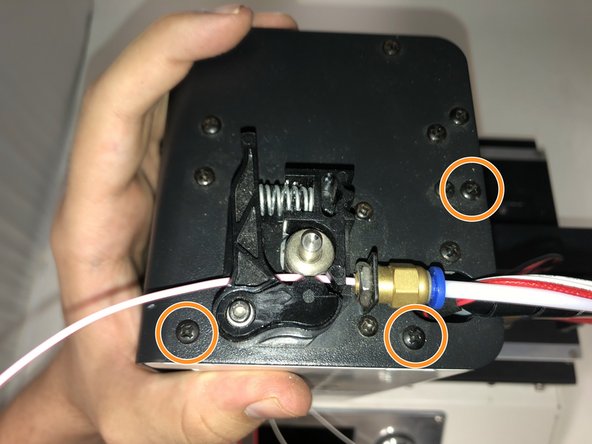
      • Remove the three Phillips head screws from the bottom of the vertical assembly that hold the front panel in place.

      • Remove the three Phillips head screws from the top of the vertical assembly that hold the front panel.

      • Remove the front panel from the vertical assembly.

      Ask FixBot

      Add Comment

    13. Monoprice Select Mini V2 3D Printer Heating Element and Temperature Sensor Replacement: step 13, image 1 of 3 Monoprice Select Mini V2 3D Printer Heating Element and Temperature Sensor Replacement: step 13, image 2 of 3 Monoprice Select Mini V2 3D Printer Heating Element and Temperature Sensor Replacement: step 13, image 3 of 3
      • Push the wires for the heating element and the temperature sensor through the hole in the top of the vertical assembly.

      Ask FixBot

      Add Comment

    14. Monoprice Select Mini V2 3D Printer Heating Element and Temperature Sensor Replacement: step 14, image 1 of 2 Monoprice Select Mini V2 3D Printer Heating Element and Temperature Sensor Replacement: step 14, image 2 of 2
      • Cut the remaining zip ties holding the wires together.

      Ask FixBot

      Add Comment

    15. Monoprice Select Mini V2 3D Printer Heating Element and Temperature Sensor Replacement: step 15, image 1 of 3 Monoprice Select Mini V2 3D Printer Heating Element and Temperature Sensor Replacement: step 15, image 2 of 3 Monoprice Select Mini V2 3D Printer Heating Element and Temperature Sensor Replacement: step 15, image 3 of 3
      • Unwind the remaining wire wrap from the bundle of wires.

      • Remove the old heating element and temperature sensor.

      Ask FixBot

      Add Comment

    16. Monoprice Select Mini V2 3D Printer Heating Element and Temperature Sensor Replacement: step 16, image 1 of 3 Monoprice Select Mini V2 3D Printer Heating Element and Temperature Sensor Replacement: step 16, image 2 of 3 Monoprice Select Mini V2 3D Printer Heating Element and Temperature Sensor Replacement: step 16, image 3 of 3
      • Insert the new heating element into the heater block.

      • Tighten the grub screw to secure the heating element.

      Ask FixBot

      Add Comment

    17. Monoprice Select Mini V2 3D Printer Heating Element and Temperature Sensor Replacement: step 17, image 1 of 3 Monoprice Select Mini V2 3D Printer Heating Element and Temperature Sensor Replacement: step 17, image 2 of 3 Monoprice Select Mini V2 3D Printer Heating Element and Temperature Sensor Replacement: step 17, image 3 of 3
      • Insert the new temperature sensor into the heater block.

      • If the sensor doesn't stay in place, it may be necessary to apply a small amount of thermal cement to secure it.

      Ask FixBot

      Add Comment

    18. Monoprice Select Mini V2 3D Printer Heating Element and Temperature Sensor Replacement: step 18, image 1 of 3 Monoprice Select Mini V2 3D Printer Heating Element and Temperature Sensor Replacement: step 18, image 2 of 3 Monoprice Select Mini V2 3D Printer Heating Element and Temperature Sensor Replacement: step 18, image 3 of 3
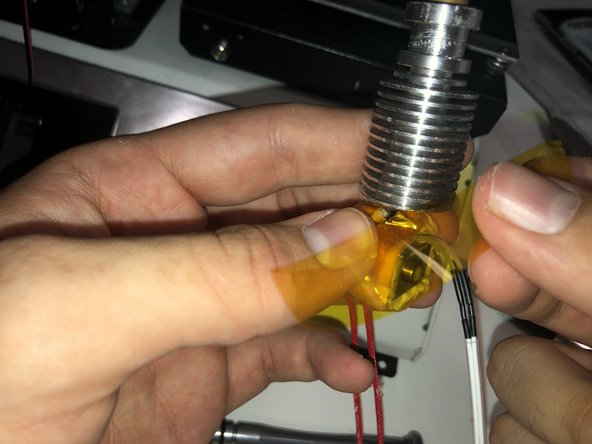
      • Use kapton tape to secure the insulation around the heater block.

      Ask FixBot

      Add Comment

    19. Monoprice Select Mini V2 3D Printer Heating Element and Temperature Sensor Replacement: step 19, image 1 of 2 Monoprice Select Mini V2 3D Printer Heating Element and Temperature Sensor Replacement: step 19, image 2 of 2
      • Feed the wires from the new components through the hole at the top of the vertical assembly.

      • From this point, use steps 15-1 as a guide to reassemble the device, ignoring steps 4 and 5.

      • Remember to replace the zip ties for wire managment.

      • the 4 screws that held the vertical assembly on the base are different than the other screws that held panels on. Tighten them well.

      Ask FixBot

      Add Comment

Conclusion

To reassemble your device, follow these instructions in reverse order.

Cancel: I did not complete this guide.

One other person completed this guide.

Author

with

Noah Wargo

Member since: 06/08/22

317 Reputation

1 Guide authored

3 Guide Comments

Very good. It would be simpler, for those who can contemplate it, to just cut the wires to the heating element and thermistor a couple of inches away from them. and splice the new ones in, paying attention to heat-shrinking the joints. Then you don't have to rewire all the way back to the PCB. You need soldering and heatshrinking facilities for this procedure.

The 'you need' list should also include zip ties.

Esmond Pitt - Reply Share
Where did you get the new heating element? Would this fix the issue of the printer not printing anything, even after preheating it? That's why mine has been collecting dust for years.

Arthur Lemus - Reply Share

Interesante gracias, la mía igual lleva años acumulando polvo pero en mi caso es por qué la cama caliente no funciona en el panel me marca una temperatura de 100°C sin embargo la cama no calienta por ende cuando quiero imprimir se despega todo de por sí no encontré refacciones en internet.

Ramón Cambrano Izquierdo - Reply Share

Add Comment

View Statistics:

Past 24 Hours: 3

Past 7 Days: 35

Past 30 Days: 132

All Time: 3,922