Free Shipping on Domestic Orders $75+

This translation may not reflect the most recent updates from the source guide. Help update the translation or view the source guide.

Monitor LCD Hannspree capacitors replacement

What you need

Video Overview

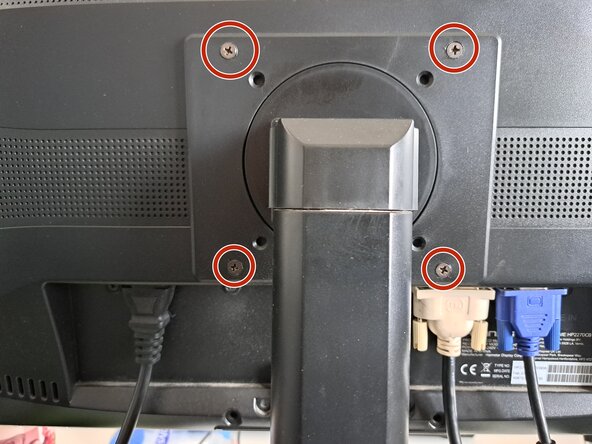
  1. Monitor LCD Hannspree capacitors replacement, Remove the stand screws: step 1, image 1 of 1
    • Unplug all.

    • Use a PH2 driver to remove the four screws securing the stand.

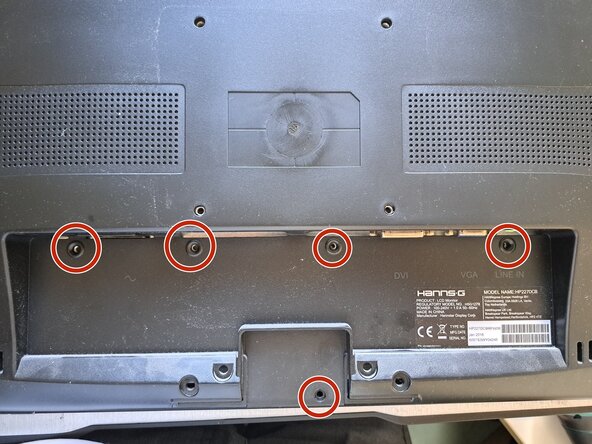
  2. Monitor LCD Hannspree capacitors replacement, Remove the back panel screws: step 2, image 1 of 1
    • Use a PH2 driver to remove the five screws securing the back panel.

    • Throughout this repair, keep track of each screw and make sure it goes back exactly where it came from.

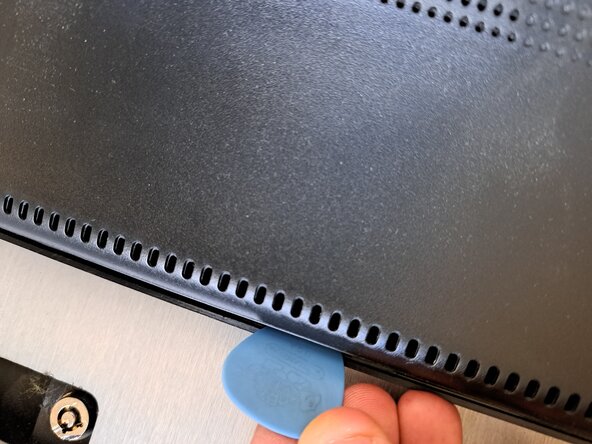
  3. Monitor LCD Hannspree capacitors replacement, Unclip the back panel: step 3, image 1 of 1
    • Insert the flat end of a spudger into the gap between the back panel and the shell.

    • Gently pass around the entire frame of the monitor, you will hear several clicks.

    • Skip the corners if you have trouble. It will open anyway.

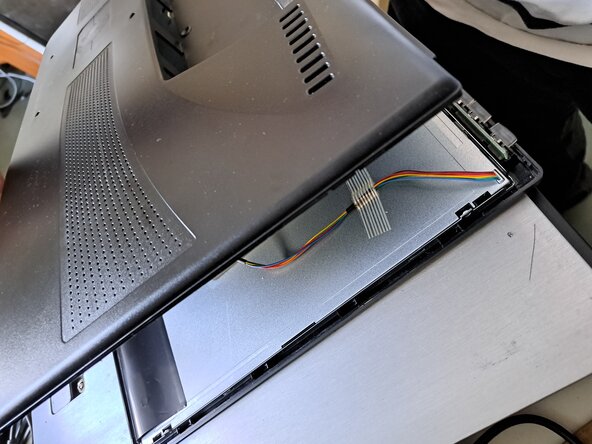
  4. Monitor LCD Hannspree capacitors replacement, Remove the back panel: step 4, image 1 of 1
    • Hold one of the two short sides and lift the panel.

    • During reassembly, press along the edges of the back panel to snap it into place.

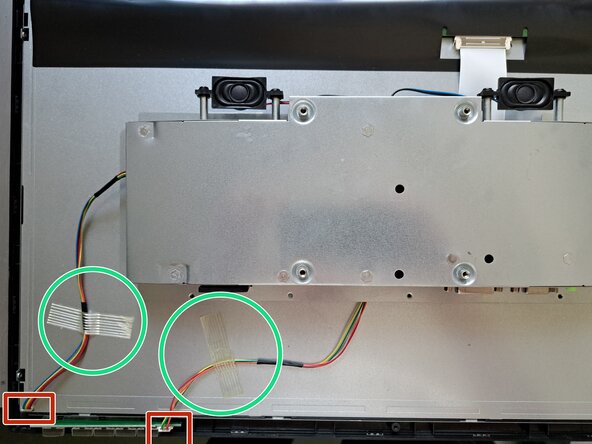
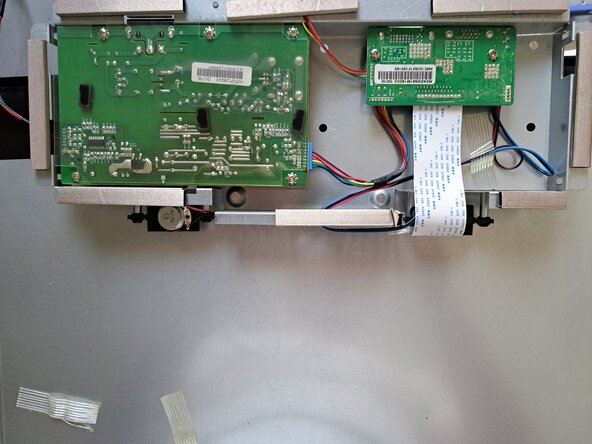
  5. Monitor LCD Hannspree capacitors replacement: step 5, image 1 of 2 Monitor LCD Hannspree capacitors replacement: step 5, image 2 of 2
    • Unplug connectors

    • Unstick the tape

    • Flip up the metal case

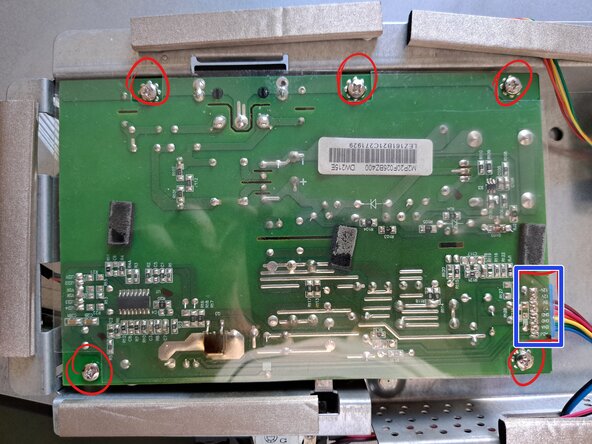
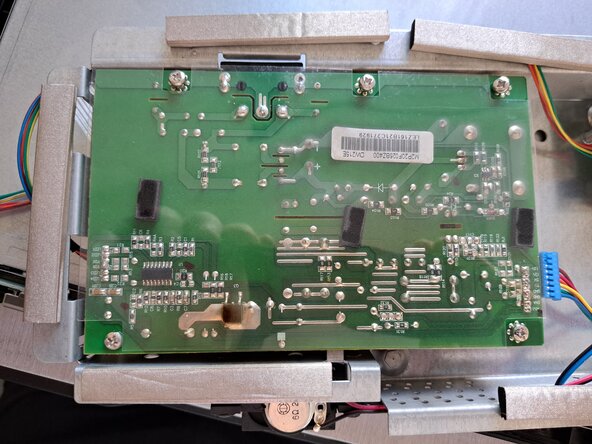
  6. Monitor LCD Hannspree capacitors replacement, Power board: step 6, image 1 of 2 Monitor LCD Hannspree capacitors replacement, Power board: step 6, image 2 of 2
    • Use a PH2 driver to remove the five screws securing the power board.

    • Unplug the "rainbow" connector.

    • Remove the plastic cover.

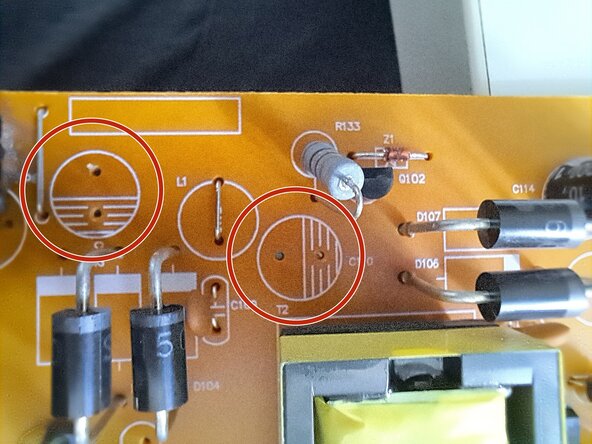
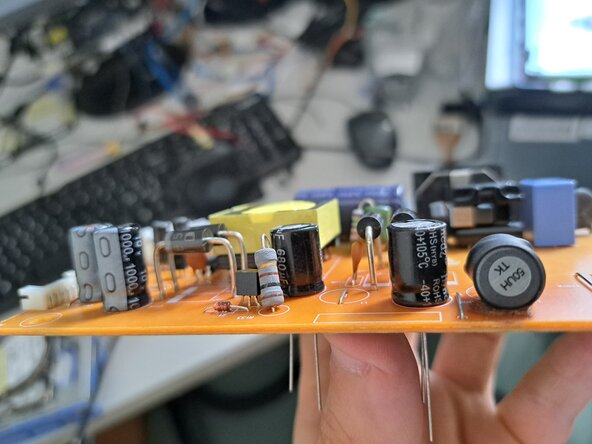
  7. Monitor LCD Hannspree capacitors replacement, Inspect the board: step 7, image 1 of 3 Monitor LCD Hannspree capacitors replacement, Inspect the board: step 7, image 2 of 3 Monitor LCD Hannspree capacitors replacement, Inspect the board: step 7, image 3 of 3
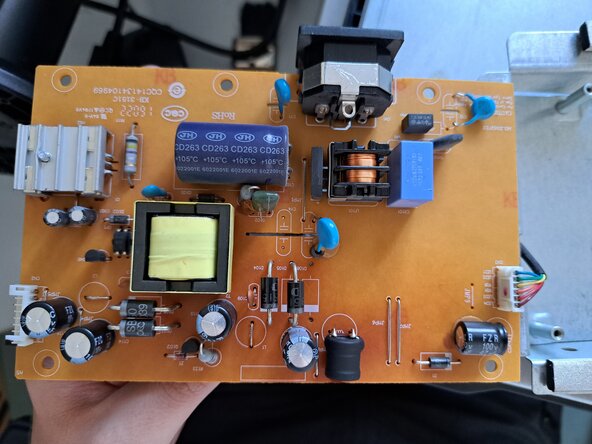
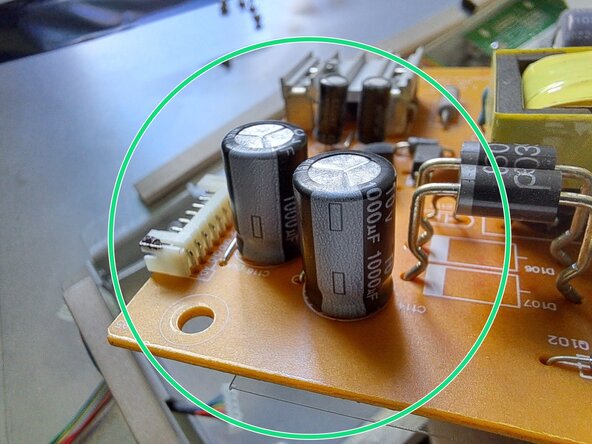
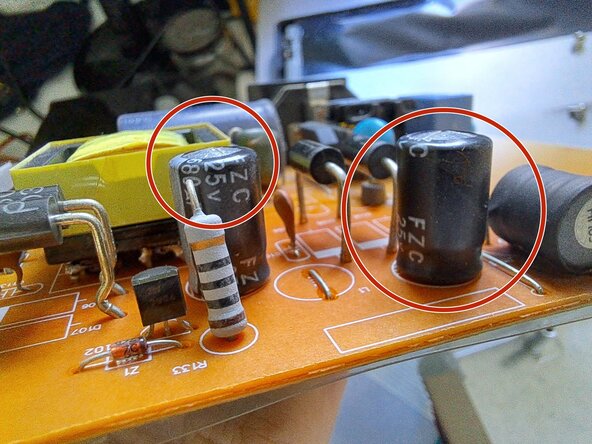
    • Inspect the board paying attention to the capacitors

    • These two have no bulges, they look normal. If you have a tester you can test them.

    • These two are a little swollen and need to be replaced. If you have a tester you can test them.

    • Pay attention to Voltage and Capacity.

  8. Monitor LCD Hannspree capacitors replacement, Desolder the old capacitors: step 8, image 1 of 2 Monitor LCD Hannspree capacitors replacement, Desolder the old capacitors: step 8, image 2 of 2
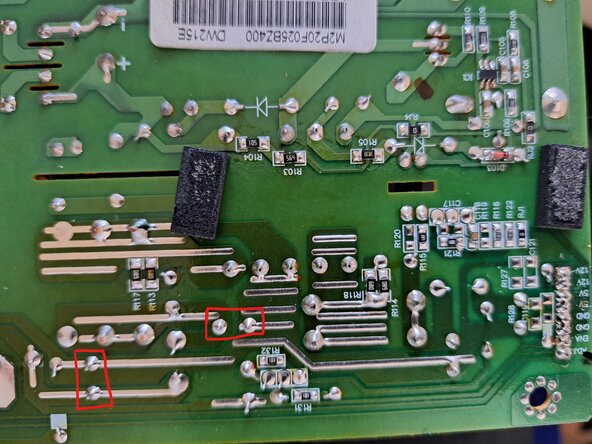
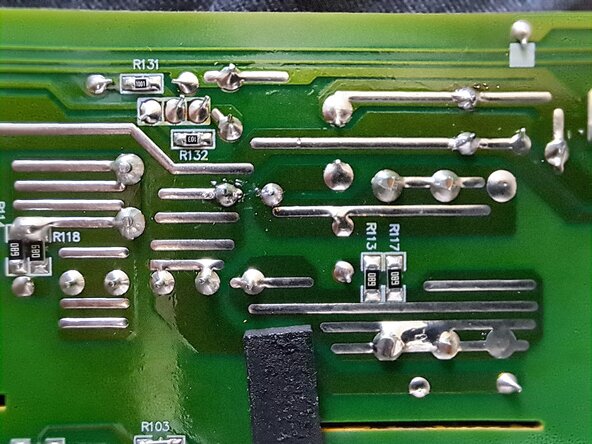
    • Look where the old capacitors are placed on the PCB and unsolder them

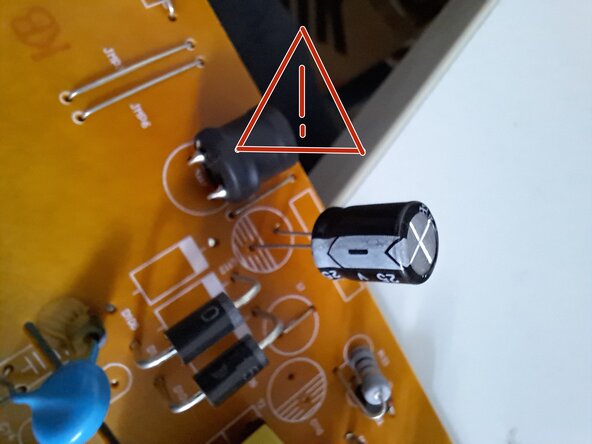
  9. Monitor LCD Hannspree capacitors replacement, Install the new capacitors: step 9, image 1 of 2 Monitor LCD Hannspree capacitors replacement, Install the new capacitors: step 9, image 2 of 2
    • Insert the new capacitors.

    • Respect the polarity of the capacitors. Otherwise they will explode.

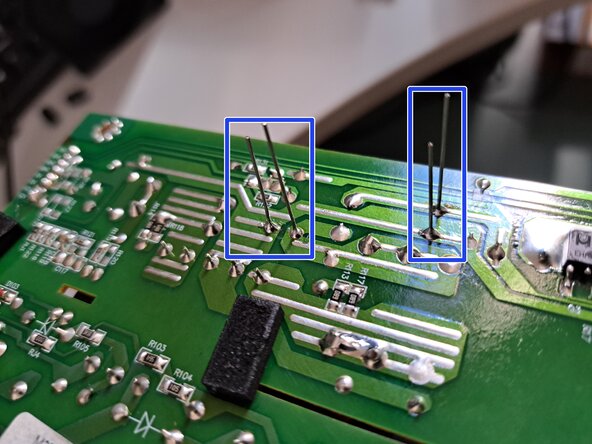
  10. Monitor LCD Hannspree capacitors replacement, Solder the new capacitors: step 10, image 1 of 2 Monitor LCD Hannspree capacitors replacement, Solder the new capacitors: step 10, image 2 of 2
    • Solder the new capacitors, then cut off the excess wire.

    • Finished. To reassemble, go back from point 6 to point 1.

Conclusion

To reassemble your device, follow these instructions in reverse order.

Special thanks to these translators:

it en

13%

saverio92sx is helping us fix the world! Want to contribute?
Start translating ›

saverio92sx

Member since: 06/07/22

301 Reputation

1 Guide authored

0 Guide Comments

Add Comment

View Statistics:

Past 24 Hours: 0

Past 7 Days: 4

Past 30 Days: 16

All Time: 160