Free Shipping on Domestic Orders $75+

ModRetro M64 Disassembly

What you need

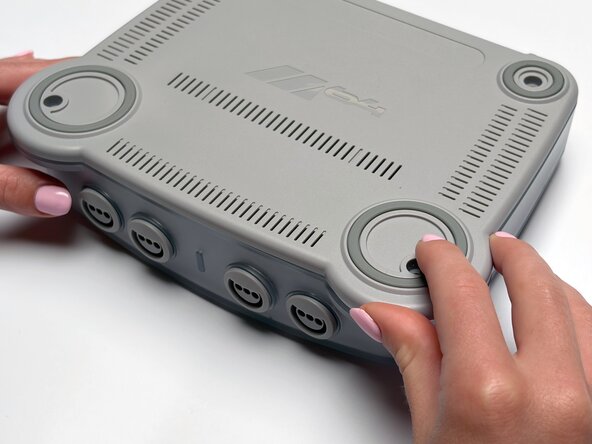
  1. ModRetro M64 Disassembly, Power and Cables: step 1, image 1 of 2 ModRetro M64 Disassembly, Power and Cables: step 1, image 2 of 2
    • Before beginning disassembly, disconnect all cables and remove the microSD card.

    Ask FixBot

    Add Comment

  2. ModRetro M64 Disassembly, Menu Dial: step 2, image 1 of 2 ModRetro M64 Disassembly, Menu Dial: step 2, image 2 of 2
    • Pull the menu dial straight up to remove it, then set it aside.

    • When reattaching the menu dial, ensure the button shafts align with the D shaft.

    Ask FixBot

    Add Comment

  3. ModRetro M64 Disassembly, Bottom Screws: step 3, image 1 of 3 ModRetro M64 Disassembly, Bottom Screws: step 3, image 2 of 3 ModRetro M64 Disassembly, Bottom Screws: step 3, image 3 of 3
    • Place the device on a soft, flat surface to avoid scratching the top shell.

    • Flip the M64 upside down to access the screws on the bottom.

    • Remove four gamebit 4.5mm screws using the Gamebit 4.5mm Screwdriver.

    Ask FixBot

    Add Comment

  4. ModRetro M64 Disassembly, Base Shell: step 4, image 1 of 3 ModRetro M64 Disassembly, Base Shell: step 4, image 2 of 3 ModRetro M64 Disassembly, Base Shell: step 4, image 3 of 3
    • Lift the front edge of the base shell upward to release it. You will encounter slight resistance.

    • Work your way toward the back, gently lifting the base shell at a slight angle to clear the I/O ports.

    • Set the base shell aside.

    Ask FixBot

    Add Comment

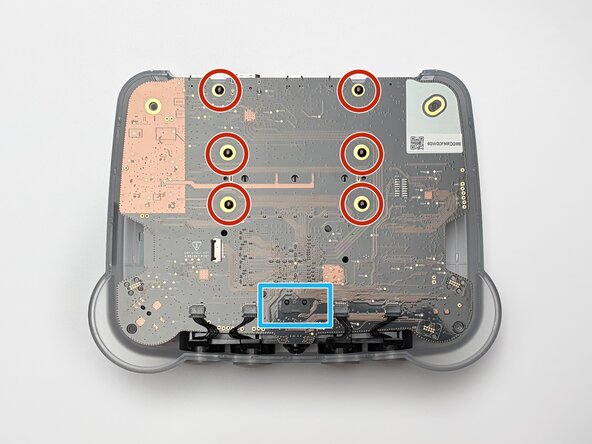
  5. ModRetro M64 Disassembly, PCBA: step 5, image 1 of 3 ModRetro M64 Disassembly, PCBA: step 5, image 2 of 3 ModRetro M64 Disassembly, PCBA: step 5, image 3 of 3
    • Use ESD Protection.

    • Remove six gamebit screws on the PCB using the gamebit 4.5mm Screwdriver.

    • Push the opening tool against each pin near the front edge to release and remove the center console light retention tab.

    • Use your fingers to gently remove the 4 cable connectors for the controller port.

    • Carefully lift the PCB away and set aside.

    Ask FixBot

    Add Comment

  6. ModRetro M64 Disassembly, Cartridge Carrier: step 6, image 1 of 3 ModRetro M64 Disassembly, Cartridge Carrier: step 6, image 2 of 3 ModRetro M64 Disassembly, Cartridge Carrier: step 6, image 3 of 3
    • Remove four screws holding the cartridge carrier to the upper shell using the Gamebit 4.5mm Screwdriver.

    • Lift the cartridge carrier up and set aside.

    Ask FixBot

    Add Comment

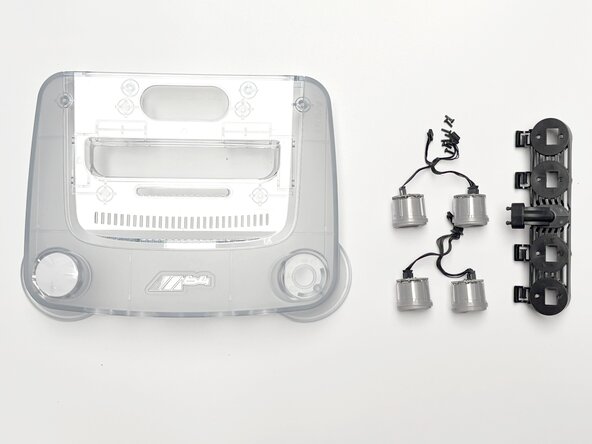
  7. ModRetro M64 Disassembly, Controller Ports: step 7, image 1 of 3 ModRetro M64 Disassembly, Controller Ports: step 7, image 2 of 3 ModRetro M64 Disassembly, Controller Ports: step 7, image 3 of 3
    • Disconnect the cable connectors to gain better access to the screws.

    • Remove eight screws using the Phillips #00 screwdriver.

    • Slide out the controller port module and set it aside. Once all four ports are removed, pull the controller port cover out and set aside.

    Ask FixBot

    Add Comment

  8. ModRetro M64 Disassembly, Cartridge Eject Button: step 8, image 1 of 3 ModRetro M64 Disassembly, Cartridge Eject Button: step 8, image 2 of 3 ModRetro M64 Disassembly, Cartridge Eject Button: step 8, image 3 of 3
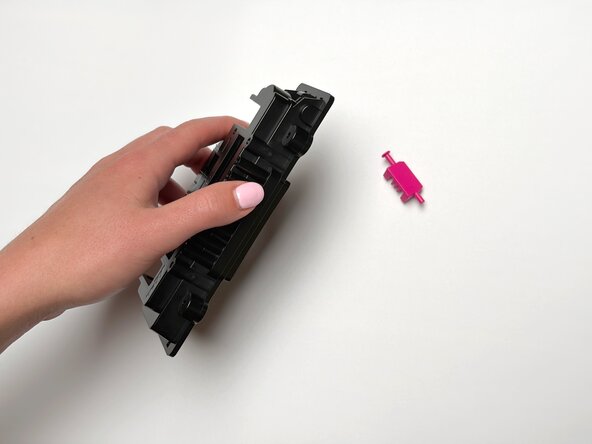
    • Firmly grip the button and pull it upward at a slight forward angle to clear the plastic retaining lip.

    • Remove the button mechanism and spring, then set them aside.

    • When reassembling, ensure the alignment peg on the button seats inside the spring and that the button is oriented correctly.

    Ask FixBot

    Add Comment

  9. ModRetro M64 Disassembly, Cart Eject (Linkage): step 9, image 1 of 3 ModRetro M64 Disassembly, Cart Eject (Linkage): step 9, image 2 of 3 ModRetro M64 Disassembly, Cart Eject (Linkage): step 9, image 3 of 3
    • Twist the linkage clockwise or counterclockwise and pull one end out of the button housing, then set both parts aside.

    • Insert one side of the linkage alignment tab into the button pocket at an angle, then press the opposite side into place.

    • Double-check that the linkage is seated in the cartridge carrier (tub) with its flap facing inward.

    Ask FixBot

    Add Comment

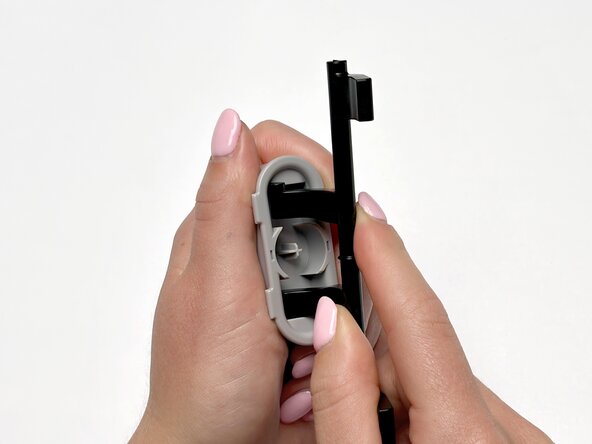
  10. ModRetro M64 Disassembly, LED Bar: step 10, image 1 of 2 ModRetro M64 Disassembly, LED Bar: step 10, image 2 of 2
    • Pinch the LED bar and pull it straight up to remove it, then set it aside.

    • The LED bar is press-fit, so you will feel some resistance when pulling.

    Ask FixBot

    Add Comment

  11. ModRetro M64 Disassembly, Cartridge Doors: step 11, image 1 of 3 ModRetro M64 Disassembly, Cartridge Doors: step 11, image 2 of 3 ModRetro M64 Disassembly, Cartridge Doors: step 11, image 3 of 3
    • Hold the cartridge tub with your fingers resting over the doors to prevent them from springing away during removal.

    • Insert a precision screwdriver into the opening on the underside of the cartridge tub, then push against the door hinge to pop out each door.

    • Watch out for the small torsion springs; they can easily pop loose and fall out when the door releases.

    • Remove the doors and set them aside.

    • For reassembly, install the door marked "B" (back) on the side near the cartridge eject button, and the door marked "F" (front) on the side near the LED bar (Image 3).

    Ask FixBot

    Add Comment

  12. ModRetro M64 Disassembly, Torsion Springs: step 12, image 1 of 3 ModRetro M64 Disassembly, Torsion Springs: step 12, image 2 of 3 ModRetro M64 Disassembly, Torsion Springs: step 12, image 3 of 3
    • Remove the spring from each door, then set them aside. The springs are interchangeable.

    • For reassembly, ensure the spring leg rests inside the door pocket (Image 3).

    Ask FixBot

    Add Comment

  13. ModRetro M64 Disassembly, Door Lock Button: step 13, image 1 of 2 ModRetro M64 Disassembly, Door Lock Button: step 13, image 2 of 2
    • Flip the cartridge tub upside down to remove the door lock button, then set it aside.

    • For reassembly, ensure the angled top of the button faces upward, then slide the button down into its slot at an angle.

    Ask FixBot

    Add Comment

Finish Line

Cancel: I did not complete this guide.

tmai@modretro

Member since: 07/15/26

1 Reputation

2 Guides authored

0 Guide Comments

Add Comment

View Statistics:

Past 24 Hours: 238

Past 7 Days: 341

Past 30 Days: 353

All Time: 353