Introduction
This guide will show you how to replace the back clock button for your Minolta Maxxum STsi.
What you need
-
-
Open the back panel by firmly pressing up on the back-cover release on the lower right side of the camera.
 Ask FixBot
-
-
-
Remove the black case by gently lifting it with your fingers and rotating counterclockwise.
-
-
-
-
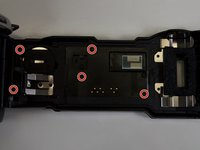
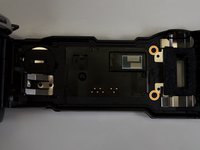
Remove the five black Phillips #00 2.5 mm screws from the back panel.
-
Also remove the two black Phillips #00 5.0 mm screws from the back panel.
-
-
Tool used on this step:Tweezers$4.99
-
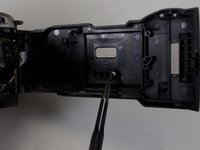
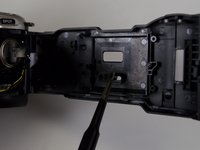
Use the tweezers to carefully peel back the adhesive foam connecting the back panel to the case and remove the panel.
-


To reassemble your device, follow these instructions in reverse order.
Team

Cal Poly, Team 14-12, Amido Spring 2015 Member of Cal Poly, Team 14-12, Amido Spring 2015
CPSU-AMIDO-S15S14G12
3 Members
7 Guides authored