What you need
-
-
Remove the 8 mm M3 Phillips head self tapping machine screws.
-
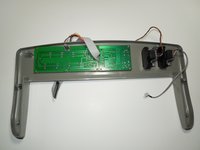
Remove all 13 of the back plate screws.
 Ask FixBot
-
-
-
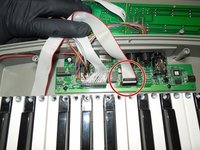
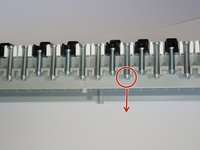
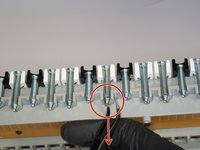
Remove the two highlighted 10 mm M3 galvanized machine screws using the J1 head fro the iFixit Tool Kit or a comparable tool.
-
-
-
Removal of Ribbon Cables
-
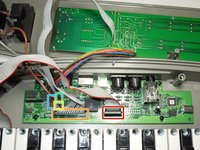
To separate the back plate, remove all five cables that connect to the motherboard but do not originate from the back plate; the key assembly, LCD circuit, rotor tuning circuit, and the pitch and modulator circuits. None of these cables require tools to remove, simply apply firm upward pressure to remove them.
-
-
-
-
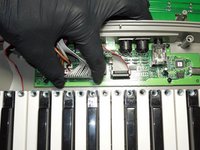
Remove the key assembly from the key board.
-
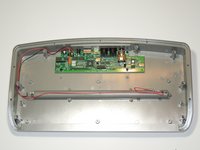
What remains is the back plate and the top plate assemblies.
-
-
Tool used on this step:Tweezers$4.99
-
The keys are retained via a tension spring. The removal of these springs is simple using the hooked needle point tweezers from the IFixit Toolkit.
-
-
-
To remove, simply insert one of the tweezer ends through the opening at the end of the spring.
-
Press the end between the spring windings after the windings start to reduce in size towards the inside of the spring.
-
-
-
Next, clasp the spring windings with the tweezers and gently apply tension outward.
-
The spring should thin slightly and be easily raised up and out of the retaining keyway.
-
This will free the key from the keyboard assembly for repair or replacement.
-


To reassemble your device, follow these instructions in reverse order.
Cancel: I did not complete this guide.
One other person completed this guide.
Team

USF Tampa, Team 1-6, Sullivan Fall 2016 Member of USF Tampa, Team 1-6, Sullivan Fall 2016
USFT-SULLIVAN-F16S1G6
4 Members
6 Guides authored