
Microsoft Surface Pro 7+ Kickstand Replacement

Last updated on May 19, 2026
Views: 336
View statistics:
- Past 24 Hours:
- 4
- Past 7 Days:
- 19
- Past 30 Days:
- 75
- All Time:
- 336
Comments: 0
No one has left comments on this guide. Will you be first?
Go to guide commentsCompleted: 0 1
No one has marked this guide "completed." Will you be the first?
1 person has marked this guide "completed." It's you — great job!
Favorites: 0 1
No one has favorited (and subscribed to) this guide. Will you be the first?
1 person has favorited (and subscribed to) this guide — and that's you!
Introduction
Go to step 1 ↓Follow this guide to replace a broken or damaged kickstand on your Surface Pro 7+ tablet.
What you need
Parts


Tools


-
-
-
Before starting your repair, unplug all cables and fully shut down your Surface Pro.
 Ask FixBot
-
-
-
-
-
-
While holding the kickstand behind the hinge with your finger, use a Torx Plus 3IP screwdriver to remove the two 2.7 mm‑long screws from each hinge (four total).
-
-
-
Lay the kickstand down towards the top of the device so it's lying flat.
-
-
-
Wrap your finger in a clean cloth and push both hinges down to about 30 degrees.
-
-
-
-
Flip the kickstand towards the bottom of the device so it's resting on the hinges.
-
-
-
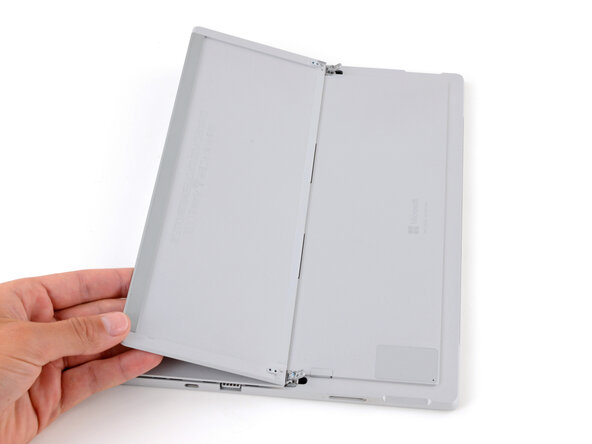
Firmly secure the device to your work surface with one hand, and use your free hand to pull the kickstand out until both foam tabs slide out.
-
-




To reassemble your device, follow these instructions in reverse order.
Repair didn’t go as planned? Try some basic troubleshooting, or ask our Answers community for help.

