Mattel Loopz Speaker Replacement

What you need

  1. Mattel Loopz Speaker Replacement, Batteries: step 1, image 1 of 1
    • Use a No. 2 Phillips head screwdriver to take out the 1/4" screw that holds the battery cover in place on the bottom of the device.

  2. Mattel Loopz Speaker Replacement: step 2, image 1 of 1
    • Take out the 4 AA Batteries.

  3. Mattel Loopz Speaker Replacement, Speaker: step 3, image 1 of 1
    • Remove red screw covers (13 total) using spudger.

  4. Mattel Loopz Speaker Replacement: step 4, image 1 of 1
    • Remove the thirteen 12.7mm screws with a #1 Phillips screwdriver.

  5. Mattel Loopz Speaker Replacement: step 5, image 1 of 1
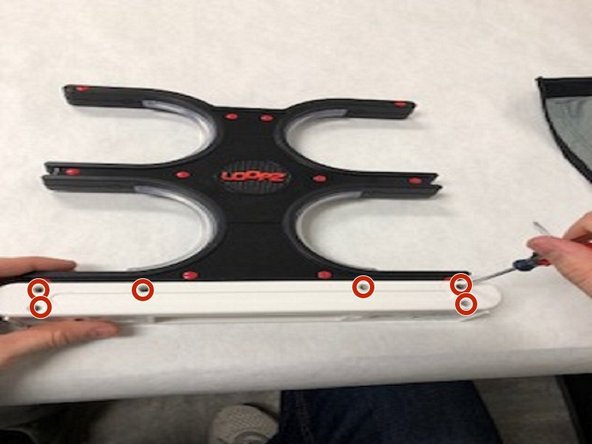
    • Remove 6 white caps using spudger to reveal screws underneath.

  6. Mattel Loopz Speaker Replacement: step 6, image 1 of 1
    • Remove the six 16mm screws with a #1 Phillips screwdriver.

  7. Mattel Loopz Speaker Replacement: step 7, image 1 of 1
    • Remove the white cover. Be sure to remove the front and the back.

  8. Mattel Loopz Speaker Replacement: step 8, image 1 of 1
    • Remove the black, plastic cover to reveal the internal electronics as shown.

  9. Mattel Loopz Speaker Replacement: step 9, image 1 of 1
    • Remove the two 6.4mm screws with a #1 Phillips screwdriver.

  10. Mattel Loopz Speaker Replacement: step 10, image 1 of 1
    • Remove the speaker as shown.

  11. Mattel Loopz Speaker Replacement: step 11, image 1 of 1
    • Use a soldering iron to desolder the red and black speaker wires from the speaker.

Conclusion

To reassemble your device, follow these instructions in reverse order.

One other person completed this guide.

Trevor Lasiter

Member since: 01/08/18

227 Reputation

1 Guide authored

Team

IUPUI, Team S1-G2, Freund Spring 2018 Member of IUPUI, Team S1-G2, Freund Spring 2018

IUPUI-FREUND-S18S1G2

3 Members

5 Guides authored

0 Comments

Add Comment

View Statistics:

Past 24 Hours: 0

Past 7 Days: 1

Past 30 Days: 12

All Time: 415