Makita Jack Hammer HM1203C 2010 Barrel Service

Prerequisite Only
This guide is only intended to be used as a prerequisite for other guides. It's incomplete by itself.

What you need

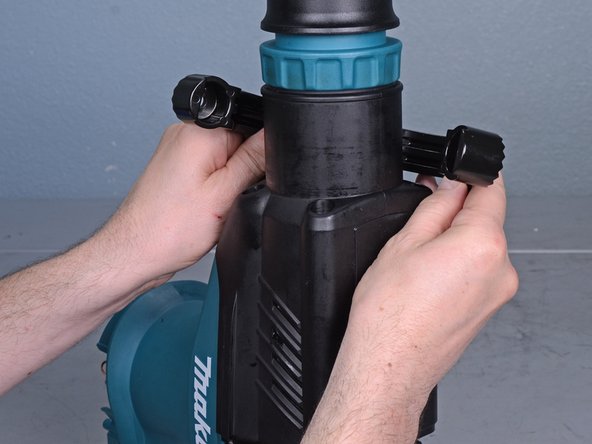
  1. Makita Jack Hammer HM1203C 2010 Barrel Service, Remove the side handle: step 1, image 1 of 1
    • Unscrew the knob securing the side handle.

  2. Makita Jack Hammer HM1203C 2010 Barrel Service: step 2, image 1 of 2 Makita Jack Hammer HM1203C 2010 Barrel Service: step 2, image 2 of 2
    • Remove the bolt securing the side handle.

    • Remove the side handle.

  3. Makita Jack Hammer HM1203C 2010 Barrel Service, Disassemble the front end: step 3, image 1 of 3 Makita Jack Hammer HM1203C 2010 Barrel Service, Disassemble the front end: step 3, image 2 of 3 Makita Jack Hammer HM1203C 2010 Barrel Service, Disassemble the front end: step 3, image 3 of 3
    • Use a small pry bar or flathead screwdriver to pry the rubber front cap off of the hammer.

    • This can be replaced as part of a service kit.

  4. Makita Jack Hammer HM1203C 2010 Barrel Service: step 4, image 1 of 2 Makita Jack Hammer HM1203C 2010 Barrel Service: step 4, image 2 of 2
    • Use a pair of snap ring pliers to expand the snap ring on the front of the hammer.

    • Remove the snap ring.

  5. Makita Jack Hammer HM1203C 2010 Barrel Service: step 5, image 1 of 1
    • Remove the washer on the front of the hammer.

  6. Makita Jack Hammer HM1203C 2010 Barrel Service: step 6, image 1 of 1
    • Lift the front cover off of the front of the hammer.

  7. Makita Jack Hammer HM1203C 2010 Barrel Service: step 7, image 1 of 1
    • Lift the rubber ring off of the front of the hammer.

  8. Makita Jack Hammer HM1203C 2010 Barrel Service: step 8, image 1 of 1
    • Remove the inner front cover.

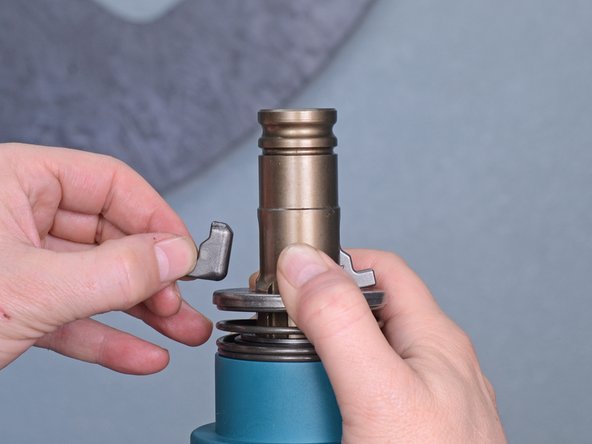
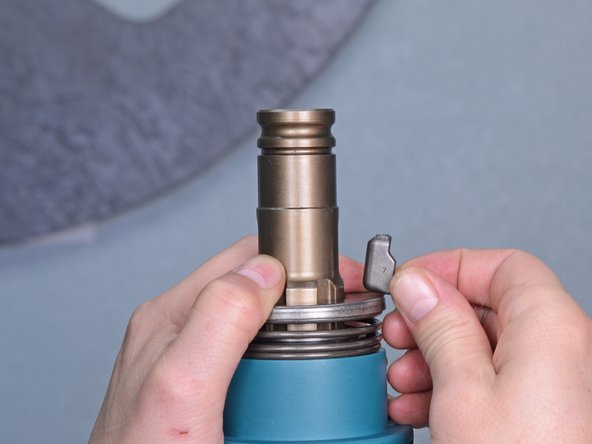
  9. Makita Jack Hammer HM1203C 2010 Barrel Service: step 9, image 1 of 3 Makita Jack Hammer HM1203C 2010 Barrel Service: step 9, image 2 of 3 Makita Jack Hammer HM1203C 2010 Barrel Service: step 9, image 3 of 3
    • Compress the spring and hold it down while you pull the two retainers out of their slots and remove them.

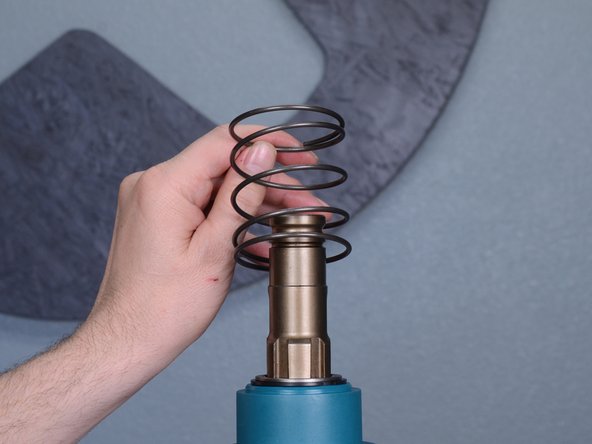
  10. Makita Jack Hammer HM1203C 2010 Barrel Service: step 10, image 1 of 2 Makita Jack Hammer HM1203C 2010 Barrel Service: step 10, image 2 of 2
    • Remove the spring guide.

    • Remove the spring.

  11. Makita Jack Hammer HM1203C 2010 Barrel Service, Remove the barrel: step 11, image 1 of 2 Makita Jack Hammer HM1203C 2010 Barrel Service, Remove the barrel: step 11, image 2 of 2
    • Remove the front barrel cover.

  12. Makita Jack Hammer HM1203C 2010 Barrel Service: step 12, image 1 of 1
    • Remove the 4 mm hex bolt securing the barrel cover.

  13. Makita Jack Hammer HM1203C 2010 Barrel Service: step 13, image 1 of 2 Makita Jack Hammer HM1203C 2010 Barrel Service: step 13, image 2 of 2
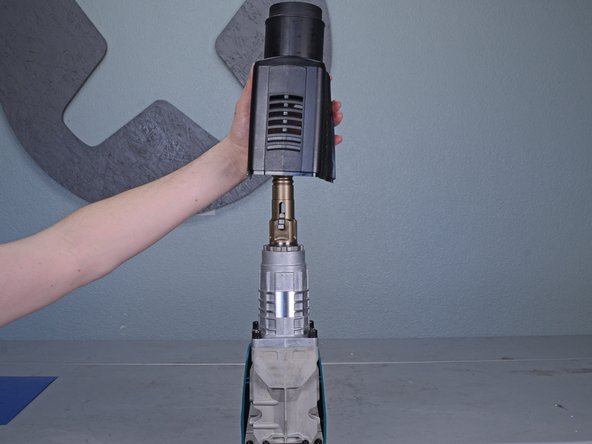
    • Lift the barrel cover straight up and remove it.

  14. Makita Jack Hammer HM1203C 2010 Barrel Service: step 14, image 1 of 2 Makita Jack Hammer HM1203C 2010 Barrel Service: step 14, image 2 of 2
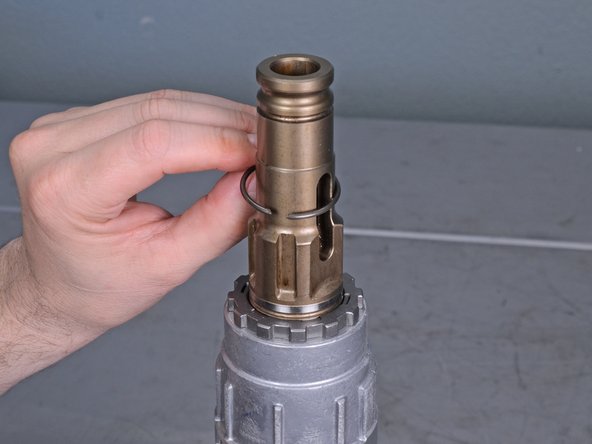
    • Use a pair of snap ring pliers to expand the snap ring securing the bolt holder.

    • Remove the snap ring.

  15. Makita Jack Hammer HM1203C 2010 Barrel Service: step 15, image 1 of 2 Makita Jack Hammer HM1203C 2010 Barrel Service: step 15, image 2 of 2
    • Lift the washer off of the bolt holder and remove it.

  16. Makita Jack Hammer HM1203C 2010 Barrel Service: step 16, image 1 of 1
    • Remove four 6 mm hex bolts securing the barrel.

  17. Makita Jack Hammer HM1203C 2010 Barrel Service: step 17, image 1 of 2 Makita Jack Hammer HM1203C 2010 Barrel Service: step 17, image 2 of 2
    • Lift the barrel straight up and remove it.

  18. Makita Jack Hammer HM1203C 2010 Barrel Service, Remove the rubber ring 39: step 18, image 1 of 3 Makita Jack Hammer HM1203C 2010 Barrel Service, Remove the rubber ring 39: step 18, image 2 of 3 Makita Jack Hammer HM1203C 2010 Barrel Service, Remove the rubber ring 39: step 18, image 3 of 3
    • Use an angled pick to pull the washer and rubber ring 39 out of the barrel.

  19. Makita Jack Hammer HM1203C 2010 Barrel Service: step 19, image 1 of 1
    • Remove the rubber ring 39.

    • This can be replaced as part of a service kit.

Conclusion

To reassemble your device, follow these instructions in reverse order.

Adam O'Camb

Member since: 04/11/15

196,940 Reputation

416 Guides authored

0 Comments

Add Comment

View Statistics:

Past 24 Hours: 0

Past 7 Days: 1

Past 30 Days: 2

All Time: 19