
Magellan RoadMate 1440 Battery Replacement

What you need

  1. Magellan RoadMate 1440 Battery Replacement, Magellan RoadMate 1440 Back Cover Disassembly: step 1, image 1 of 1
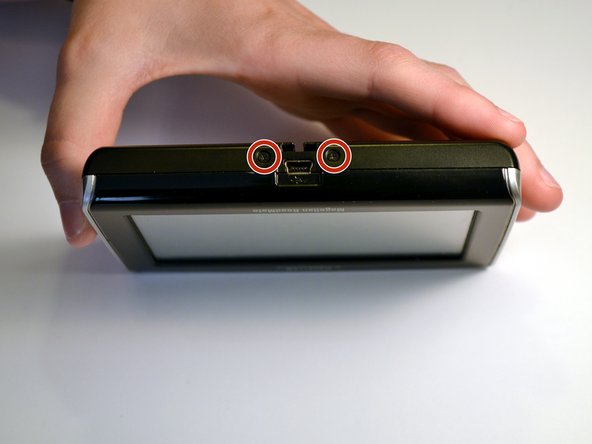
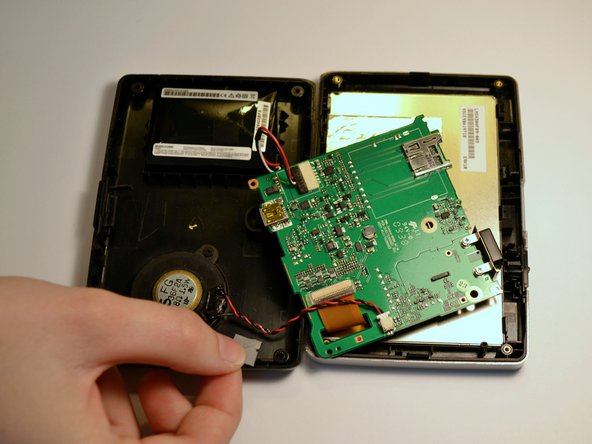
    • Place the GPS with the screen facing down.

  2. Magellan RoadMate 1440 Battery Replacement: step 2, image 1 of 2 Magellan RoadMate 1440 Battery Replacement: step 2, image 2 of 2
    • Remove the four 4.2 mm screws on the back cover of the device using a Phillips #0 screwdriver.

  3. Magellan RoadMate 1440 Battery Replacement: step 3, image 1 of 2 Magellan RoadMate 1440 Battery Replacement: step 3, image 2 of 2
    • Remove the two 4.2mm screws at the bottom of the device using a Phillips #0 screwdriver.

  4. Magellan RoadMate 1440 Battery Replacement: step 4, image 1 of 3 Magellan RoadMate 1440 Battery Replacement: step 4, image 2 of 3 Magellan RoadMate 1440 Battery Replacement: step 4, image 3 of 3
    • Insert the black spudger into the crease in the side of the GPS.

    • Move the end of the spudger down to break the seal between the two plastic shells.

    • Continue doing this along each side of the GPS to ensure a smooth removal.

  5. Magellan RoadMate 1440 Battery Replacement: step 5, image 1 of 3 Magellan RoadMate 1440 Battery Replacement: step 5, image 2 of 3 Magellan RoadMate 1440 Battery Replacement: step 5, image 3 of 3
    • Fully separate the two sides of the case.

    • Remove the tape on the battery wires and the tape on the speaker wires.

  6. Magellan RoadMate 1440 Battery Replacement, Battery: step 6, image 1 of 2 Magellan RoadMate 1440 Battery Replacement, Battery: step 6, image 2 of 2
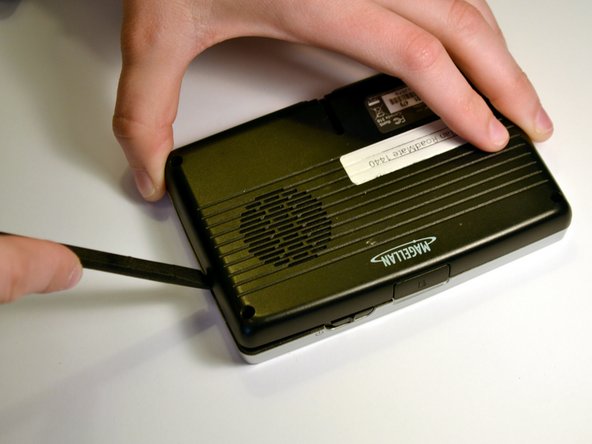
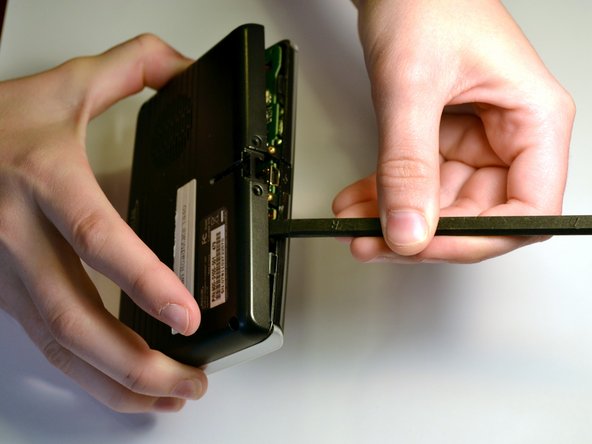
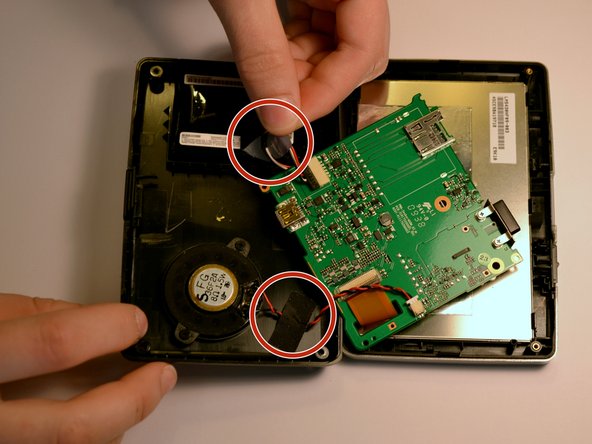
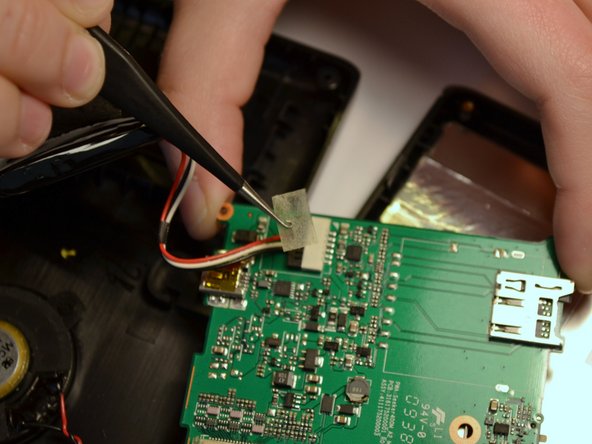
    • Use the black spudger to break the seal between the adhesive and battery. Use the same spudger to continue to pry the battery from the backing

    • This may be a little tough to separate the battery and the adhesive

  7. Magellan RoadMate 1440 Battery Replacement: step 7, image 1 of 2 Magellan RoadMate 1440 Battery Replacement: step 7, image 2 of 2
    • Lift the battery from the device

    • Once the battery is free from the adhesive, remove the piece of tape with a pair of tweezers that is covering the connection of the battery to the motherboard.

  8. Magellan RoadMate 1440 Battery Replacement: step 8, image 1 of 2 Magellan RoadMate 1440 Battery Replacement: step 8, image 2 of 2
    • Unplug the battery from the mother board by pulling back the clips and pulling the wires away from the motherboards receptacle

    • It is important for your and the device's safety to remove the battery before continuing with any other part removals.

    • It is not necessary to separate the red and white wires from the battery. A replacement battery pack will come with similar wires already attached.

Conclusion

To reassemble your device, follow these instructions in reverse order.

One other person completed this guide.

Jeremy Johnson

Member since: 03/21/16

201 Reputation

2 Guides authored

Team

Clemson, Team 7-3, Benson Spring 2016 Member of Clemson, Team 7-3, Benson Spring 2016

CLEM-BENSON-S16S7G3

4 Members

7 Guides authored

0 Comments

Add Comment

View Statistics:

Past 24 Hours: 2

Past 7 Days: 5

Past 30 Days: 7

All Time: 802