
Magellan RoadMate 1200 GPS Sensor Replacement

What you need

  1. Magellan RoadMate 1200 GPS Sensor Replacement, Back Cover: step 1, image 1 of 2 Magellan RoadMate 1200 GPS Sensor Replacement, Back Cover: step 1, image 2 of 2
    • Remove the four rubber caps from the back by using the Phillips #00 screwdriver.

  2. Magellan RoadMate 1200 GPS Sensor Replacement: step 2, image 1 of 1
    • Remove the four screws holding the cover in place by using the Phillips #00 screwdriver.

  3. Magellan RoadMate 1200 GPS Sensor Replacement: step 3, image 1 of 2 Magellan RoadMate 1200 GPS Sensor Replacement: step 3, image 2 of 2
    • Remove the back cover from the device by separating the back cover along its seam.

    • Slowly lift the cover—the speaker is screwed onto the back cover and is connected to the circuit board.

  4. Magellan RoadMate 1200 GPS Sensor Replacement: step 4, image 1 of 2 Magellan RoadMate 1200 GPS Sensor Replacement: step 4, image 2 of 2
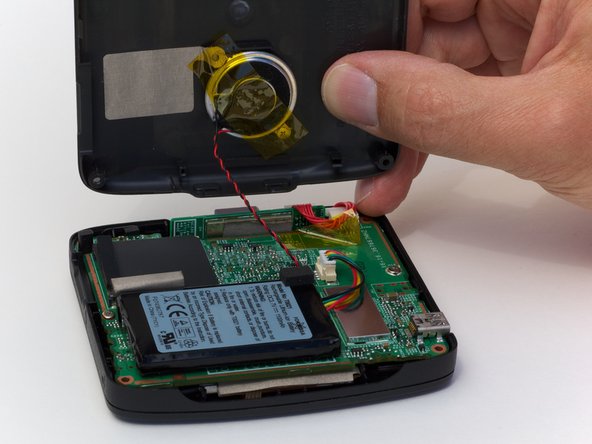
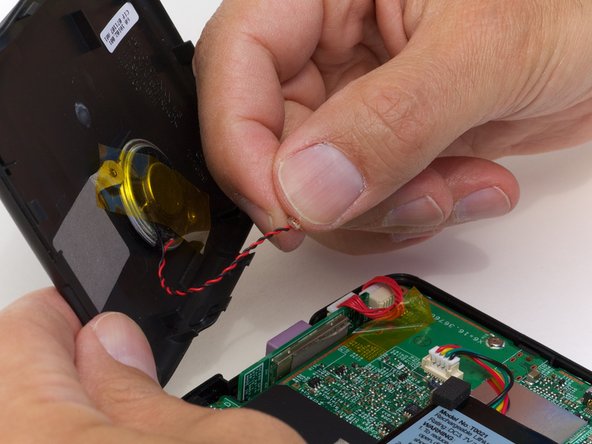
    • Pull the speaker cord, horizontally, by its base, away from the motherboard.

    • When reassembling, make sure that you plug the terminal in the same way. The black wire should be on the side farthest from the battery.

    In my 1200, the speaker is glued to the back and soldered into the board so there is no plug to undo. Just carefully find a position so that board doesn't pull on the speaker wire while it is open.

    Jomar - Reply

    where can we get the speakers from? please

    bbunni1404 - Reply

  5. Magellan RoadMate 1200 GPS Sensor Replacement, Motherboard: step 5, image 1 of 1
    • Remove the two screws on that are located on opposite sides of the board.

    For me, there were two screws, just located at the corners. One was near where the speaker is soldered to the board and the other was diagonally across the board where the GPS unit is soldered into the board.

    Jomar - Reply

  6. Magellan RoadMate 1200 GPS Sensor Replacement: step 6, image 1 of 1
    • Lift up the circuit board and disconnect the GPS wire, pulling horizontally from its connector port.

    My GPS unit, as mentioned, is soldered into the board, so no conector to remove. The GPS unit lifted right out with the board and was not attached to the display at all.

    Jomar - Reply

  7. Magellan RoadMate 1200 GPS Sensor Replacement, GPS Sensor: step 7, image 1 of 2 Magellan RoadMate 1200 GPS Sensor Replacement, GPS Sensor: step 7, image 2 of 2
    • Carefully flip the circuit board out so you can get to the sensor easily.

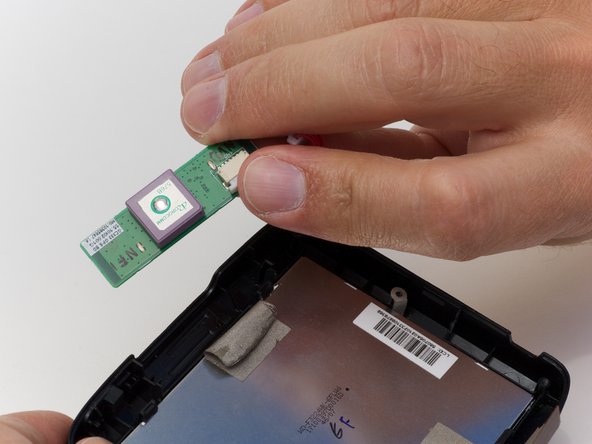
    • Remove the tape holding the sensor to the display and take out the sensor.

    As mentioned before, this step didi not apply to my GPS.

    Jomar - Reply

Conclusion

To reassemble your device, follow these instructions in reverse order.

One other person completed this guide.

Ross Light

Member since: 04/12/10

217 Reputation

6 Guides authored

0 Comments

Add Comment

View Statistics:

Past 24 Hours: 0

Past 7 Days: 1

Past 30 Days: 1

All Time: 3,133