
MacBook Unibody Model A1342 LCD Replacement

Prerequisite Only
This guide is only intended to be used as a prerequisite for other guides. It's incomplete by itself.

What you need

  1. MacBook Unibody Model A1342 LCD Replacement, LCD: step 1, image 1 of 1
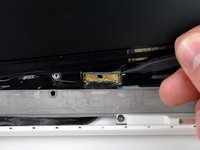
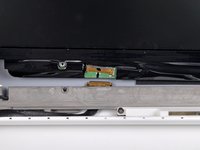
    • Remove following six screws securing the LCD to the rear display bezel:

    • Four 3.4 mm Phillips.

    • Two 3 mm Phillips.

  2. MacBook Unibody Model A1342 LCD Replacement: step 2, image 1 of 1
    • Do not try to remove the LCD yet. The circuitry along its lower edge is wedged in a gap along the lower edge of the display recess in the plastic display assembly.

    • Hold the display vertically and tip it enough to grab the top edge of the LCD and rotate it slightly out of the display assembly, being careful not to break the circuitry off its lower edge.

  3. MacBook Unibody Model A1342 LCD Replacement: step 3, image 1 of 1
    • Peel the piece of tape covering the display data cable connector away from the edge closest to the LCD.

  4. MacBook Unibody Model A1342 LCD Replacement: step 4, image 1 of 2 MacBook Unibody Model A1342 LCD Replacement: step 4, image 2 of 2
    • Use the tip of a spudger to flip up the thin steel retaining clip securing the display data cable to its socket on the LCD.

    • Pull the display data cable straight away from its socket on the LCD.

    • Lift the LCD out of the display assembly and set it aside.

Conclusion

To reassemble your device, follow these instructions in reverse order.

0 Comments

Add Comment

View Statistics:

Past 24 Hours: 0

Past 7 Days: 0

Past 30 Days: 0

All Time: 791