
MacBook Pro 15" Unibody Mid 2009 Left Fan Replacement

What you need

  1. MacBook Pro 15" Unibody Mid 2009 Left Fan Replacement, Lower Case: step 1, image 1 of 1
    • Remove the following ten screws securing the lower case to the upper case:

    • Seven 3 mm Phillips screws.

    • Three 13.5 mm Phillips screws.

  2. MacBook Pro 15" Unibody Mid 2009 Left Fan Replacement: step 2, image 1 of 2 MacBook Pro 15" Unibody Mid 2009 Left Fan Replacement: step 2, image 2 of 2
    • Using both hands, lift the lower case near the vent to pop it off two clips securing it to the upper case.

    • Remove the lower case and set it aside.

  3. MacBook Pro 15" Unibody Mid 2009 Left Fan Replacement, Left Fan: step 3, image 1 of 3 MacBook Pro 15" Unibody Mid 2009 Left Fan Replacement, Left Fan: step 3, image 2 of 3 MacBook Pro 15" Unibody Mid 2009 Left Fan Replacement, Left Fan: step 3, image 3 of 3
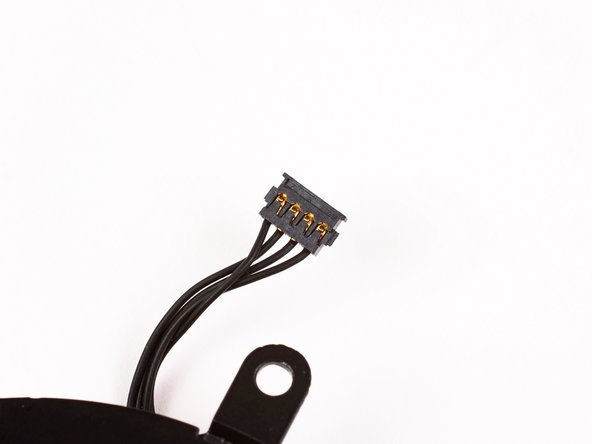
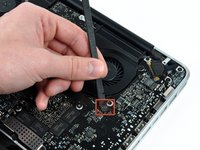
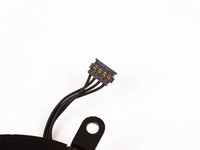
    • Use the flat end of a spudger to disconnect the left fan connector from the logic board.

    • It is useful to twist the spudger axially from beneath the fan cable wires to release the connector.

    • The fan socket and the fan connector can be seen in the second and third pictures. Be careful not to break the plastic fan socket off the logic board as you use your spudger to lift the fan connector straight up and out of its socket. The layout of the logic board shown in the second picture may look slightly different than your machine but the fan socket is the same.

  4. MacBook Pro 15" Unibody Mid 2009 Left Fan Replacement: step 4, image 1 of 2 MacBook Pro 15" Unibody Mid 2009 Left Fan Replacement: step 4, image 2 of 2
    • Remove three T6 Torx screws securing the left fan to the logic board.

    • Lift the left fan out of the upper case.

Conclusion

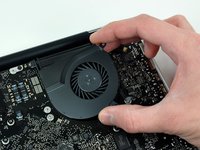
To reassemble your device, follow these instructions in reverse order.

70 other people completed this guide.

4 Comments

Connecting the fan to the logic board is unclear. Could you walk through that a little more clearly?

kamoako1 - Reply

When connecting the new fan to the logic board, set the connector piece above its socket on the logic board and then gently press down. It should click together.

k. -

quite easy. i’m very happy with this manual. Though connecting the new fan until it clicks is the most difficult part. thank you!

Oliver - Reply

Great guide, easy work to do! If I can do this, anyone can. If I can do this, someone who does not exist almost can. Not quite! But almost. I was happy to get that squalling and howling old fan out of my MacBook Pro, and thereby to end the squalling I got from my family over the noise it made. Like the old one, the new fan works great, but it is new, and quiet, and I am thankful. Happy customer.

pstewart - Reply

Add Comment

View Statistics:

Past 24 Hours: 0

Past 7 Days: 1

Past 30 Days: 17

All Time: 42,061