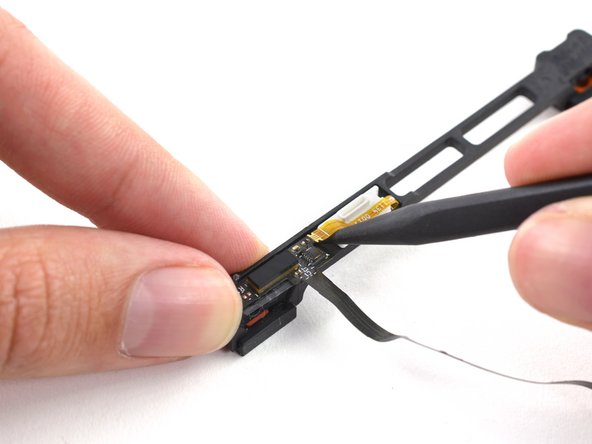
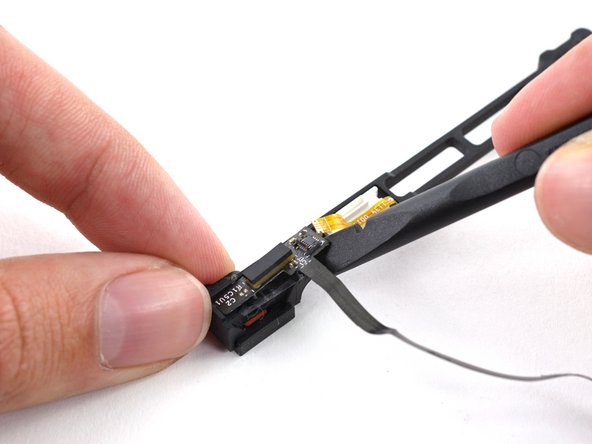
MacBook Pro 15" Unibody Mid 2009 Hard Drive Cable Replacement

What you need

  1. MacBook Pro 15" Unibody Mid 2009 Hard Drive Cable Replacement, Lower Case: step 1, image 1 of 1
    • Remove the following ten screws securing the lower case to the upper case:

    • Seven 3 mm Phillips screws.

    • Three 13.5 mm Phillips screws.

  2. MacBook Pro 15" Unibody Mid 2009 Hard Drive Cable Replacement: step 2, image 1 of 2 MacBook Pro 15" Unibody Mid 2009 Hard Drive Cable Replacement: step 2, image 2 of 2
    • Using both hands, lift the lower case near the vent to pop it off two clips securing it to the upper case.

    • Remove the lower case and set it aside.

  3. MacBook Pro 15" Unibody Mid 2009 Hard Drive Cable Replacement, Battery: step 3, image 1 of 1
    Tool used on this step:
    P6 Pentalobe Screwdriver 2009 15" MacBook Pro Battery
    $5.49
    Buy
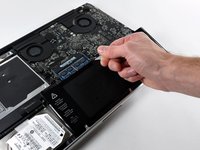
    • Remove the two 5-Point Pentalobe screws along the top edge of the battery.

    • You do not necessarily have to follow steps 3-6 to remove the battery in order to replace the hard drive. However it is recommended to remove all power sources from electronics before working on them.

  4. MacBook Pro 15" Unibody Mid 2009 Hard Drive Cable Replacement: step 4, image 1 of 1
    • Use the tip of a spudger to bend back the finger of the "Warning: Do not remove the battery" sticker while you remove third five-point Pentalobe screw hidden underneath.

  5. MacBook Pro 15" Unibody Mid 2009 Hard Drive Cable Replacement: step 5, image 1 of 2 MacBook Pro 15" Unibody Mid 2009 Hard Drive Cable Replacement: step 5, image 2 of 2
    • Lift the battery by its plastic pull tab and slide it away from the long edge of the upper case.

    • Do not try to completely remove the battery just yet.

  6. MacBook Pro 15" Unibody Mid 2009 Hard Drive Cable Replacement: step 6, image 1 of 1
    • Tilt the battery back enough to access the battery cable connector.

    • Pull the battery cable connector away from its socket on the logic board and remove the battery from the upper case.

    • If you're installing a new battery, you should calibrate it after installation.

  7. MacBook Pro 15" Unibody Mid 2009 Hard Drive Cable Replacement, Hard Drive: step 7, image 1 of 2 MacBook Pro 15" Unibody Mid 2009 Hard Drive Cable Replacement, Hard Drive: step 7, image 2 of 2
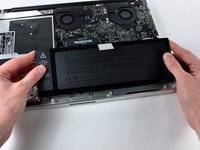
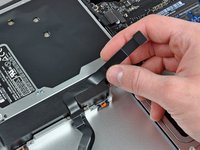
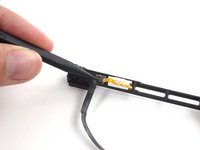
    • Remove the two Phillips screws securing the hard drive bracket to the upper case.

    • These screws are captive to the hard drive bracket.

    • Lift the the retaining bracket out of the upper case.

  8. MacBook Pro 15" Unibody Mid 2009 Hard Drive Cable Replacement: step 8, image 1 of 1
    • Lift the hard drive by its pull tab and pull it out of the chassis, minding the cable attaching it to the computer.

  9. MacBook Pro 15" Unibody Mid 2009 Hard Drive Cable Replacement: step 9, image 1 of 2 MacBook Pro 15" Unibody Mid 2009 Hard Drive Cable Replacement: step 9, image 2 of 2
    • Remove the hard drive cable by pulling the hard drive straight away from the connector. Keep the connector steady. If pulled by the connector, it can be pulled too far and accidentally tear the hard drive cable.

  10. MacBook Pro 15" Unibody Mid 2009 Hard Drive Cable Replacement, Hard Drive Cable: step 10, image 1 of 1
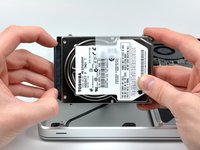
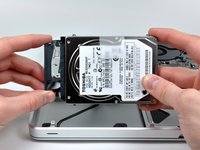
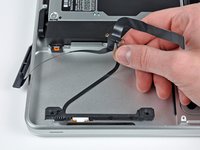
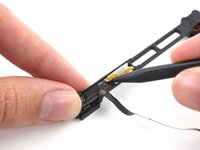
    • Remove the following four screws securing the hard drive and IR sensor cable to the upper case:

    • Two 1.5 mm Phillips screws.

    • Two 4 mm Phillips screws.

  11. MacBook Pro 15" Unibody Mid 2009 Hard Drive Cable Replacement: step 11, image 1 of 1
    • Slide the hard drive and IR sensor bracket away from the edge of the upper case.

  12. MacBook Pro 15" Unibody Mid 2009 Hard Drive Cable Replacement: step 12, image 1 of 1
    • Use the flat end of a spudger to pry the hard drive cable connector up off the logic board.

  13. MacBook Pro 15" Unibody Mid 2009 Hard Drive Cable Replacement: step 13, image 1 of 2 MacBook Pro 15" Unibody Mid 2009 Hard Drive Cable Replacement: step 13, image 2 of 2
    • Carefully peel the hard drive and IR sensor cable off the right speaker body/upper case and remove them from your computer.

  14. MacBook Pro 15" Unibody Mid 2009 Hard Drive Cable Replacement: step 14, image 1 of 3 MacBook Pro 15" Unibody Mid 2009 Hard Drive Cable Replacement: step 14, image 2 of 3 MacBook Pro 15" Unibody Mid 2009 Hard Drive Cable Replacement: step 14, image 3 of 3
    • Your replacement part may or may not come with the front (sensor) bracket. If it does not, you'll need to transfer it to your new cable.

    • Use the tip of a spudger to flip the ZIF connector on the hard drive cable.

    • Gently pull the sensor bracket cable out of the ZIF connector.

    • Use the flat end of a spudger to pry the hard drive cable up off the sensor bracket.

    • Remove the adhesive backing from your new hard drive cable, stick it onto the sensor bracket, and connect the sensor bracket cable.

Conclusion

To reassemble your device, follow these instructions in reverse order.

48 other people completed this guide.

3 Comments

I found that the smaller cable branch to the IR sensor was glued down to the case. The new part (purchased from ifixit.com) didn't have a sticky backing so I carefully removed some of the sticky material from the original cable and stuck it to the new cable. This kept the cable in place when I replaced the hard drive. I could see how one might accidentally bend or fold the cable in a way that could damage it when placing the hard drive.

shanebanderson - Reply

This guide made it really easy. It fixed my problem. Thanks!

sarashunter - Reply

I want to buy a hard drive cable but I live in Mozambique, how can I get it, because my country is not included?

Arsenio Divas - Reply

Add Comment

View Statistics:

Past 24 Hours: 1

Past 7 Days: 3

Past 30 Days: 30

All Time: 25,249