Introduction
Accessing the RAM in this computer is straightforward and requires minimal disassembly.
What you need
-
-
Remove the following ten screws securing the lower case to the upper case:
-
Three 13.5 mm (14.1 mm) Phillips screws.
-
Seven 3 mm Phillips screws.
 Ask FixBot
-
-
-
Using both hands, lift the lower case near the vent to pop it off two clips securing it to the upper case.
-
Remove the lower case and set it aside.
-
-
-
-
Use the edge of a spudger to pry the battery connector upwards from its socket on the logic board.
-
-
-
Bend the battery cable slightly away from its socket on the logic board so it does not accidentally connect itself while you work.
-
-
-
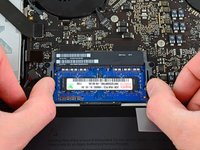
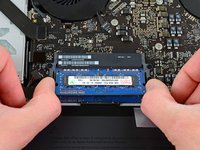
Release the tabs on each side of the RAM chip by simultaneously pushing each tab away from the RAM module.
-
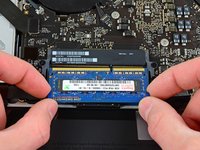
After the RAM chip has popped up, pull it straight out of its socket.
-


To reassemble your device, follow these instructions in reverse order.
Cancel: I did not complete this guide.
216 other people completed this guide.

3 Guide Comments
Hi,
thanks for the guide, I plan to upgrade my 15” early 2011 2.3 GHz MBP today. I am changing my 750GB HDD to a Firecuda 2TB SSHD (can’t afford the SSD I wish I could get into currently), and I plan to upgrade my RAM from the 8GB to 16GB as well to give my 2011 a little sprucing up. I have performed a full time machine backup to my 2TB WD passport pro external HD (It’s set up as a RAID 0 device and has a thunderbolt 1 interface, which I was glad for bc a USB 2.0 interface would have taken like 3 days or blown up my computer.
My questions are:
1. Is there a preferred order to switch out the internal hard drive and memory? Do I need to switch out one first then boot up and shutdown, or can you safely upgrade the HD and RAM at the same time?
2. Is there anything else I need to do before upgrading the HD besides a time machine backup? Do I need a “bootable OS?” Whatever that is? Thanks!