MacBook Pro 13" Retina Display Late 2012 Lower Case Replacement

What you need

  1. MacBook Pro 13" Retina Display Late 2012 Lower Case Replacement, Lower Case: step 1, image 1 of 1
    Tool used on this step:
    Magnetic Project Mat
    $19.95
    Buy
    • Remove the following ten screws securing the lower case to the upper case:

    • Two 2.3 mm P5 Pentalobe screws

    • Eight 3.0 mm P5 Pentalobe screws

    • Throughout this repair, keep track of each screw and make sure it goes back exactly where it came from to avoid damaging your device.

  2. MacBook Pro 13" Retina Display Late 2012 Lower Case Replacement: step 2, image 1 of 1
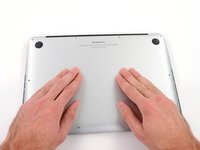
    • Wedge your fingers between the upper case and the lower case.

    • Gently pull the lower case away from the upper case.

    • Remove the lower case and set it aside.

  3. MacBook Pro 13" Retina Display Late 2012 Lower Case Replacement: step 3, image 1 of 3 MacBook Pro 13" Retina Display Late 2012 Lower Case Replacement: step 3, image 2 of 3 MacBook Pro 13" Retina Display Late 2012 Lower Case Replacement: step 3, image 3 of 3
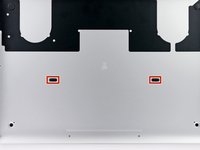
    • During reassembly, gently push down the center of the lower case to reattach the two plastic clips.

    • The lower case is connected to the upper case at the center, with two plastic clips.

Conclusion

To reassemble your device, follow these instructions in reverse order.

7 other people completed this guide.

0 Comments

Add Comment

View Statistics:

Past 24 Hours: 1

Past 7 Days: 8

Past 30 Days: 47

All Time: 20,786