
MacBook Pro 13" Retina Display Late 2012 Logic Board Assembly Replacement

Prerequisite Only
This guide is only intended to be used as a prerequisite for other guides. It's incomplete by itself.

What you need

  1. MacBook Pro 13" Retina Display Late 2012 Logic Board Assembly Replacement, Logic Board Assembly: step 1, image 1 of 3 MacBook Pro 13" Retina Display Late 2012 Logic Board Assembly Replacement, Logic Board Assembly: step 1, image 2 of 3 MacBook Pro 13" Retina Display Late 2012 Logic Board Assembly Replacement, Logic Board Assembly: step 1, image 3 of 3
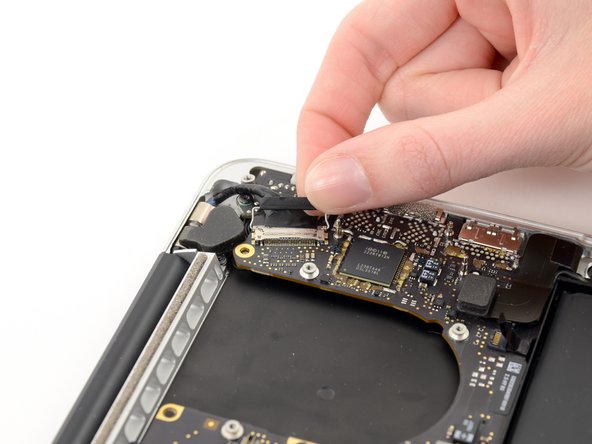
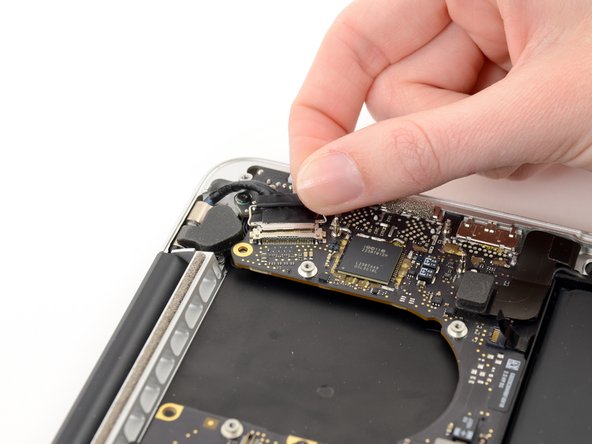
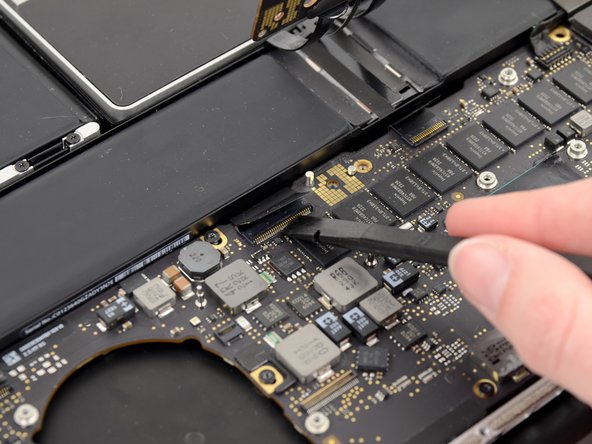
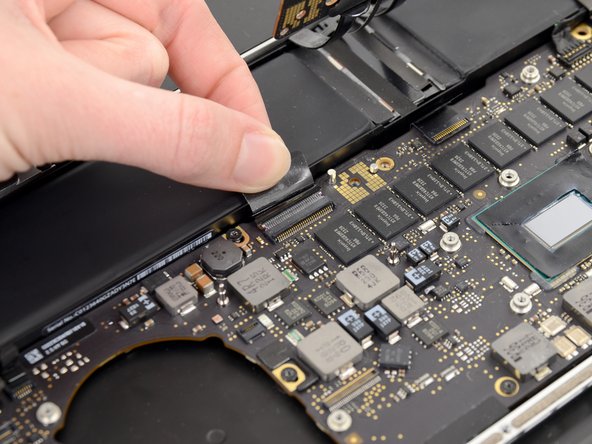
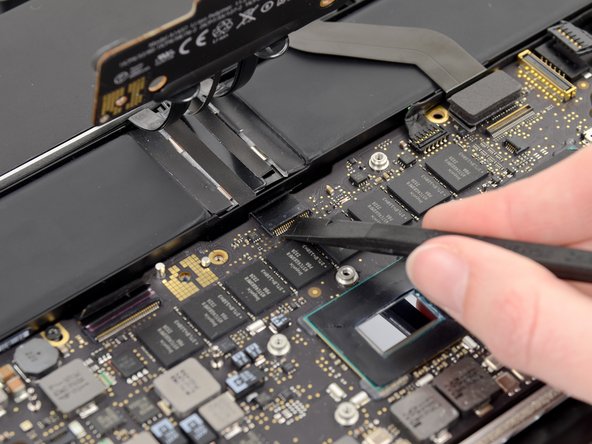
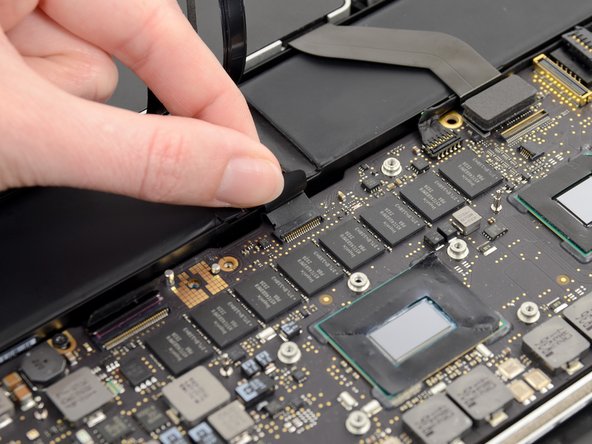
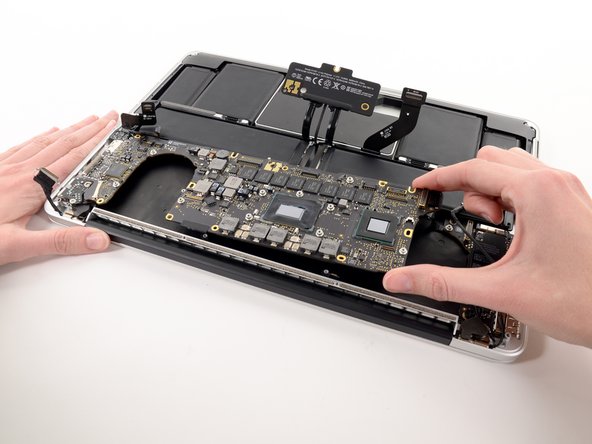
    • Use the tip of a spudger to push the edges of the I/O board connector straight out of its socket on the logic board.

    • It is recommended to carefully push on both sides of the connector to "walk" it out of its socket.

  2. MacBook Pro 13" Retina Display Late 2012 Logic Board Assembly Replacement: step 2, image 1 of 2 MacBook Pro 13" Retina Display Late 2012 Logic Board Assembly Replacement: step 2, image 2 of 2
    • Wedge the flat end of a spudger underneath the keyboard backlight connector and the logic board.

    • Gently twist the flat end of a spudger upwards to pry the keyboard backlight connector up off its socket on the logic board.

  3. MacBook Pro 13" Retina Display Late 2012 Logic Board Assembly Replacement: step 3, image 1 of 3 MacBook Pro 13" Retina Display Late 2012 Logic Board Assembly Replacement: step 3, image 2 of 3 MacBook Pro 13" Retina Display Late 2012 Logic Board Assembly Replacement: step 3, image 3 of 3
    • Grab the black pull tab secured to the display data cable lock and rotate it toward the DC-In side of the computer.

    • Pull the display data cable straight out of its socket on the logic board.

    • Do not lift up on the display data cable, as its socket is very fragile. Pull the cable parallel to the face of the logic board.

  4. MacBook Pro 13" Retina Display Late 2012 Logic Board Assembly Replacement: step 4, image 1 of 1
    • Pry the headphone jack cable connector up off its socket on the logic board.

  5. MacBook Pro 13" Retina Display Late 2012 Logic Board Assembly Replacement: step 5, image 1 of 3 MacBook Pro 13" Retina Display Late 2012 Logic Board Assembly Replacement: step 5, image 2 of 3 MacBook Pro 13" Retina Display Late 2012 Logic Board Assembly Replacement: step 5, image 3 of 3
    • Use the tip of a spudger to flip up the retaining flap on the microphone ribbon cable ZIF socket.

    • Be sure you are prying up on the hinged retaining flap, not the socket itself.

    • Grasp the plastic pull tab and pull the microphone ribbon cable out of its socket.

  6. MacBook Pro 13" Retina Display Late 2012 Logic Board Assembly Replacement: step 6, image 1 of 3 MacBook Pro 13" Retina Display Late 2012 Logic Board Assembly Replacement: step 6, image 2 of 3 MacBook Pro 13" Retina Display Late 2012 Logic Board Assembly Replacement: step 6, image 3 of 3
    • Use the flat edge of a spudger to flip up the retaining flap on the keyboard ribbon cable ZIF socket.

    • Be sure you are prying up on the hinged retaining flap, not the socket itself.

    • Grasp the plastic pull tab and pull the keyboard ribbon cable out of its socket.

  7. MacBook Pro 13" Retina Display Late 2012 Logic Board Assembly Replacement: step 7, image 1 of 3 MacBook Pro 13" Retina Display Late 2012 Logic Board Assembly Replacement: step 7, image 2 of 3 MacBook Pro 13" Retina Display Late 2012 Logic Board Assembly Replacement: step 7, image 3 of 3
    • Repeat the previous procedure to disconnect the Trackpad ribbon cable from its socket on the logic board.

  8. MacBook Pro 13" Retina Display Late 2012 Logic Board Assembly Replacement: step 8, image 1 of 2 MacBook Pro 13" Retina Display Late 2012 Logic Board Assembly Replacement: step 8, image 2 of 2
    • Wedge the flat end of a spudger beneath the right speaker cable connector.

    • Gently pry the right speaker cable connector up off from its socket on the logic board.

    • Be sure you are prying up on the connector, not the socket itself.

  9. MacBook Pro 13" Retina Display Late 2012 Logic Board Assembly Replacement: step 9, image 1 of 1
    • Use the flat end of a spudger to pry the SSD cable connector up off its socket on the logic board.

  10. MacBook Pro 13" Retina Display Late 2012 Logic Board Assembly Replacement: step 10, image 1 of 2 MacBook Pro 13" Retina Display Late 2012 Logic Board Assembly Replacement: step 10, image 2 of 2
    • Wedge the tip of a spudger beneath the left speaker cable connector.

    • Gently pry the left speaker cable connector up off from its socket on the logic board.

    • Be sure you are prying up on the connector, not the socket itself.

  11. MacBook Pro 13" Retina Display Late 2012 Logic Board Assembly Replacement: step 11, image 1 of 1
    • Remove the nine 3.3 mm T5 Torx screws securing the logic board and MagSafe DC-in board to the upper case.

  12. MacBook Pro 13" Retina Display Late 2012 Logic Board Assembly Replacement: step 12, image 1 of 2 MacBook Pro 13" Retina Display Late 2012 Logic Board Assembly Replacement: step 12, image 2 of 2
    • Carefully grasp the corner of the logic board (opposite of the I/O ports) and lift the logic board out of the upper case.

Conclusion

To reassemble your device, follow these instructions in reverse order.

Andrew Optimus Goldheart

Member since: 10/17/09

502,855 Reputation

407 Guides authored

Team

iFixit Member of iFixit

Staff

135 Members

16,817 Guides authored

0 Comments

Add Comment

View Statistics:

Past 24 Hours: 0

Past 7 Days: 0

Past 30 Days: 0

All Time: 96