Introduction
Prerequisite only guide to remove the screen on a MacBook Neo.
What you need
-
-
-
Use the flat end of a spudger to gently push under the metal buckle of the display cable connector, located on the top‑right corner of the logic board, to unclip it.
 Ask FixBot
-
-
-
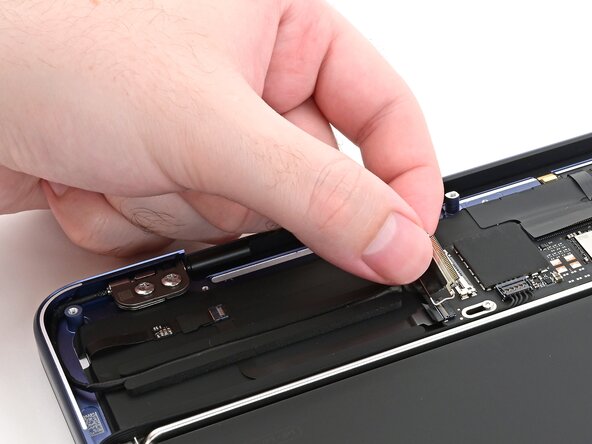
Grab the buckle and cable together and gently pull the connector straight out of its socket.
-
-
-
Repeat this procedure to disconnect the camera cable, located on the left edge of the logic board.
-
Grip the buckle and insert the connector fully into its socket. Realign it as necessary and don't try to force it in.
-
Flip the buckle over the socket and press it down until it clicks into place.
-
-
-
Pick up the buckle and cable together and gently pull the camera cable out of its channel securing it to the frame.
-
Free the cable so it's not wrapped around the corner of the laptop frame.
-
-
-
-
Hold the display cable's buckle and cable together and free it from the laptop frame.
-
-
-
Use a Torx Plus 8IP driver to loosen (not remove) all four hinge screws.
-
-
Tool used on this step:IC-LOC-Blue Nonpermanent Threadlocker$6.99
-
Loosen the hinge screws at least one full turn.
-
Adjust the screen until it's correctly centered and aligned on each side. The screen should sit flush with the rest of the laptop.
-
Fully tighten the four hinge screws.
-
-
-
Open the laptop all the way and gently place it keyboard side down on a table, so the screen hangs over the edge.
-
-
-
Support the screen with one hand.
-
With your free hand, use a Torx Plus 8IP driver to remove the four 6.2 mm–long screws securing the hinges.
-
-
-
Hold the screen with both hands and lift the hinges out of their recesses to remove it.
-
-