
Mac Pro First Generation Hard Disk Drive (HDD) Replacement

What you need

  1. Mac Pro First Generation Hard Disk Drive (HDD) Replacement, Case Panel: step 1, image 1 of 1
    • Lift the lever to unlock the case.

  2. Mac Pro First Generation Hard Disk Drive (HDD) Replacement: step 2, image 1 of 1
    Tool used on this step:
    Anti-Static Wrist Strap
    $7.95
    Buy
    • Remove the side panel of the Mac Pro.

    • Discharge any static electricity by touching a grounded surface prior to working on any internal components. Touching the metal PCI slot covers works great, or any other grounded metal surface. You can also wear a anti-static wrist strap.

  3. Mac Pro First Generation Hard Disk Drive (HDD) Replacement, Locate the Hard Drive Bays: step 3, image 1 of 1
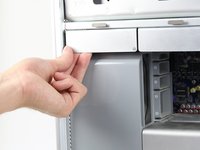
    • Locate the desired hard drive bay after opening the case .

    • This is usually the drive closest to the front of the case.

  4. Mac Pro First Generation Hard Disk Drive (HDD) Replacement, Remove the Hard Drive Bay: step 4, image 1 of 3 Mac Pro First Generation Hard Disk Drive (HDD) Replacement, Remove the Hard Drive Bay: step 4, image 2 of 3 Mac Pro First Generation Hard Disk Drive (HDD) Replacement, Remove the Hard Drive Bay: step 4, image 3 of 3
    • Make sure that the clip used to release the side panel is open or the Hard Drive bays won't slide out

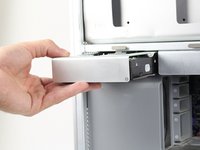
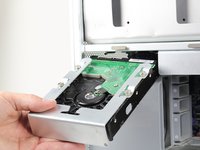
    • Pull the Hard Drive straight out by grabbing the metal sled from the bottom. It may be hard to pull out at first, but after it gets released the sled shouldn't take a lot of effort to remove.

  5. Mac Pro First Generation Hard Disk Drive (HDD) Replacement, Remove metal Hard Drive sled: step 5, image 1 of 3 Mac Pro First Generation Hard Disk Drive (HDD) Replacement, Remove metal Hard Drive sled: step 5, image 2 of 3 Mac Pro First Generation Hard Disk Drive (HDD) Replacement, Remove metal Hard Drive sled: step 5, image 3 of 3
    • When handling the hard drive hold it by the sled or sides be sure not to touch the green circuit board visible in all 3 pictures.

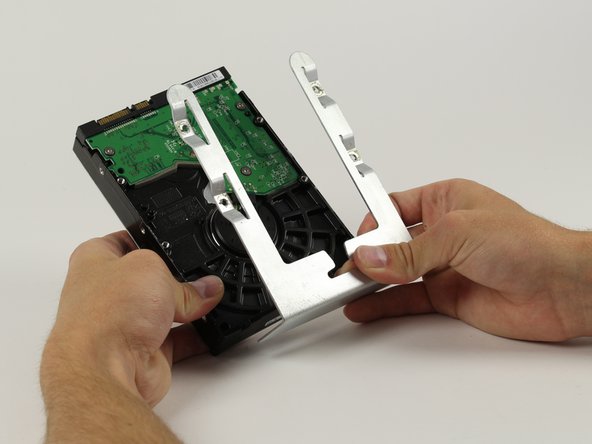
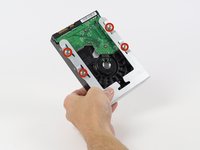
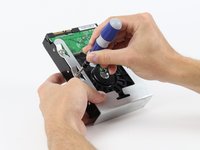
    • Locate the four 6-32 type screws on the Hard Drive sled.

    • Using a Phillips head screw driver remove the four screws and separate the metal sled from the Hard Drive

Conclusion

To reassemble your device, follow these instructions in reverse order.

10 other people completed this guide.

Charlie Franklin

Member since: 10/12/14

1,148 Reputation

1 Guide authored

Team

Cal Poly, Team 6-24, Maness Fall 2014 Member of Cal Poly, Team 6-24, Maness Fall 2014

CPSU-MANESS-F14S6G24

4 Members

13 Guides authored

0 Comments

Add Comment

View Statistics:

Past 24 Hours: 5

Past 7 Days: 32

Past 30 Days: 158

All Time: 22,063